Setup Terrain
By default, the RTS Engine uses Unity's Navigation Mesh system to handle pathfinding. Before setting up the navigation mesh for the tutorial scene, we are going to see how the RTS Engine handles terrain objects.
1. Create Terrain Area Type
In your RTS game, you can define multiple Terrain Areas and then decide the behavior of some components to be limited or to be dependent on these terrain areas. For example, you can limit the movement of units to certain terrain areas, so in the case where you have ground and water units, you can define two terrain area types for each and then restrict movement for ground and water units to these two terrain areas respectively.
To create a new Terrain Area, right-click in the project tab and select: Create -> RTS Engine -> Terrain Area Type.

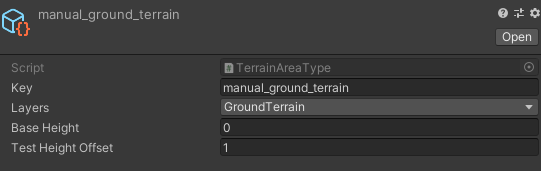
Then select the new terrain area asset file and configure it by defining a unique key that represents the identifier used to reference the terrain area. Then define a set of layers to assign to game objects so that they represent that terrain area. As for the rest of the two fields, you can find detailed description on them in the Terrain Area inspector document as the for sake of this tutorial, we will be keeping them with default values.
2. Setup Terrain Manager
The Terrain Manager is an essential manager component, responsible for handling the terrain area types in your map scene. Select the game object holding this component in the hierarchy (by default, it is under the path: GameManager -> Essentials -> Terrain) and let's set its inspector fields:
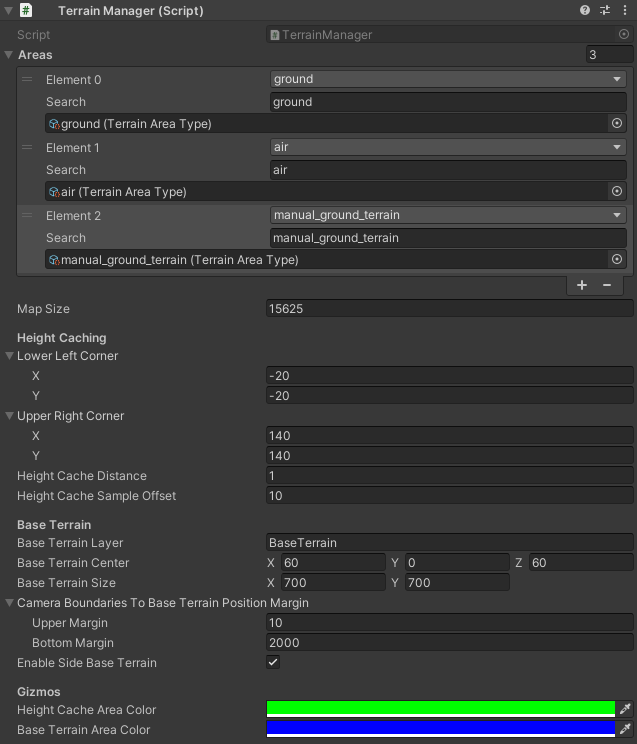
- Areas: Add the terrain area type that you just created to the list.
- Map Size: The terrain plane object that we're using in this map scene is plane of height 120 and width 120, therefore we will be setting the map size accordingly to 14400 (120*120). This value is used by some RTS Engine components to approximate the terrain size (for example, NPC related components that handle expanding a NPC faction's territory within the terrain use this value to determine the size of the terrain they aim to occupy).
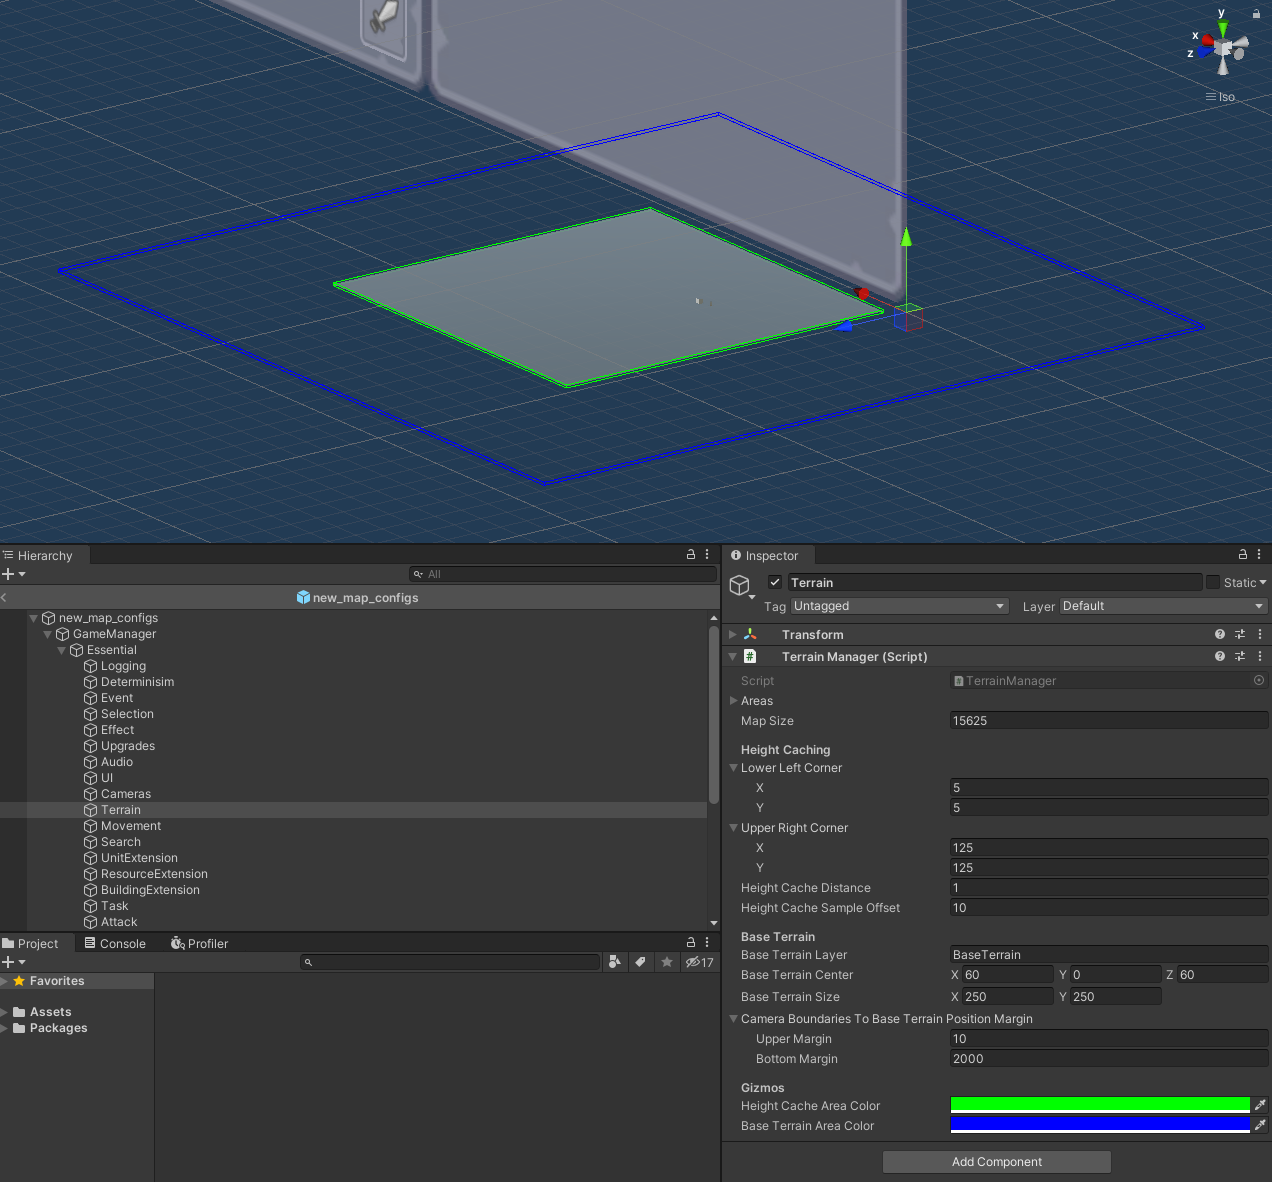
- Height Caching: The RTS Engine caches the height of the terrain area objects in the scene before the game starts. This is done because quite a few components require the height information during run-time and the caching allows to improve performance so that no runtime Raycasting is required each time the height information is needed. When you select the game object holding the Terrain Manager component, a gizmo appears that shows the area that will be included in the caching process so make sure the whole map terrain is included. The following fields are available:
- Lower Left Corner: Defines the lower-left corner of the map as a boundary for caching height values.
- Upper Right Corner: Defines the upper-right corner of the map as a boundary for caching height values.
- Height Cache Distance: Starting from the lower left corner of the map, move by this distance value to cache height values each time until reaching the upper right corner of the map.
- Height Cache Sample Offset: When sampling terrain's height to cache, this offset is added to the Raycast source position which will head downwards to detect the terrain object and sample the height.
- Base Terrain: The base terrain is a box collider with a height of 1.0f that is extended through the whole map scene used by other components for tasks such as main camera and minimap camera clicks and caching entity models. This base terrain collider is created automatically when the map scene starts. The base terrain must cover the entire map and beyond. The rule here is that at any allowed main camera position, any Raycast that happens from the main camera must hit this base terrain collider. Set the following fields to configure the base terrain:
- Base Terrain Layer: A pre-defined layer used to create a collider to be used for caching, main camera and minimap clicks among other things. By default it is assigned to 'BaseTerrain'. If you have imported the demo layers, this layer should be present in your project. If you want to use a different layer for the base terrain then make sure it is defined in your project settings layers and not used on any object by default.
- Base Terrain Center: The center of the base terrain. It is recommended to have the base terrain at a level lower than all other terrain areas.
- Base Terrain Size: The size of the base terrain. Make sure this covers more than the entire map so that at any allowed camera position, a ray can be drawn from any of the camera's corners and it hits the base terrain collider.
- Camera Boundaries To Base Terrain Position Margin: When inspecting the main camera's boundaries and using them to determine the positions on the base terrain that they hit, this margin value allows to widen the main camera's boundaries. This is mainly useful in caching model objects as a small margin would allow to display models just outside of the camera view to make sure that they are visible immediately when the camera pans over a little to look at the model objects. Pick the margin applied to the top right and top left corners of the camera view (Upper Margin) and the one applied to the bottom left and right corners (Bottom Margin).
- Enable Side Base Terrain: When enabled, this field allows to create base terrain colliders on each side of the map (instead of just on the bottom of the map) to avoid the raycasting errors caused by the main camera when it is not directly looking at the bottom of the map. Enable this field only if you allow the player to rotate the main camera freely, including rotating it so that the camera corners face any of the sides of the map and not the bottom directly. In this example, we can leave this field disabled.
When you select the game object that holds the TerrainManager component, both the area where heights are cached (by default in green color) and the base terrain area (by default in blue) are shown via gizmos.
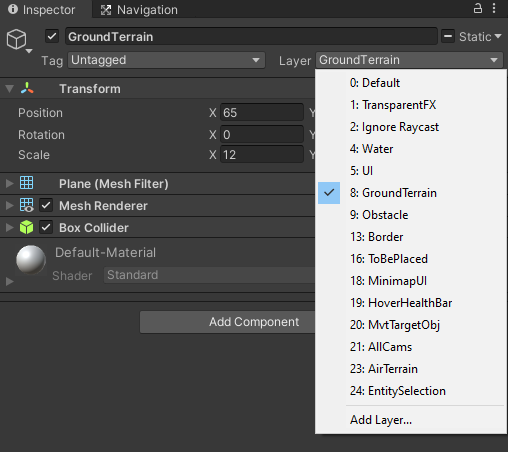
3. Set Terrain Objects Layers
The next step is to set the layers of the terrain objects in the scene, that represent each terrain area type. Since we only have one terrain area type and we have only a simple plane object as the terrain (under the name of GroundTerrain), make sure that this object has one of the ground terrain's area type layers assigned it (in this case, we simply assign it to the GroundTerrain layer if it's not already set).
4. Bake the Navigation Mesh
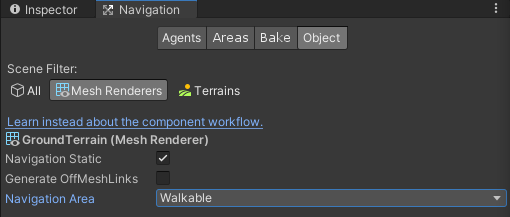
We now need to bake the terrain navigation mesh. Open the Navigation tab in the Unity editor and have the GroundTerrain object selected and make sure that its Navigation Area (from the Object tab) is assigned to Walkable since we want the unit to be able to walk on it. We will not be going into much details into the inner-workings of Unity's navmesh system and the navigation areas, for that please check the Unity docs for Building a Navmesh.
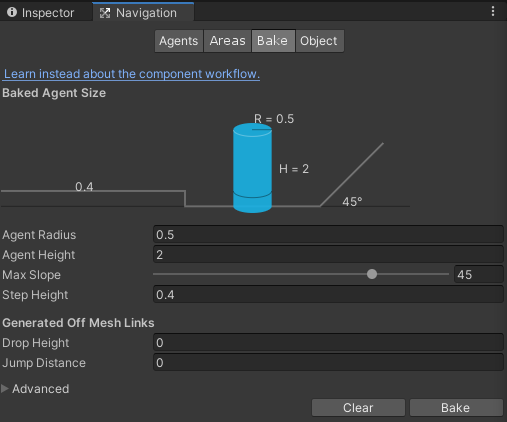
Then bake the navigation mesh in the Bake tab. We will be keeping the default configurations for this one but if you'd like to change them, take a look at Unity's documentation.
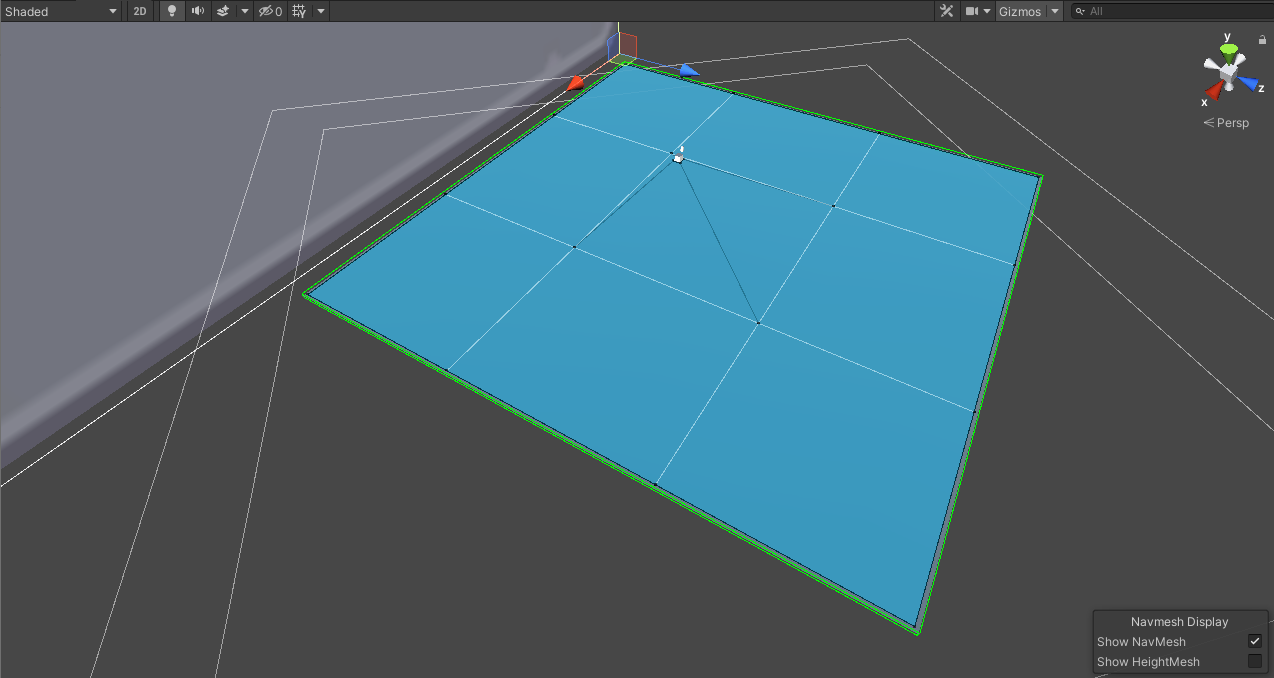
This is how your scene view should look like right now with the navmesh baked (make sure your scene is saved at this point!):
5. Setup Terrain Grid Search
The final step in setting up the terrain is configure the Grid Search Handler manager component which is responsible for allowing other components to search for entities (units, buildings and resources) inside the terrain. It functions by separating the map scene terrain into searchable cells so that search operations are not as computationally expensive as they would be if they would involve the whole terrain each time.
Find this manager component under the Essential manager components object (by default, it is under the path: GameManager -> Essentials -> Search) and update its fields to fit the plane terrain:
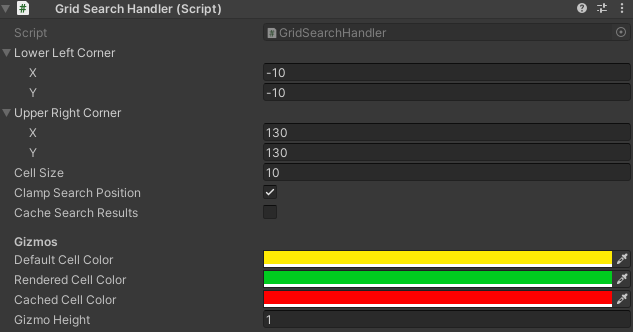
- Set the Lower Left Corner and Upper Right Corner values in order to cover the whole terrain object and update the Cell Size field to set the amount of searchable cells. A small Cell Size would generate more cells, meaning that the searches would be more localized. A high Cell Size would generate a small amount of cells which might make the search operations more computationally expensive as the search inspects every entity within a cell.
In order to make sure that your searchable cells cover the whole terrain object then you can select the object holding the Grid Search Handler component and you will see the cells drawn as gizmos in the scene view.

This separates the terrain of a map scene into searchable cells to allow other components to launch searches (for entities to interact with) within a limited space of the map (specific cells depending on the search source position and range) instead of having to go through the whole map.
6. Testing
You can now test the scene and you will be able to move the unit entity around the terrain!
Please note that when we do not specify exactly what terrain areas the unit can move on (which is the case for the unit entity we have now), it is able to move all around terrain area types, and since we only have one terrain area type here, we will leave this unchanged for now.
Download Files
You can download the results of this tutorial here.