Create New Building
1. Create Building Prefab
To create a new building entity, open the RTS Engine top bar menu and click on New Building.
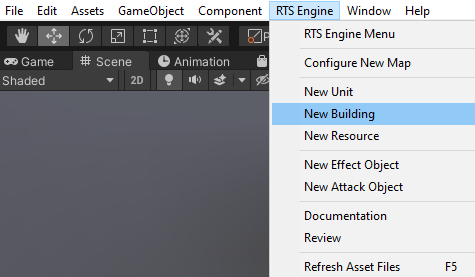
This would launch the building creation in the RTS Engine Editor window.
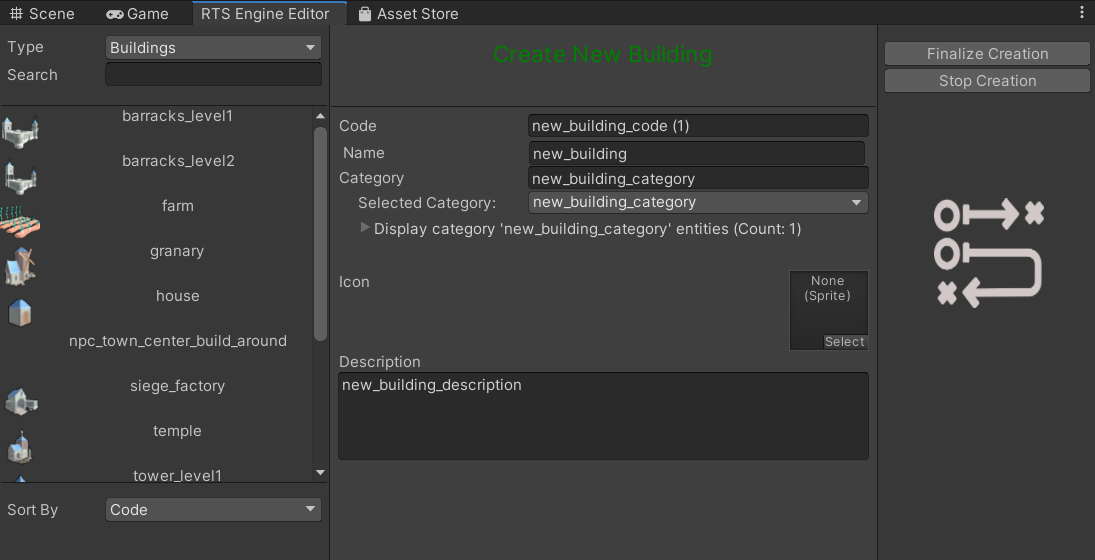
From this window, you can pick the following initial properties of the new building:
- Name: This is the name that appears on UI elements, when the building is selected for example.
- Code: Provide a unique identifier code for the building. For example: tutorial_building.
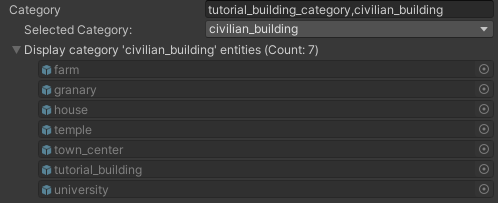
Category: Assign one (or multiple) category for the building that allows it to belong to certain groups of other entities (which must not only include building types as categories can be shared between different entity types). To assign multiple categories, make sure to separate them with a comma (',') with no spacing. We will go with: tutorial_building_category. When you assign a category or set of categories to an entity, you can browse through them and display the other entities that share the same category. As an example, add the civilian_building category to this new building and then select it and you'll be able to see the buildings that use the latter category (if you have the Demo files imported).
Description: This is the description that appears on UI elements, when the building is selected for example.
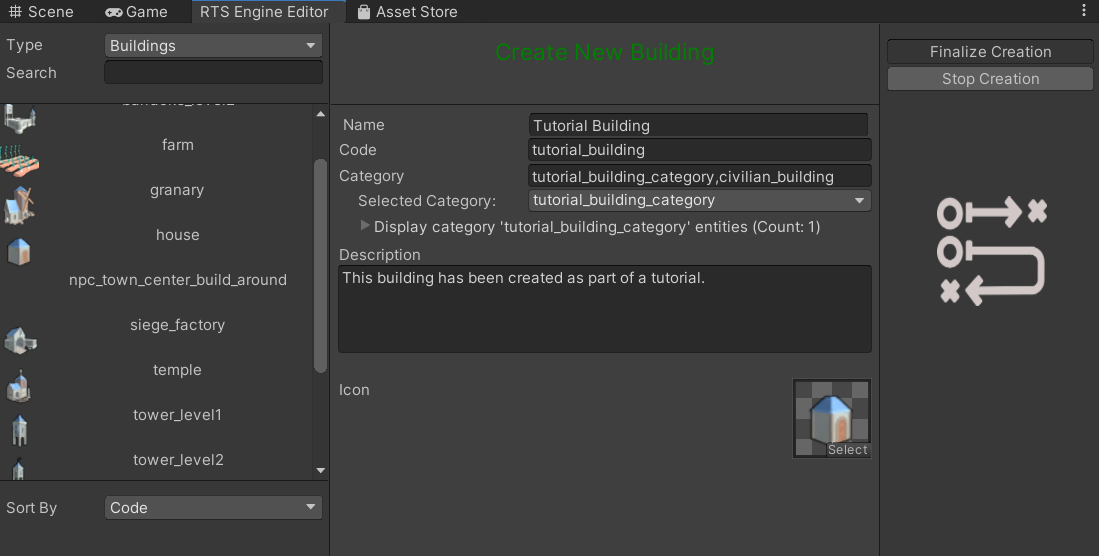
- Icon: To identify the building visually within the UI elements, we can assign a Sprite asset to it in this field. For example, we can use the Demo house building's icon. Search for house_icon in the Project tab and assign it to this field.
After setting these initial properties, click on the Finalize Creation button on the top right corner of the RTS Engine Editor window.
The new building prefab is now located under the path: Assets/Resources/Prefabs, which is the default path for newly created entity prefabs. The new entity prefab's name is set after its unique code. If you wish to move the prefab into a different path, make sure that the new path always ends with ../Resources/Prefabs. The latter requirement allows the RTS Engine to cache entity types and make them available for editor components to have a richer user-experience while creating your RTS game with the Unity editor.
Additionally you can cancel the creation of the new entity prefab by clicking on the Cancel Creation button on top right corner of the same editor window.
Next, either double click on the prefab in the Project tab to open it or find it in the RTS Engine Editor entities list in the left side bar (it should be automatically selected after you finalize its creation) and click on Edit in Prefab to open it.
Please notice that the pivot point of the parent game object of the building is set to the bottom of the object. By default, this is the case where you create a new entity through the RTS Engine menu so make sure this remains unchanged.
We will go through the main components and structure of a RTS Engine building prefab.
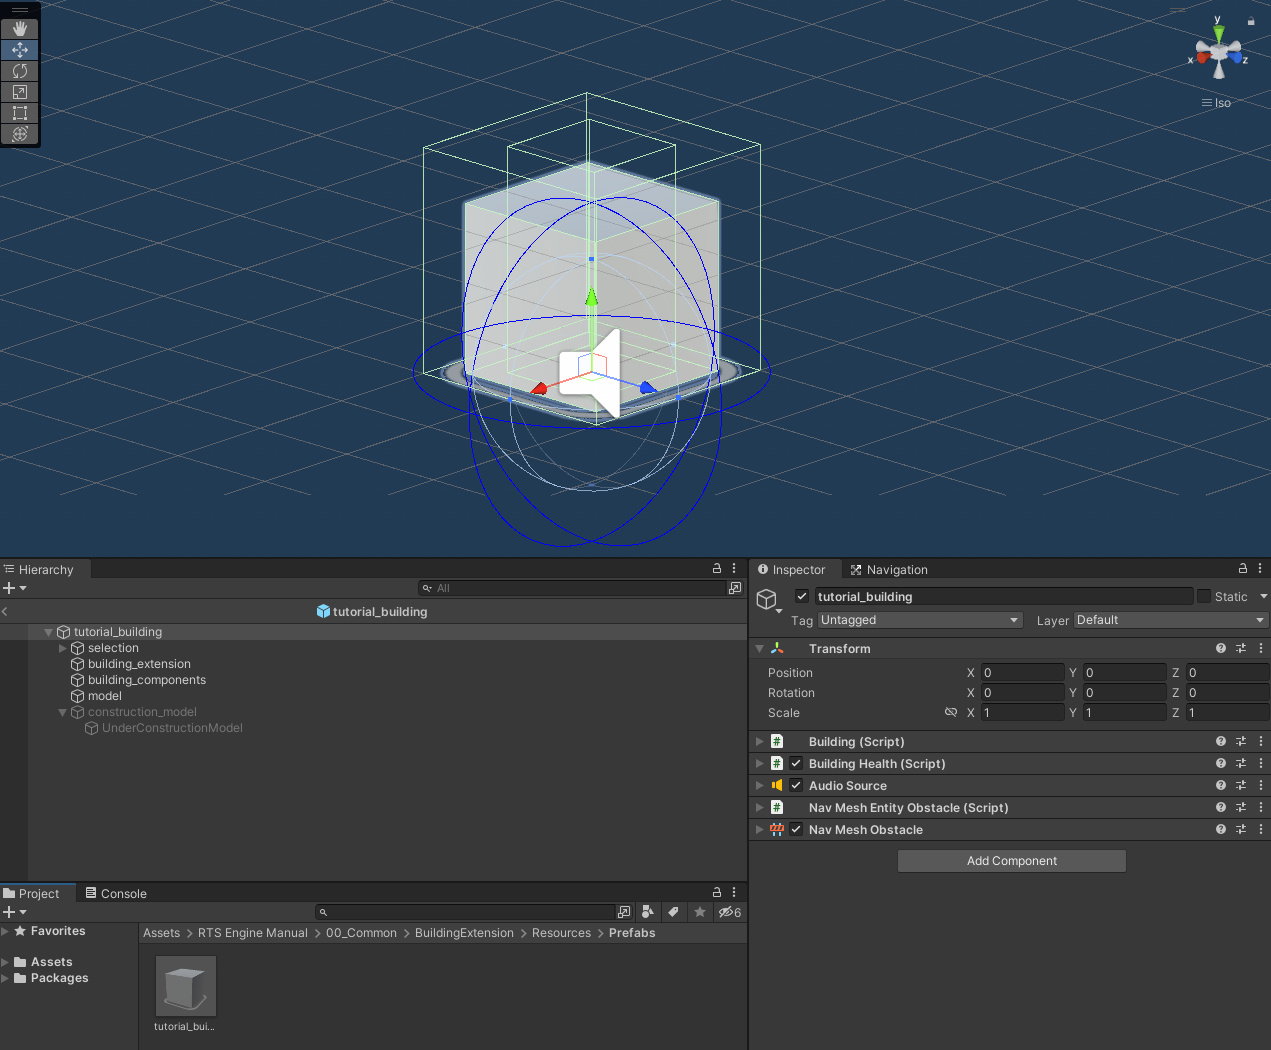
2. Building Component
The Building component is the main component of a building entity, it defines the building type and its general configurations. This component must be attached to the building prefab's parent object. Expand this component and let's look at its fields.
2.1 Entity Tab
We will start by looking at the Entity tab which is a tab that holds fields shared by buildings, units and resources.
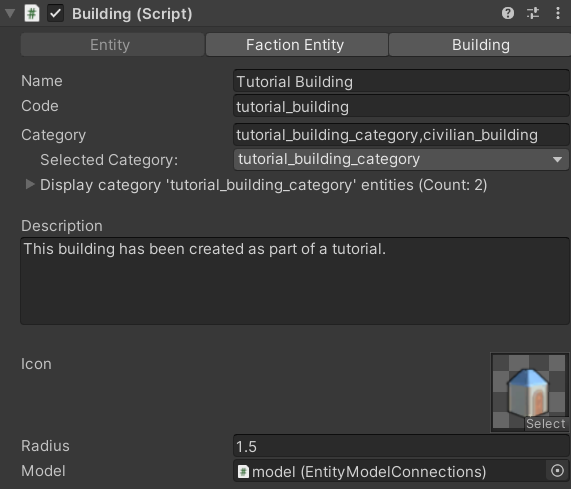
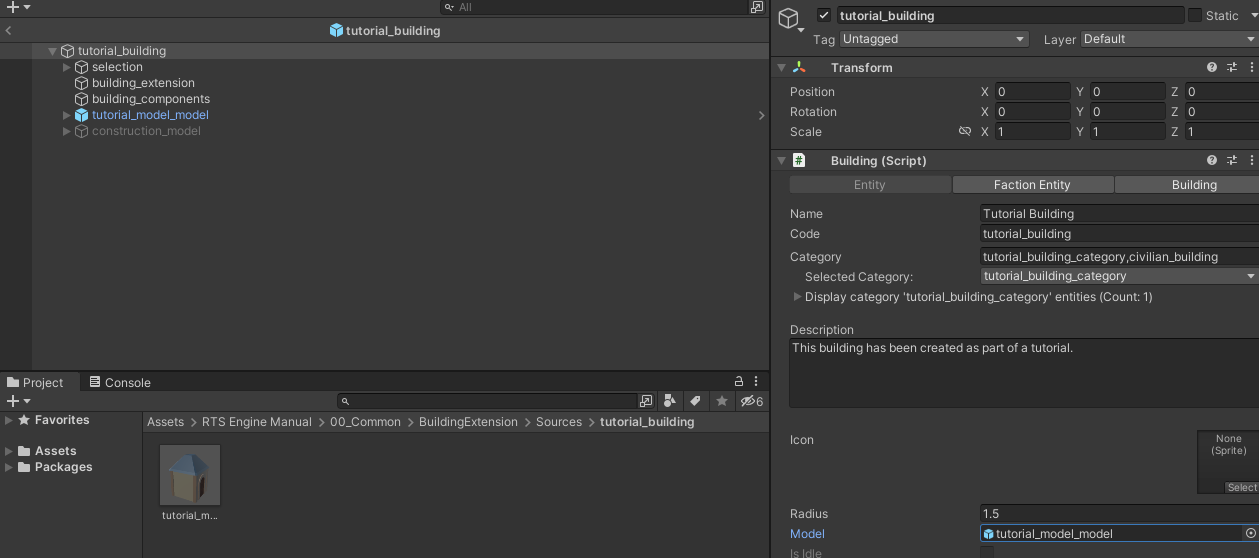
- Name, Code, Category, Description and Icon fields have been already set in the RTS Engine Editor window when creating the new entity prefab but you can still modify them here.
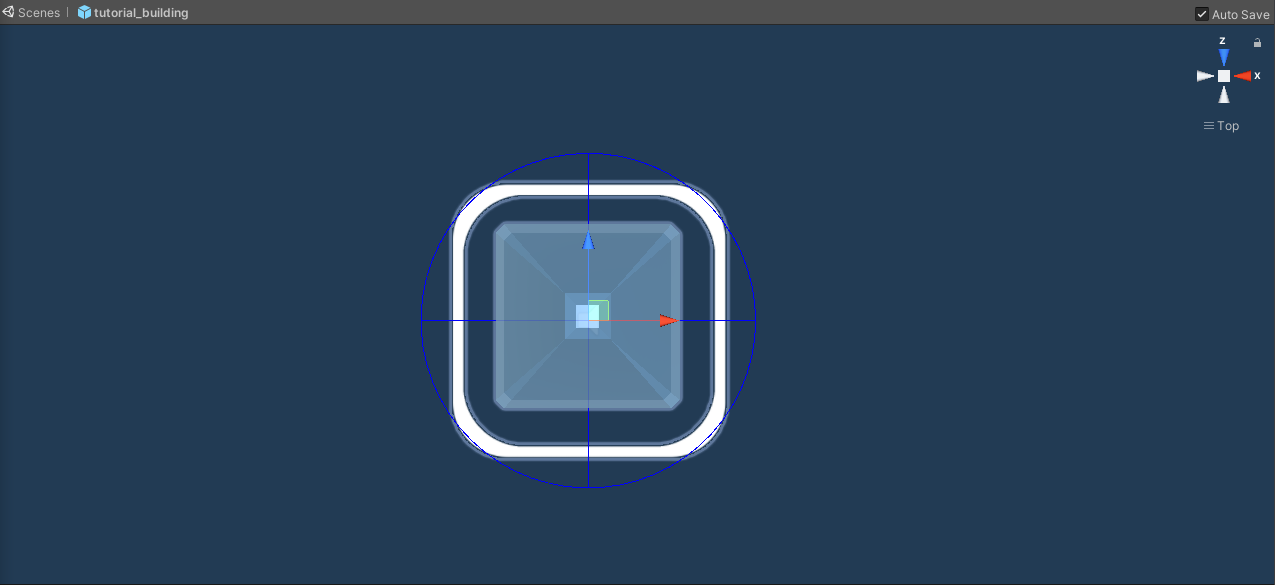
Radius: This field defines the range that the building entity is supposed to occupy within the map. When the building is selected, a blue Gizmo sphere in the scene appears to show you the size defined by the radius that the building entity will occupy. This radius value is useful when defining the ranges from which other entities can interact with this building. For this new building, we will keep the radius value to 1.5 as it seems to cover the size of the house_model object we assigned to it.
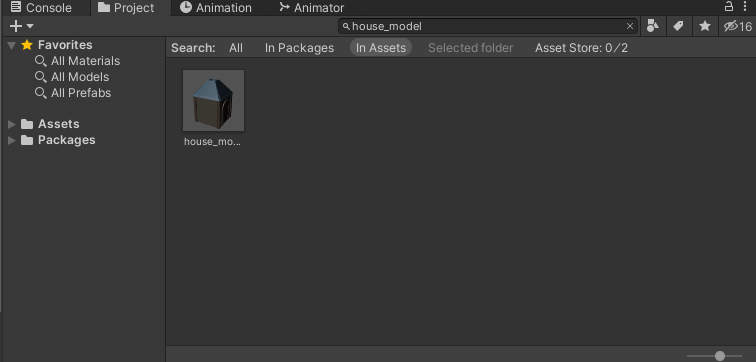
Model: The building requires to have a model child object. By default this is assigned to the cube model. If you have access to the Demo files, search for the house_model object in the Project tab in order to use one of the demo's building models. Select it and drag it as a child of the new building's prefab.
Set the position of the house_model child object to (0, 0, 0) to center it. Then remove the default cube building model and assign the house_model object to the Model field of the Building component.
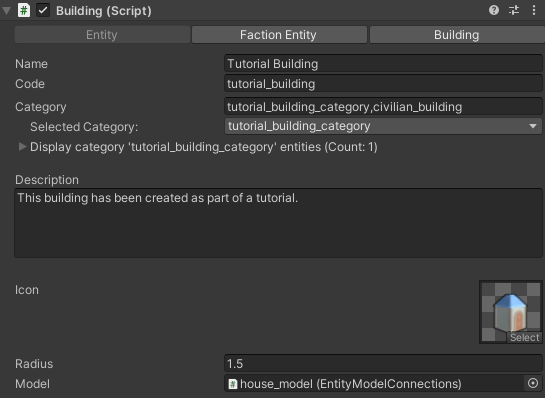
The Entity tab of the Building component should look like this now:
2.2 Faction Entity Tab
A building is a faction entity, meaning that it can belong and be controlled by a faction in the game. That is why it has a dedicated Faction Entity tab in its Building tab that holds faction-specific fields. This is what this tab looks like before we start editing it:
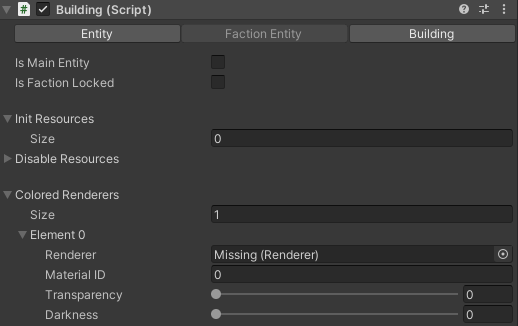
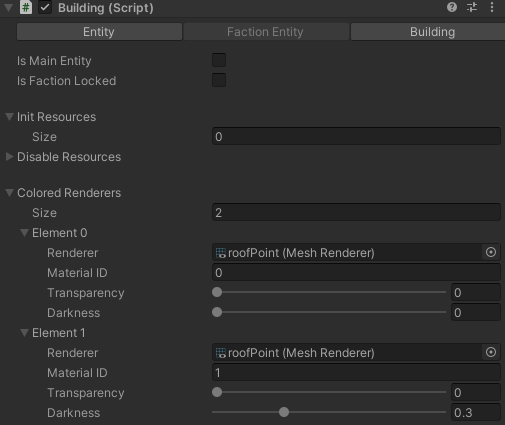
In this tab, we are interested to update the Colored Renderers field while keeping the rest to their default values. If you want to learn about the fields that are not covered within this tutorial then take a look at the Building inspector document which covers all fields or hover over the fields in the editor and you'll see a tooltip explaining the task of each field. We will also get to introduce some of them in the following tutorials (for example, we will discuss the Init Resources and Disable Resources fields when we introduce resources more thoroughly).
For the Colored Renderers field, it allows us to define what parts of the building's model that will be colored with the color of the faction that owns the building. In a previous tutorial, we showed that this color is defined within the Faction Slot in the Game Manager component inspector. By default this field was assigned to the default building's cube model and since we have removed that to replace it with the house_model it is now marked as missing. To fix this, drag and drop the roof child object of the house_model into the Renderer field.
To check what Material ID we need to assign, select the roof object of the model and under its Mesh Renderer component, expand the Materials field.
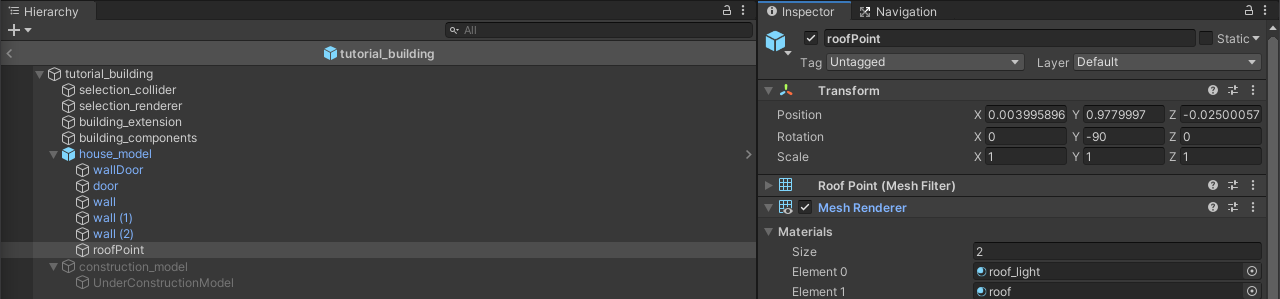
It shows that the roof object has two materials, both of which we can color to highlight the faction that owns this building in the game. For that sake, we will add a new element to the Colored Renderers field while keeping the same Renderer assignment for both fields and having the first element's Material ID assigned to 0 and the second one's assigned to 1. Now we can play with the Transparency and Darkness fields of both elements in order to apply changes to the color that will be applied to both materials. For example, you can apply more darkness to the second material's color so that it is separable from the other one.
Our Faction Entity Tab should look like this now:
2.3 Building Tab
The last tab of the Building component is the Building Tab used for fields specially dedicated for building types, for which there are currently none. If specific building-fields are added in the future, they will be added within this tab.
3. Building Health Component
The Building Health component is the second required component of a building prefab that must be attached to the parent object of the building's prefab. This component handles updating the building's health, handling its destruction as well as allowing to visually update the building's objects to highlight its health state to the player.
3.1 General Tab
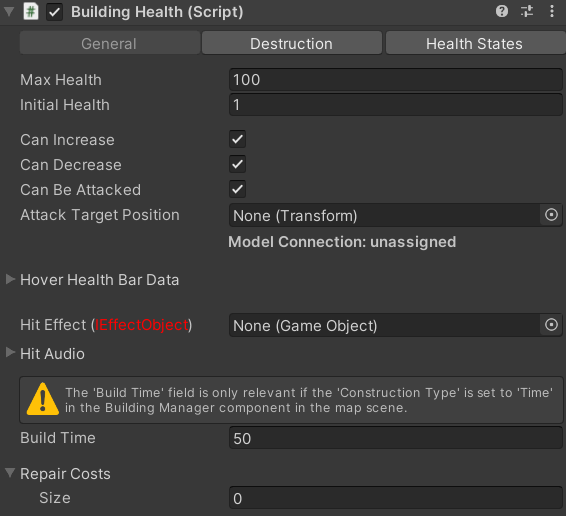
- Max/Initial Health: Update the building's maximum health points and the initial health it has. The initial health, the one that the building is assigned when it is created, must be at least 1. If the initial health is equal to its maximum health, then the building will be completely constructed when it is initialized (meaning that no builder entity has to construct it). And if the initial health is lower than the maximum health then the building will be in a construction state when it is created and it will not be usable (it can not launch any tasks and all of its other components will be disabled) until it is fully constructed (a builder entity has to construct it to make it reach its full health points).
- Attack Target Position: Drag and drop a child object of the building whose position would be used as the attack target position when enemy attacker units/buildings target this entity. If not assigned, then the attack target position would default to the child object that has the Building Selection component attached to it.
- Can Increase/Decrease/Be Attacked: We will keep those enabled as we do not want to lock the building's health update either by increasing or decreasing and we want the building to be attackable by enemy entities. Some specific use cases might require you to disable one of these options so it completely depends on the behavior you want from the building.
- Build Time: This field is explained when we handle building placement and construction in the following guide.
- Repair Costs: Building repair resources costs that apply when the building is repaired from 1 health points to maximum health points after the initial complete construction post placement. Leave array empty for no repair costs. The repair costs are proportional to the current health of the building.
3.2 Destruction Tab
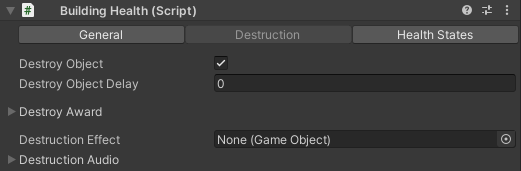
- Destroy Object/Delay: We want this option enabled as we want to destroy the building's entity object when its health reaches 0. The delay option allows you to set time before the object is actually destroyed (during which the building state would remain as Dead and will not be usable), which allows you to run a destruction animation or effect. In this case, we will keep it simple and leave the delay at 0 seconds so that the building gets immediately destroyed.
3.3 Health States Tab
3.3.1 Construction States
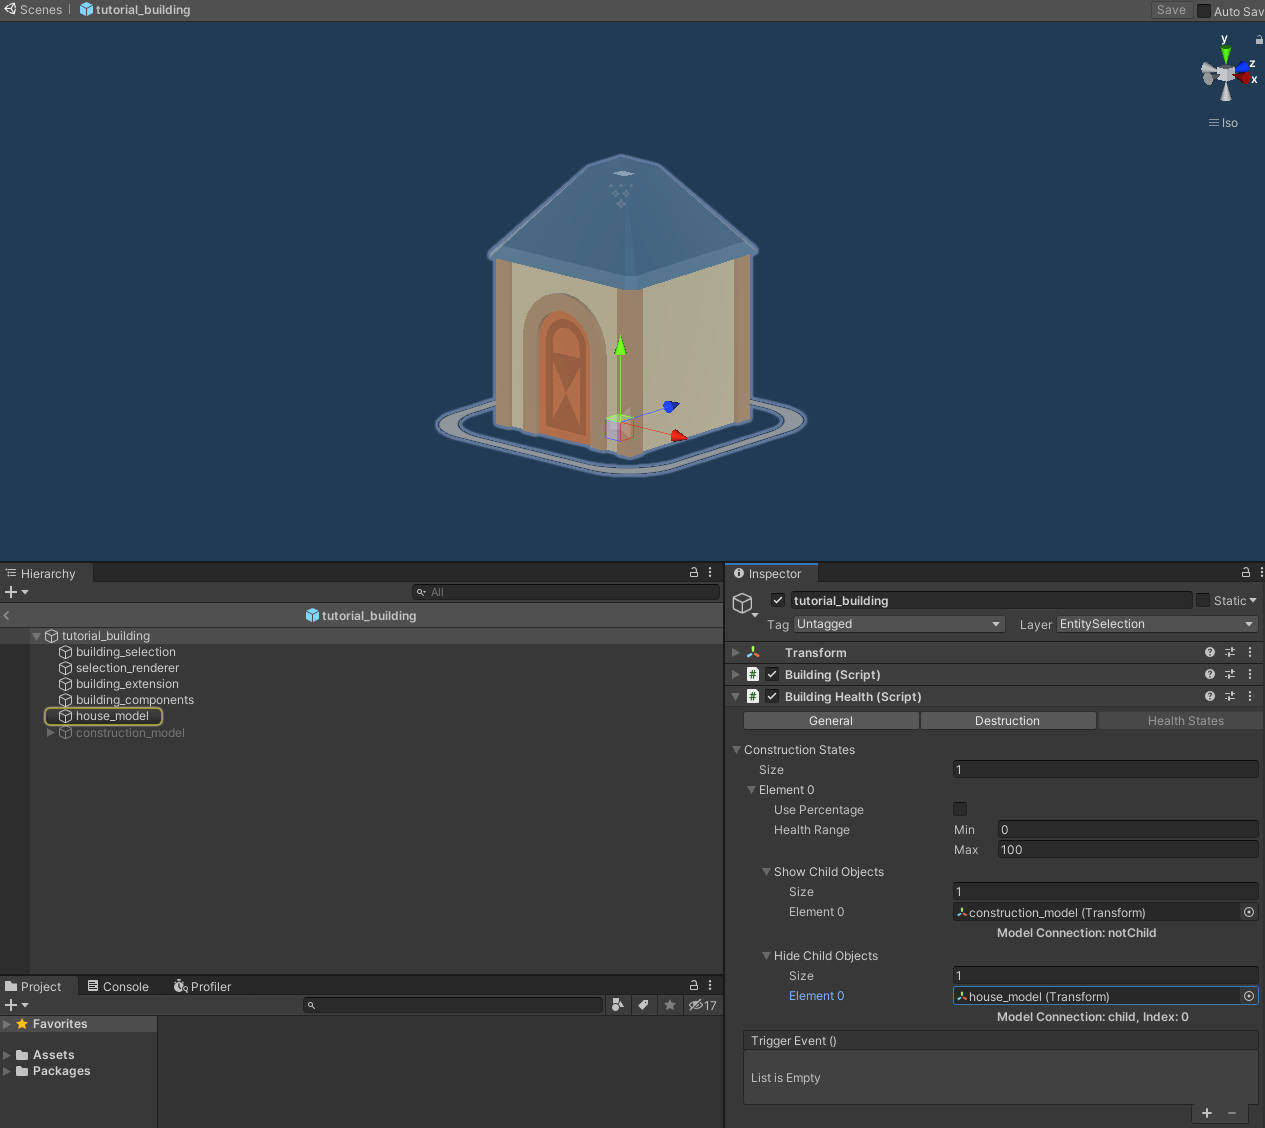
We start with the Construction States that allow us to control the building's state while it is in construction mode. In this case, we only want to have one construction health state and that is having the building's model hidden and a construction object shown instead. The building prefab has a construction_model child object. You can enable it and see that it is a simple shape that is flatter than the building's model.
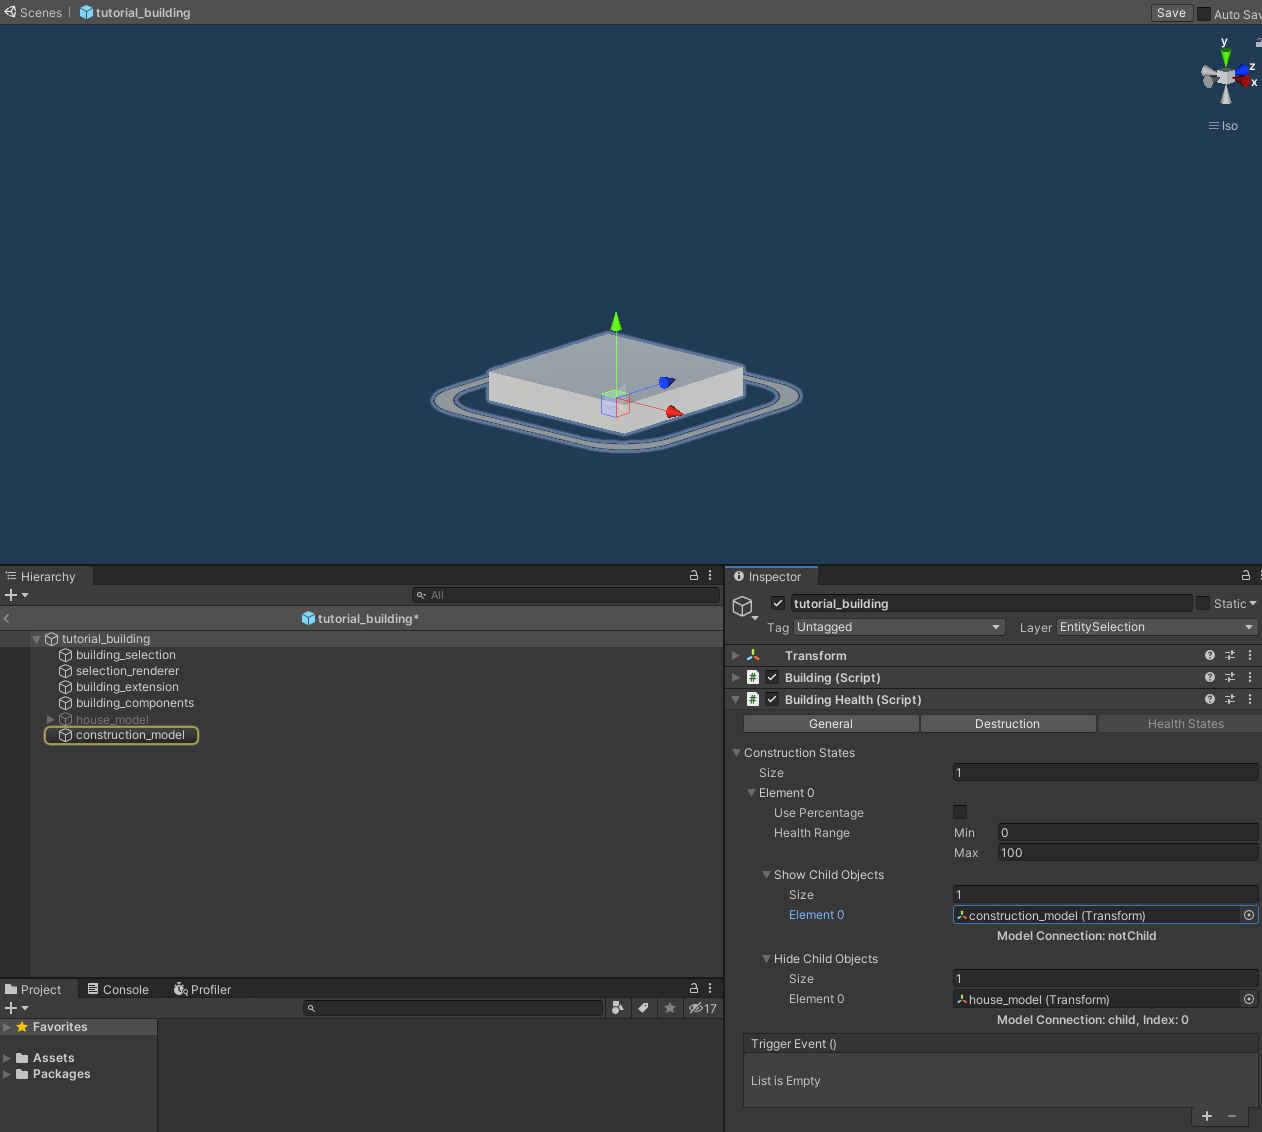
Since we have one construction state then we only need one element in the Construction States list field. For that one element, we want it to include the building's health from start (its initial health) to finish (when it is fully constructed and therefore reaching its maximum health that we earlier set to 100). Therefore set the Health Range to 0-100. That is how we define that this state will be active for the building, when it is in construction mode while its health is inside the [0,100] range (so basically during its whole construction mode).
When the Use Percentage field is enabled, the values entered in the 'Health Range' field below will be regarded as percentages with '0 -> 0% -> 0 Health Points' and '100 -> 100% -> Max Health Points'. In our case here, this is not relevant since the building has a maximum health of 100, meaning that both percentage and raw values will refer to the same health values. Using percentage values for the health range is more useful in case you plan on changing the raw maximum health values of the building while wanting to preserve the same health state configurations.
Show Child Objects list field allows you to pick child objects of the building that will appear when that health state is active. In this case, we add the construction model child object as the single element of this. In the Hide Child Object, we want to have the house_model child object so that it is hidden during the construction state of the building.
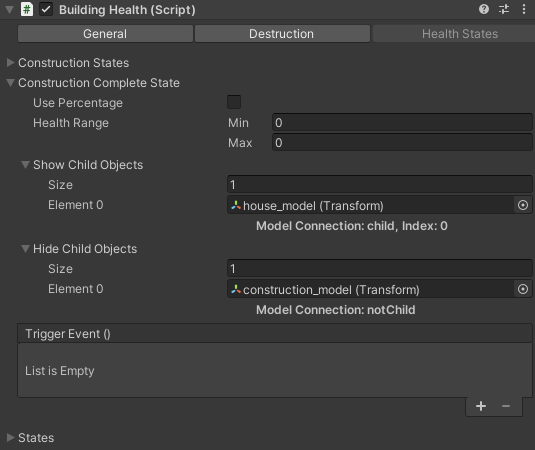
3.3.2 Construction Complete State
The Construction Complete State is a health state that is activated when the building is fully constructed for the first time after it is placed. In this state, the Health Range field is irrelevant. We want this state to activate the building's house_model child object and hide the construction_model by adding those objects to the Show Child Objects and Hide Child Objects fields respectively.
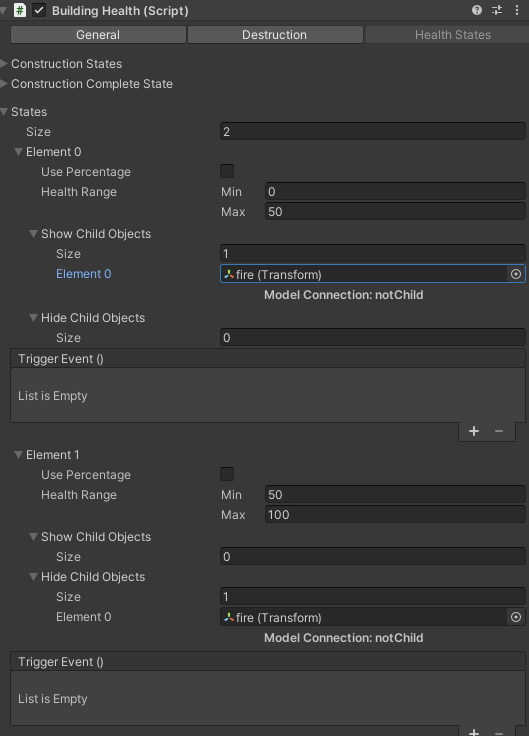
3.3.3 States
The States field allows us to hide and show child objects of the building entity when it is out of construction mode. The building goes through a construction state, then its construction is completed and finally its health states are only modified through the States field.
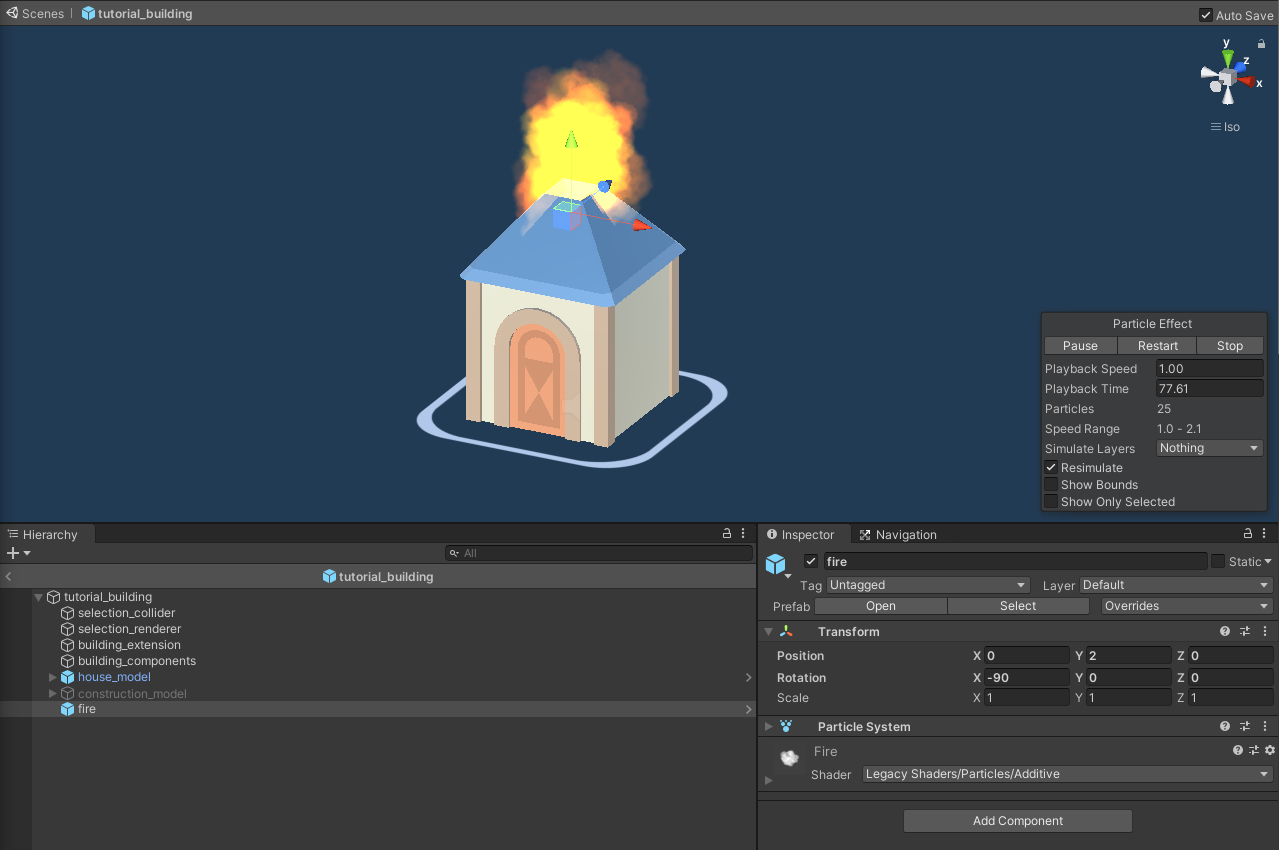
In this case, we want to highlight when the building is damaged by enabling an effect. Let's add that effect first. Search for the 'fire' particle effect under the Demo folder (you can find it under the path RTS Engine/Demo/RTS Engine/EffectObjects/Prefabs/ in the project tab). Drag and drop the particle effect prefab into the tutorial_building prefab and place it at position: (0, 2, 0) and rotation (-90, 0, 0). Select the fire effect object and in the scene view, it should appear at the top of the building. Make sure that the fire object is deactivated by default because we do not want it to appear when the building is in construction mode (or you can also have activated but add it to the Hide Child Objects list of the construction state we created earlier).
Now we want to have two states, the first has a Health Range of [0, 50] which is activated when the building has less than 50 health points. In this one we want to have the fire child object activated. The second state (which would be the second element of the States field) is the one that is active when the health of the building is in the range [50, 100] and for this one, we want to have the fire child object hidden. Make sure that health states are defined in an ascending health range order. This setup allows the fire object to appear only when the building is damaged and has less than half of its maximum health points. The States should look like the following:
3.3.4 Destroy State
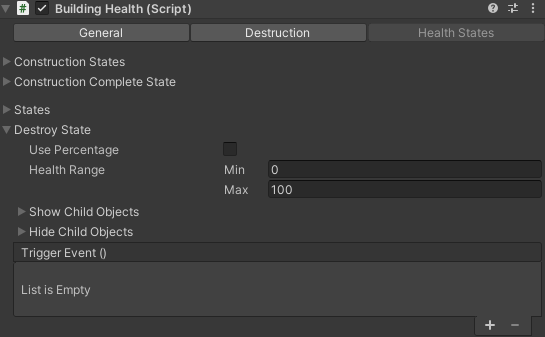
The Destroy State is activated when the building is destroyed after reaching zero health points. If the building's object is not immediately destroyed, then you can use this field to show or hide objects on the entity's model or trigger additional destruction effects.
3.3.5 Triggering Events
You can do much more with the health states than enabling or disabling child objects. In each health state, you can use the Unity Event trigger in order to call a method or update a property in a component. This means that you can have custom components that include logic to produce certain effects depending on the building's health states. You can define different health states and then use the Trigger Event to link them to your custom behavior.
4. Other Main Object Components
The other components that are attached to the building's entity main prefab object are the following:
- Audio Source: Required when you want the building components to play audio clips locally on the building.
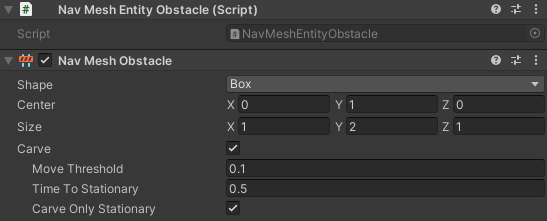
- Nav Mesh Entity Obstacle and Nav Mesh Obstacle: In order to allow the building to make a hole into the navigation mesh of the terrain, you need to add the Nav Mesh Obstacle component to the parent building's object and enable Carve on it. Then make sure that the Center and Size fields cover the territory that the building will occupy within the navigation mesh of the terrain which will block unit movement through that area. In this case, a good value for the Center field would be (0, 1, 0) and (1, 2, 1) for the Size field. Additionally, you need to add the RTS Engine's Nav Mesh Building Obstacle component which will control enabling and disabling the Nav Mesh Obstacle component depending on the building status (it is deactivated when the building is being placed by the player and then activated as soon as the building is placed). In this case, we add it to the parent obstacle because the Nav Mesh Obstacle is also attached to that object. However if the latter component is located at a child object of the building prefab then we add it to the same child object.
That is it for the building's parent object. Next we will explore some of the essential components in the children objects.
5. Building Selection
5.1 Selection Component
The building selection allows us to define what colliders are used to detect the player's mouse click in order to have the building selected when the game is running.
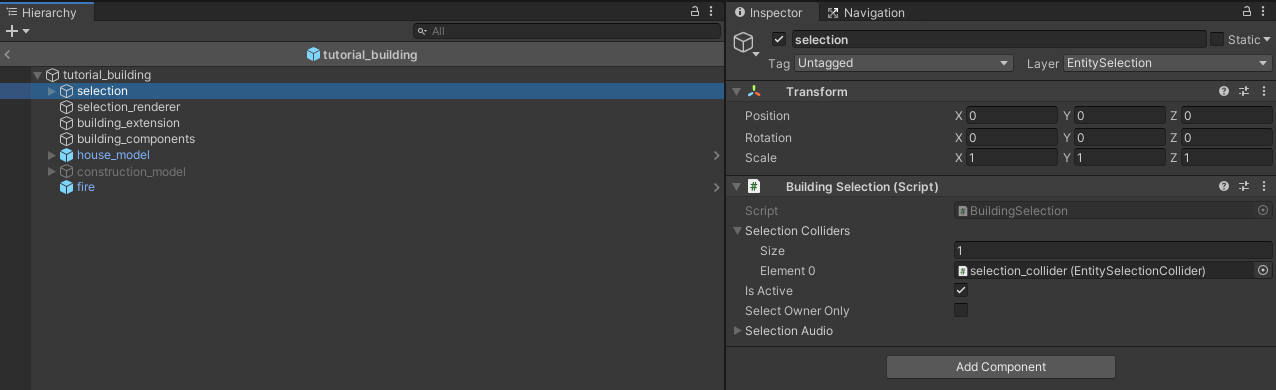
The main component in the selection process is the Building Selection component which is placed under the selection child object of the building prefab.
- Is Active: Make sure this option is enabled so that the building is selectable.
Selection Colliders: This array field defines the colliders used to select the building. You can have multiple colliders, placed on multiple child objects of the building prefab, that allow the selection of a single building. The latter is useful when you have a complex building structure which the simple collider types can not cover. Each collider object must have the following:
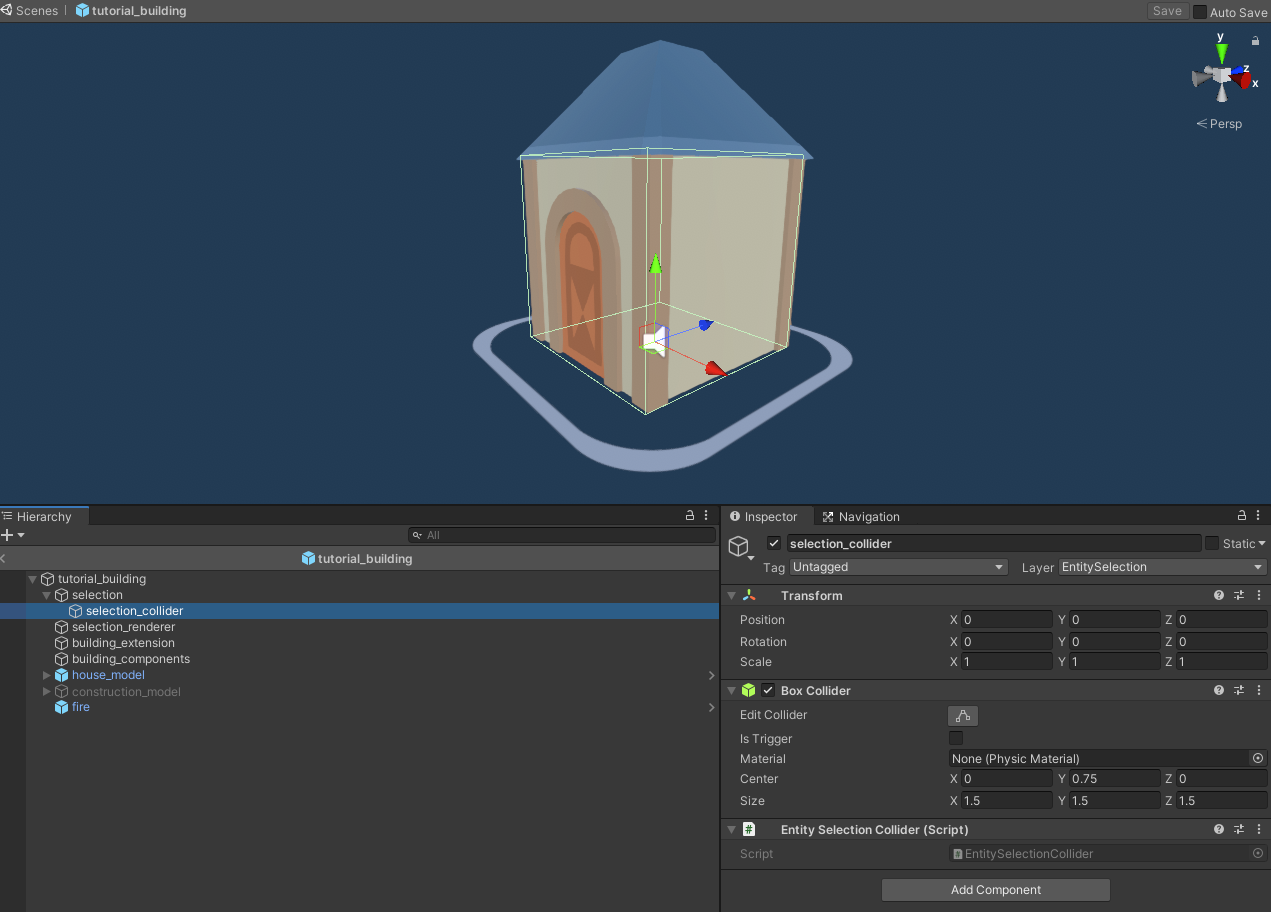
- Collider component.
- Entity Selection Collider component.
In the case of this simple tutorial_building, we have one collider object with a Box Collider of center (0,0.75,0) and size (1.5, 1.5, 1.5) which fits the model we used. Now make sure that this collider object is added to the Selection Colliders field of the Building Selection component.
5.2 Selection Renderer
We can have a visual representation to indicate when the building is selected. This is exactly the job of the selection_renderer child object. It includes a Mesh Renderer component which is enabled when the building is selected and disabled when it is not. This is the task of the Entity Selection Renderer component which is attached to the selection_renderer child object:
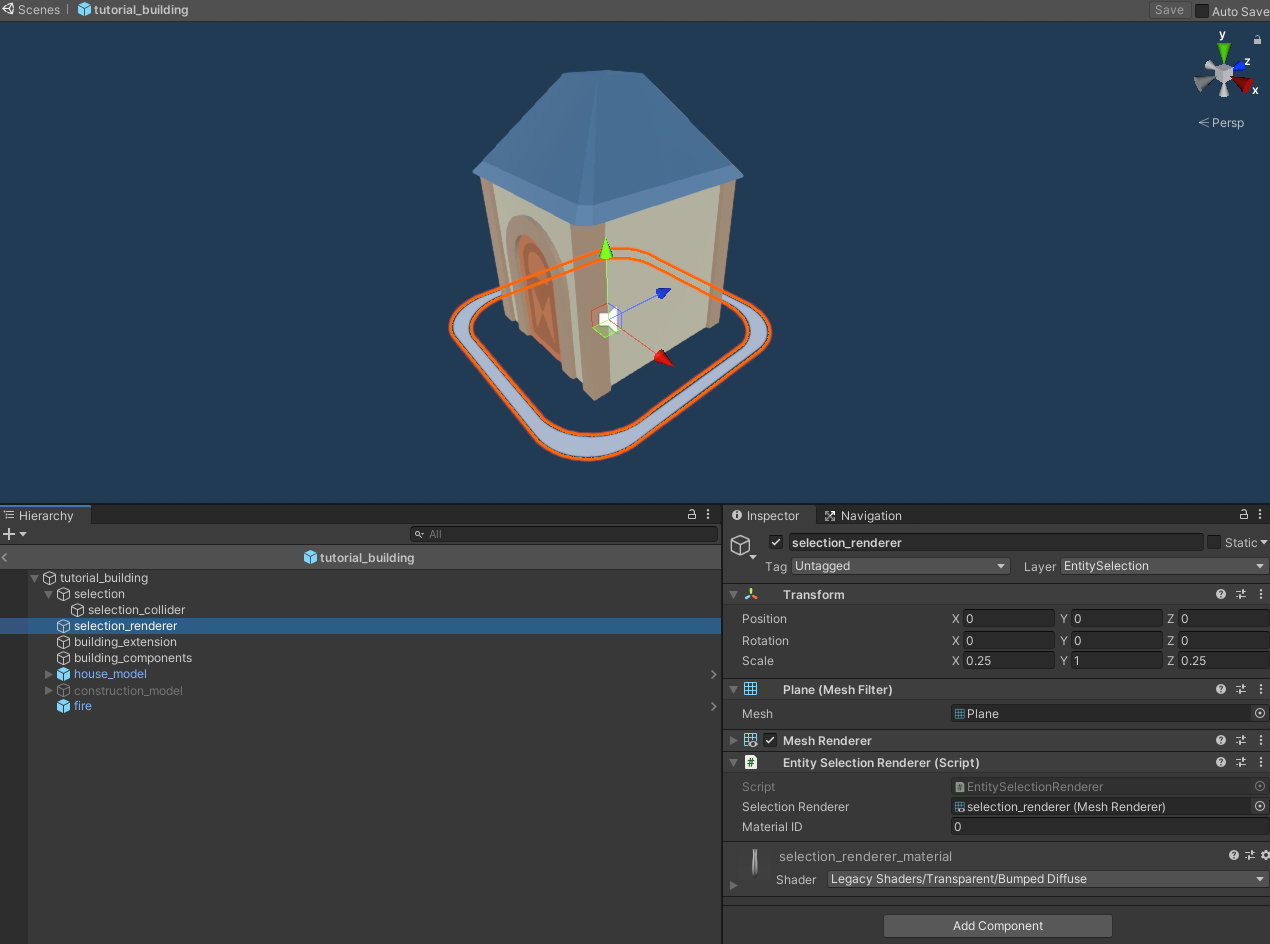
- Selection Renderer: Drag and drop the Mesh Renderer component into this field, to be enabled or disabled when the building is selected or not selected respectively.
- Material ID: The selection renderer is colored using the faction color that the building belongs to. This field defines the index of the material that will be colored on the Mesh Renderer component. In the case of the tutorial_building's selection renderer, there is one material and therefore we keep this value set to 0.
6. Other Child Object Components
The following child objects and their components are necessary to have a building prefab but they would discussed in other tutorials:
- building_extension: Includes components required for the building placement by the player. Discussed in more details in the building configurations for construction section.
- building_components: Includes components required for the building to be constructed by builder units. Discussed in more details in building configurations for construction section.
Now that the building prefab is created. The next part of this tutorial will go through adding the building to a map.
Download Files
You can download the results of this tutorial here.