Configure Building Prefab
First step to placing buildings is to make sure that the building prefab placement related components are correctly configured. Load up the tutorial_building prefab and let's start.
1. Building Construction Type
In each map scene, you can pick how building construction will be executed from the Building Manager component which can be found under the Essential manager components.
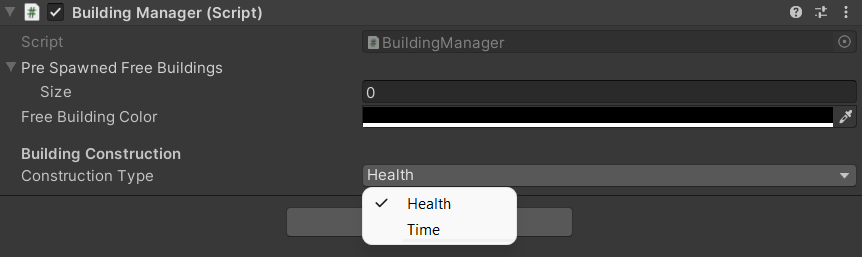
- Health: Buildings are constructed and repaired by builders where each active concurrent builder adds health points periodically to the building until it reaches maximum health.
- Time: Buildings are constructed and repaired by builders actively constructing them for a certain amount of time until it reaches maximum health. The more active concurrent builders there are, the less time it takes for the building to be constructed.
Different configurations will be applied to the builder units and the Building Health component depending on what construction type you choose.
1.1 Health Construction Type
When the construction type is set to 'Health', you only need to configure the health that each Builder unit adds during construction. This is done in the next Configure Builder Unit guide. We will be using health based construction in the following tutorial.
1.2 Time Construction Type
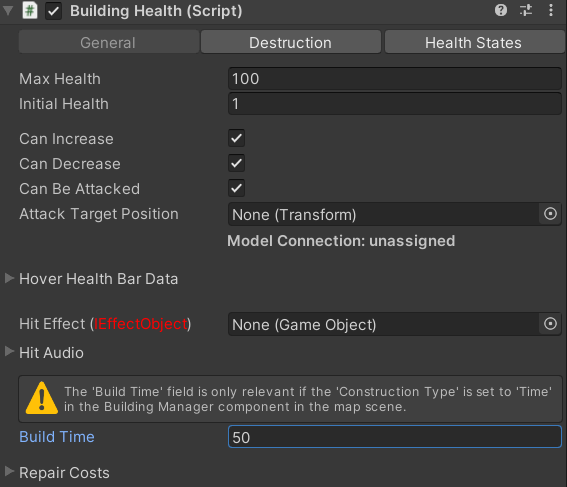
- Build Time: In case the construction type is set to 'Time' in the building manager, this field represents the amount of time needed to construct this building from 1 health points to maximum health points when only one builder is actively constructing it with a time multiplier of 0.
Then you need to configure the Builder component of the constructor unit. This is done in the next Configure Builder Unit guide.
2. Building Placer Component
Select the building_extension child object. This one includes the following components that make it possible for the building to be placed on map.
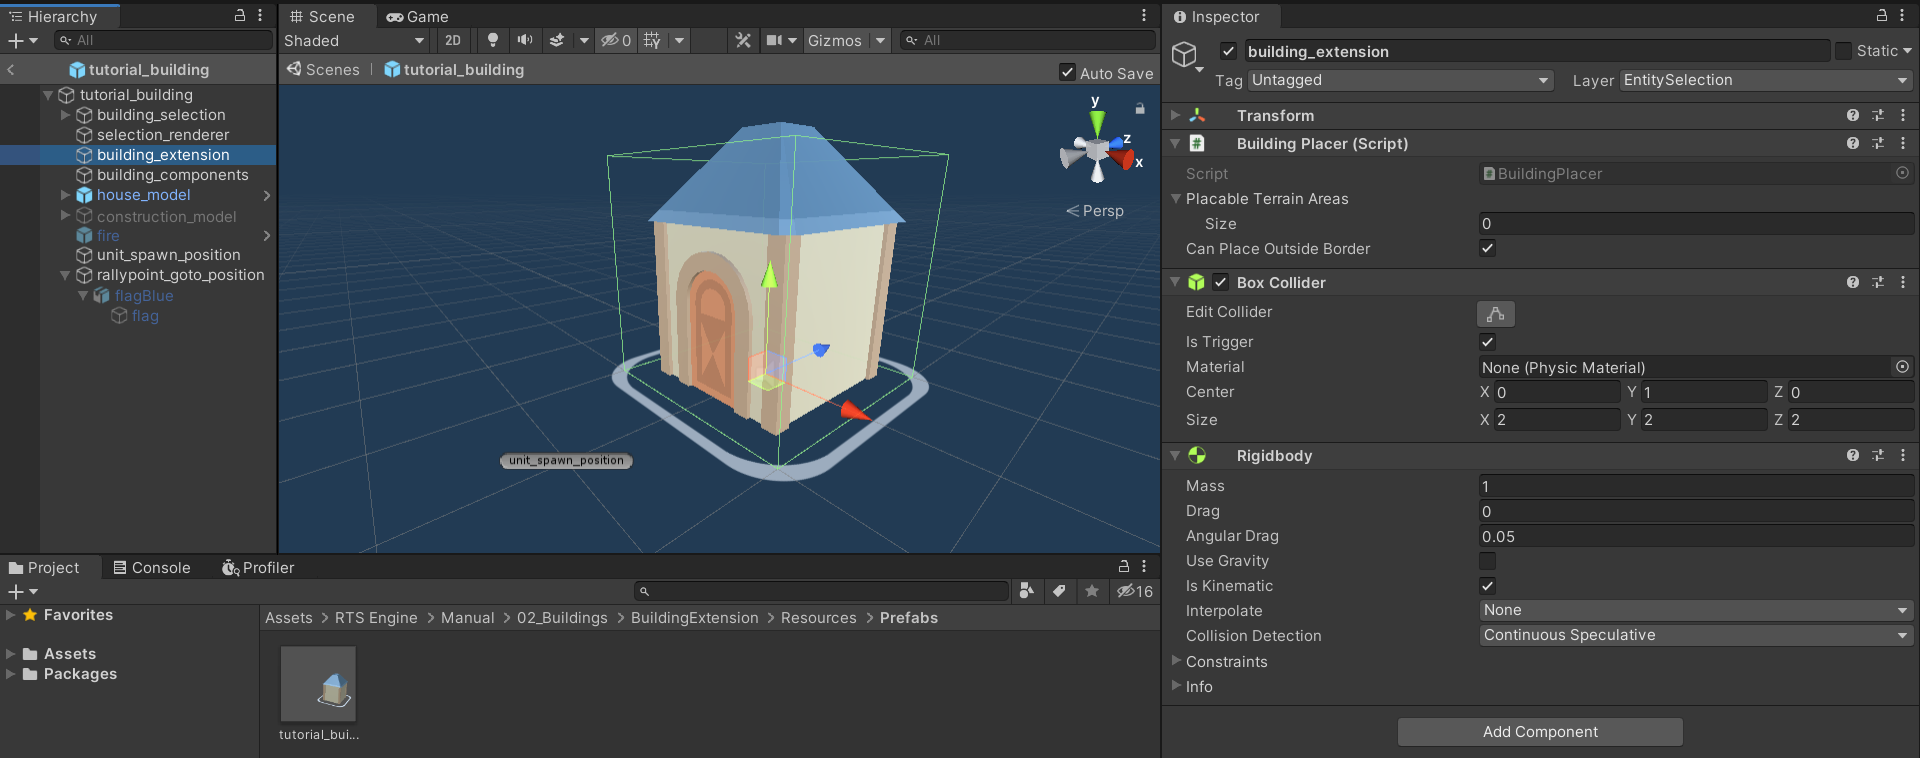
The main component here is the Building Placer component:
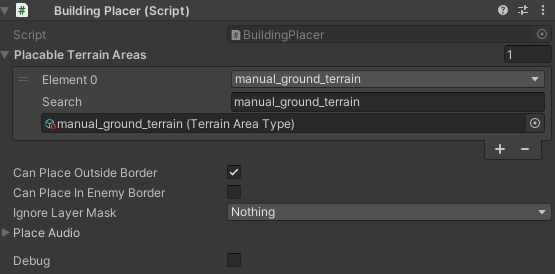
- Placable Terrain Areas: Define the Terrain Area Types where the building can be placed at. When leaving this field empty, any area type can be used to place the terrain at. You can leave it either empty or add the ground_terrain defined in the tutorial_map scene.
- Can Place Outside Border: We have not gotten to discussing the Border component if you are following this beginner's tutorial in order. But we want to have this field enabled, else the building must be included within its faction's territory, defined using the Border that we are not using yet.
- Can Place In Enemy Border: When this field is enabled then the building can be placed inside an enemy faction's territory which is defined using the Border that we are not using yet.
- Ignore Layer Mask: Colliders attached to game objects with layers inside this mask will be ignored by the building placement process when checking for obstacle colliders.
- Place Audio: Audio clip to play when the local player places this building.
- Debug: Enable this option to print a debug statement on the console that is logged every time the building the local player is placing is moved to a new placement position is evaluated:
- Border: true when border requirements are met, as in when the building is placable outside a border or when it is correctly inside a faction border.
- Map Terrain: true when the building is placed on correct map terrain areas.
- Overlapped Colliders: nothing if there are no obstacle colliding with the building or names of colliders if there are any.
- Conditions: true when all building placement conditions are met. A building condition is a component that can be attached to the same object holding the Building Placer component and adds an additional condition that has to evaluated before the building is cleared for placement. An example would be the Building Place Around Condition which allows you to specify a set of entities and a min and max distance to any of the entities in the set as the only valid placable area for a building.
The Building Placer component requires two additional components attached to the same object (should be already attached by default):
- Collider component with Is Trigger enabled so that other buildings can not be placed within collision of this building.
- Rigidbody component with Use Gravity disabled and Is Kinematic enabled.
3. Building Worker Manager
In the same prefab select the building_components child object.
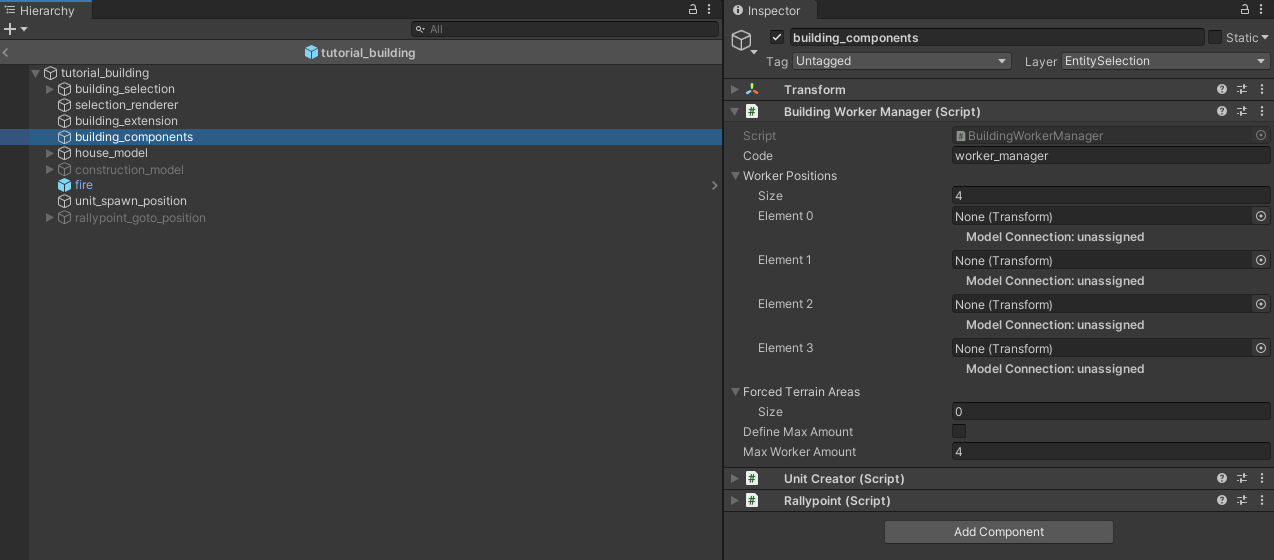
You can find the Building Worker Manager component attached. This component is responsible for allowing builder units to construct the building after it is placed and repair it when it is damaged.
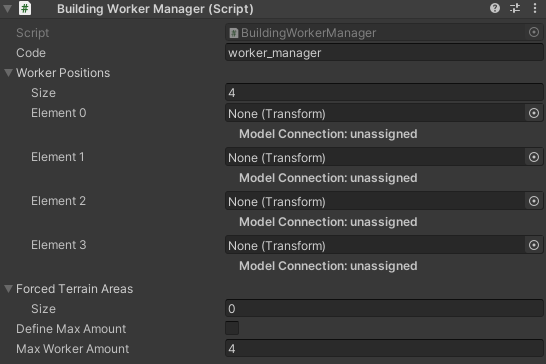
- Code: Assign a unique code to this component. For example "worker_manager".
- Worker Positions: The size of this array represents the maximum amount of builder units that can work at the same time to construct the building. When you leave the elements of this array empty, then the worker units will pick the closest position to construct the building in relation to their position and the building's position. When assigned with Transforms, the elements of the array would represent static positions that the units need to reach to start constructing the building. In this tutorial's case, we are not using static worker positions so leave the elements of this array empty.
- Forced Terrain Areas: When you have static worker positions (elements in the above array are assigned), then you can define Terrain Area Types to make sure that the static worker positions are in specific terrain areas when the building is placed (specifically, the height of the worker positions is adjusted to the height of the terrain area). Since we are not using static builder positions then we can also leave this field unassigned.
- Define Max Amount / Max Worker Amount: Enable the Define Max Amount option to allow to set the maximum amount of workers independent of the 'Worker Positions' field. When enabled, the field Max Worker Amount would represent the maximum amount of workers allowed to construct the building at the same time. The amount of this field must be lower than the size of the 'Worker Positions' array.
Download Files
You can download the results of this tutorial here.