Add Movement Task
In the Setup Unit Movement section of this tutorial, we configured the Unit Movement component for the tutorial_unit. The Unit Movement component is an entity component that allows you to set a target which can be a position on the map. An entity component with an ability to set a target allows the player to set that target either by a right-mouse click on the target while the entity is selected or by a dedicated task that appears in the dedicated UI task panel when the entity is selected as well. In this section, we will create a UI task that allows the unit to set a movement path destination.
1. Configure Task UI Panel
First, we want go through the configurations of the task panel in the map scene. Load the tutorial_map now and let's explore the UI components responsible for handling the task panel where the movement task will be displayed.
1.1 Essential UI Manager Components
First, in the hierarchy navigate to GameManager -> Essential -> UI and you will see two components attached on that game object.
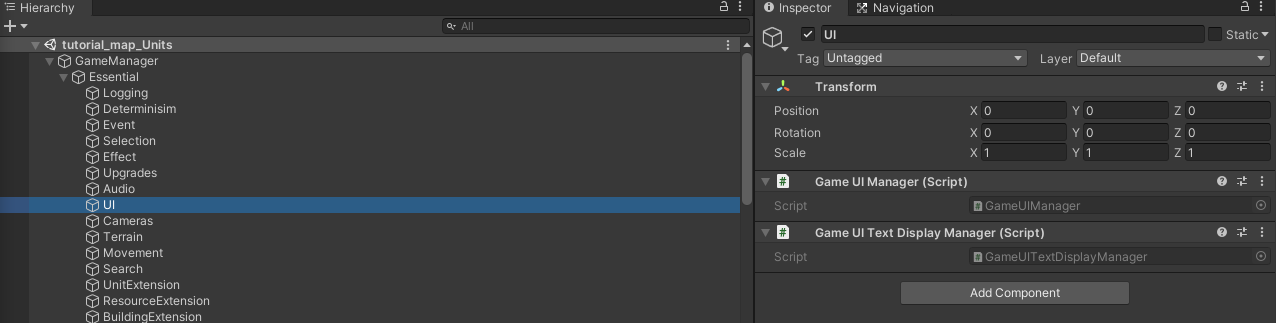
The Game UI Manager and Game UI Text Display Manager are two components which have no fields that can be assigned through the inspector. They can however be extended through code to provide more customization for the UI.
1.2 Task Panel UI Handler
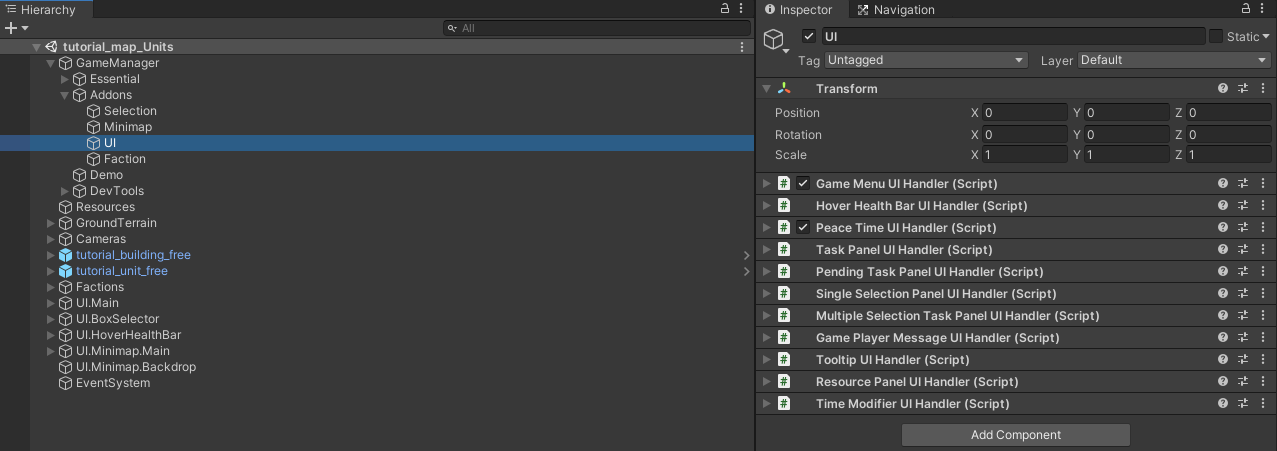
All UI manager components, except the aforementioned two, are optional and are not required for the game run as they rely on public general events fired by other RTS Engine components to update the UI elements accordingly. These optional UI components that manage the UI can be found in the hierarchy under GameManager -> Modules -> UI:
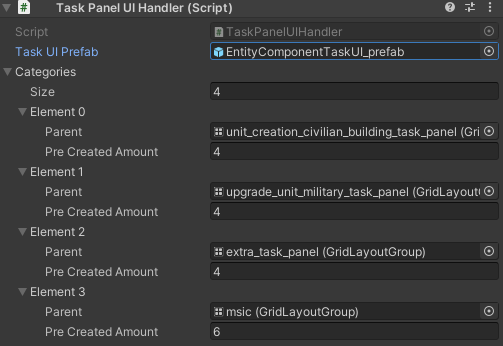
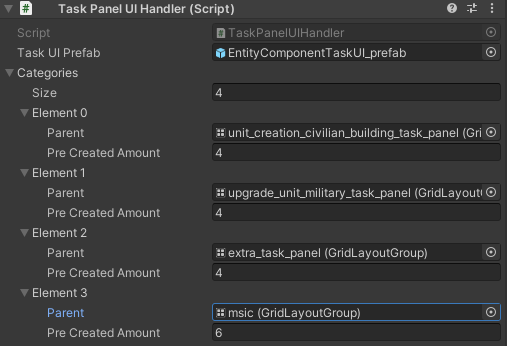
The Task Panel UI Handler is the one responsible for displaying entity component tasks on the task panel. Expand it and let's explore its fields:
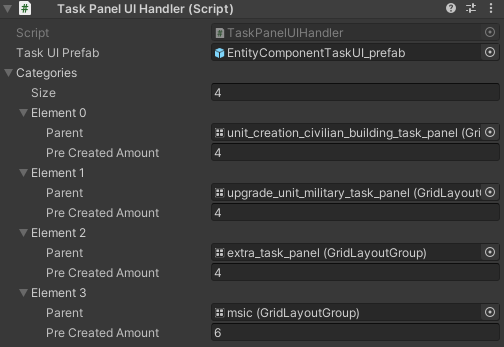
The Categories array field allows you to define multiple categories for the task panel. Each element of this array is composed of a Parent field which requires UI elements that have a Grid Layout Group component attached and then a Pre Created Amount which specifies the amount of task positions to create within the task panel category. The latter is useful when you have tasks that have pre-assigned indexes or positions within the category, meaning that having enough pre created task positions would cover them. Each task panel category is defined by a unique ID which is its index within the array field. Go through the task panel category parent objects in the scene, you can either select them from this component's inspector or find them within the hierarchy path of UI.Main -> TaskPanel. For example, let's look at the unit_creation_civilian_building_task_panel (the names here are inspired from the UI setup in the demo game).
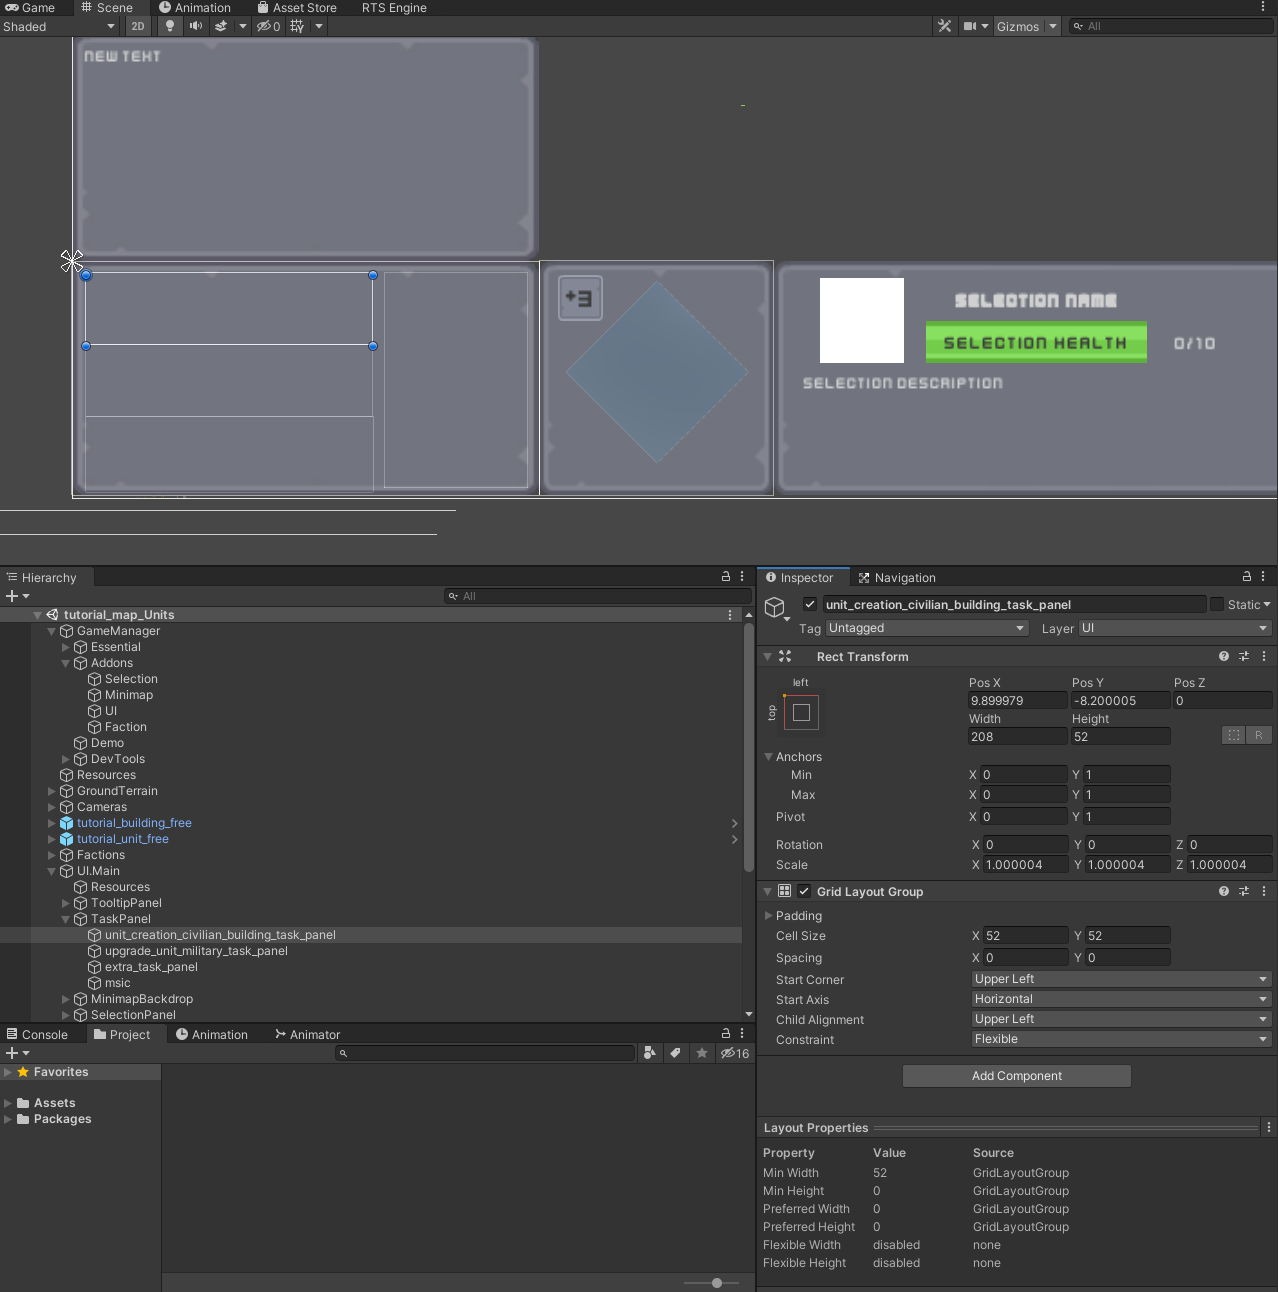
You can see in the scene view that the unit_creation_civilian_building_task_panel UI object has a Grid Layout Group where its fields define the size of each task that will be drawn inside of it and the spacing and positioning of them. You can create more task panel categories or play with how they are setup but for the sake of this tutorial, we will be keeping the default ones.
1.3 Entity Component Task UI Prefab
When a task is activated, a UI object is added to the task panel's parent object. The UI object is cloned from the Task UI Prefab field in the Task Panel UI Handler component inspector.
Click on that prefab and open it (you can also find it in the Project tab within the path: RTS Engine -> Core -> Prefabs -> UI) and let's explore its structure:
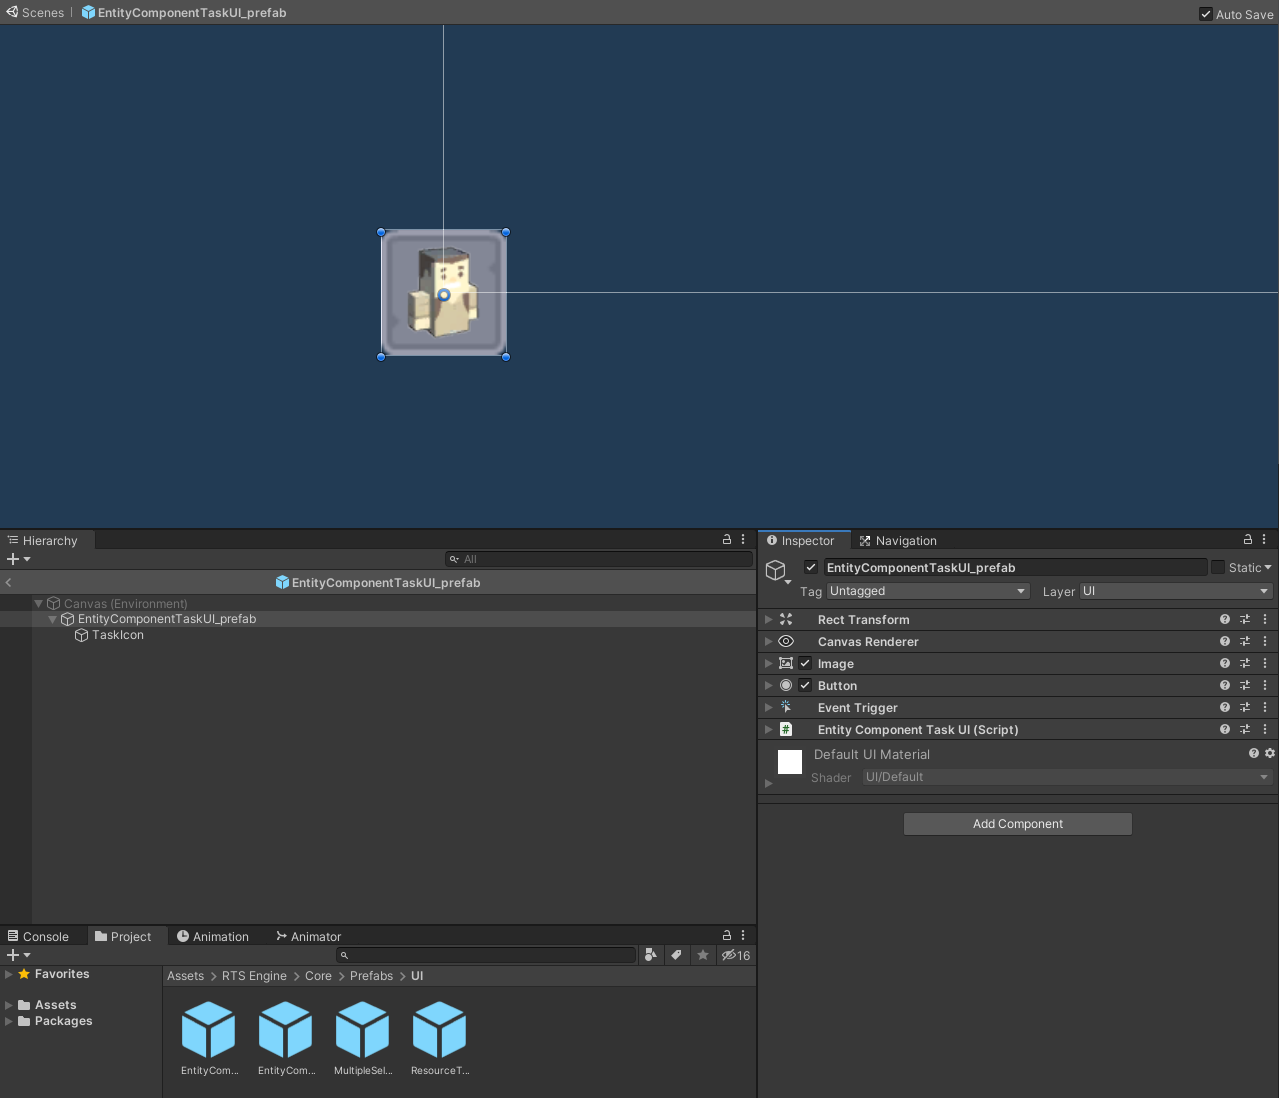
In the prefab's parent object, we have the following components:
- Image component: Responsible for displaying a backdrop for the task.
- Entity Component Task UI component: Required component responsible for relaying the player's interactions with tasks of entity components. It has one field under the name of Image which accepts a UI element that is a child object of the prefab and that has a UI Image component attached to it to be used for displaying the actual task's icon.

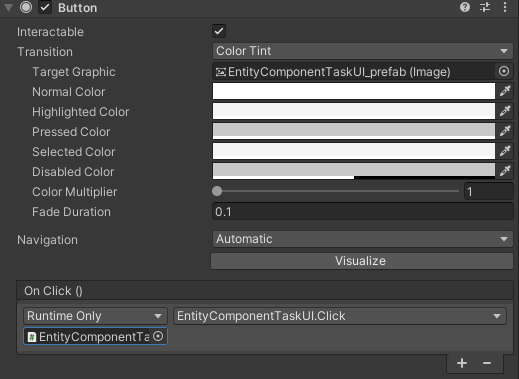
- UI Button component: Required to allow the task UI object to be clickable. In the On Click() event, make sure that it invokes Click on the Entity Component Task UI attached to the same object.
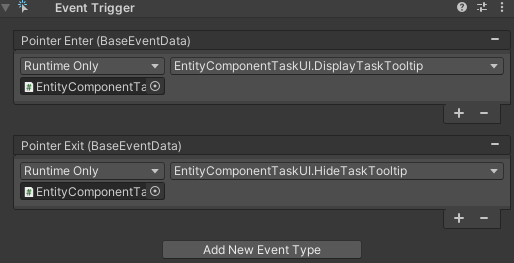
- Event Trigger component: Includes events that allow the entity component's task to have a tooltip enabled when the player's mouse is over it. Make sure it has a Pointer Enter event that invokes DisplayTaskTooltip and a Pointer Exit event that invokes HideTaskTooltip on the Entity Component Task UI attached to the same object.
 If you want a different layout for the entity component task prefab, then it is recommended that you create a clone from this prefab to use in your own scenes.
1.4 Tooltip UI Handler
Under the hierarchy path of addon UI components GameManager -> Addons -> UI, you can also find the TooltipUIHandler component. This component handles showing informative text when you hover over tasks (and other UI elements).
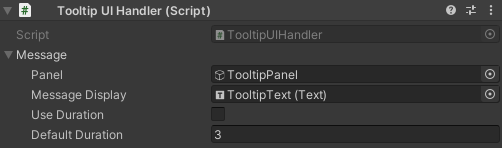
- Panel: UI object that is enabled when the tooltip text appears.
- Message Display: UI Text that displays the tooltip's text. If the Panel field above is assigned then the UI text object is usually a child of the panel.
- Duration: Enable Use Duration to make the tooltip always appear only for a limited time that you specify in the Default Duration. We will be keeping this disabled because we want a task's tooltip to remain visible as long as the player has their mouse hovering over the actual task.
When navigating to the Panel or Message Display UI objects, you can see that the tooltip is represented by UI elements drawn over the task panel.

2. Configure Task Manager
The Task Manager is an essential manager component placed in GameManager -> Essential -> Task. It handles relaying tasks to entity components from the UI panel.

However, the only configurations available in its inspector fields are related to the mouse cursor when the game is running. Enable the Change Mouse Cursor field in order to allow you entity components that allow to set a target (like the Unit Movement) to override the default mouse cursor when they are active (more on this in the next paragraph where we create the movement task and set a custom mouse cursor for it).
As for Custom Cursor field, it allows you to override the default mouse cursor's image that the player sees at all times when no entity component task is active. You can drag it into the Icon field and set its click hotspot in the Hotspot field. By default, we are using the mouse cursor from the demo game with a hotspot of (8,8).
3. Create Entity Component Task UI
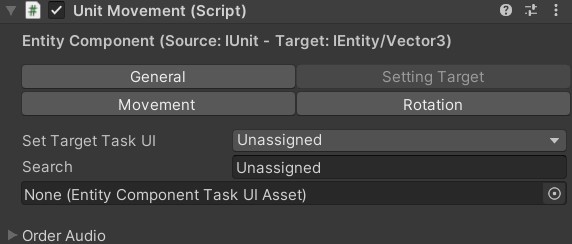
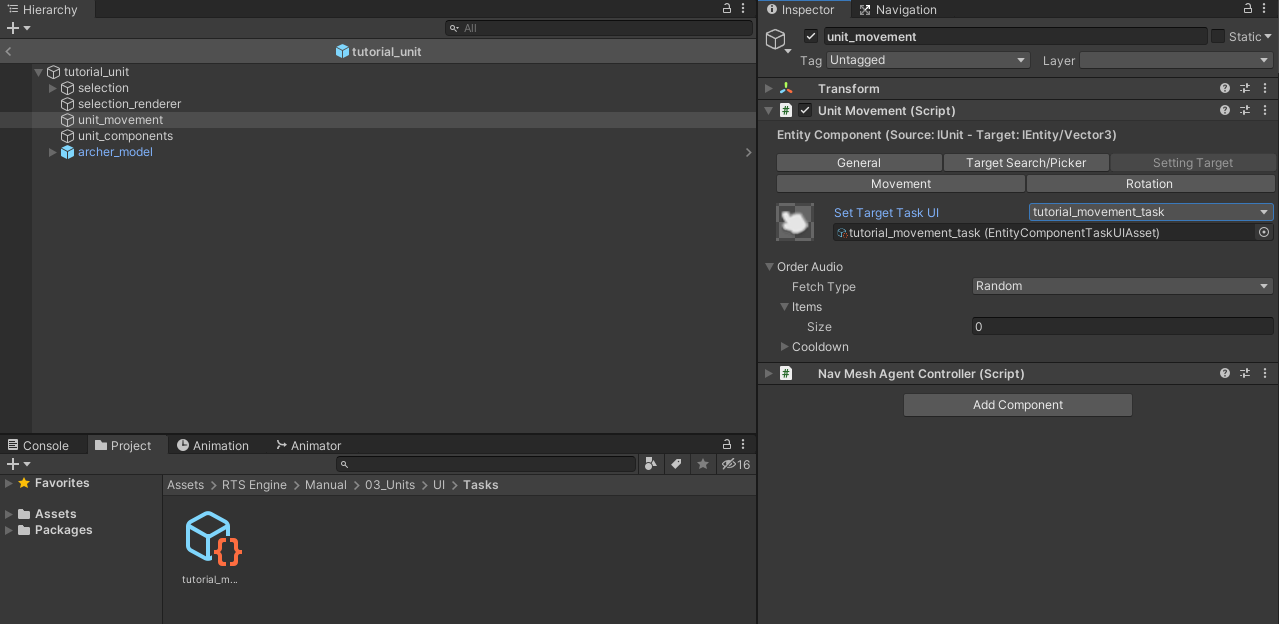
Go ahead and open the tutorial_unit prefab and select its unit_movement child object and navigate to the Setting Target tab. This how it should now:
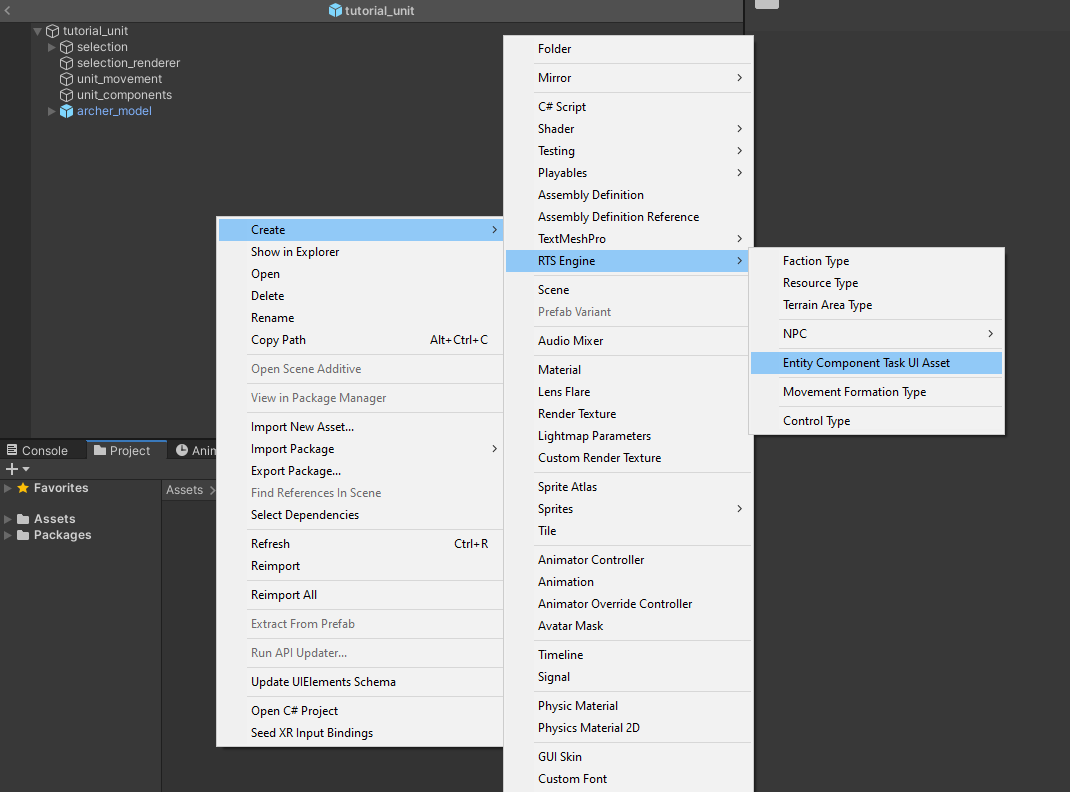
The field we want to assign is the Set Target Task UI one. To do that, we will first create an Entity Component Task UI asset for the Unit Movement component that would define data required to draw a movement a task in the tasks panel. Right click on the Project tab and Create -> RTS Engine -> Entity Component Task UI Asset and call it tutorial_movement_task.
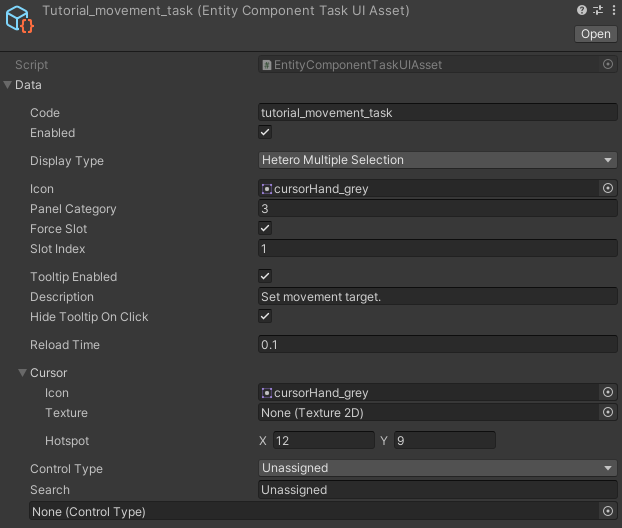
Select the tutorial_movement_task asset file and expand its inspector to set its fields:
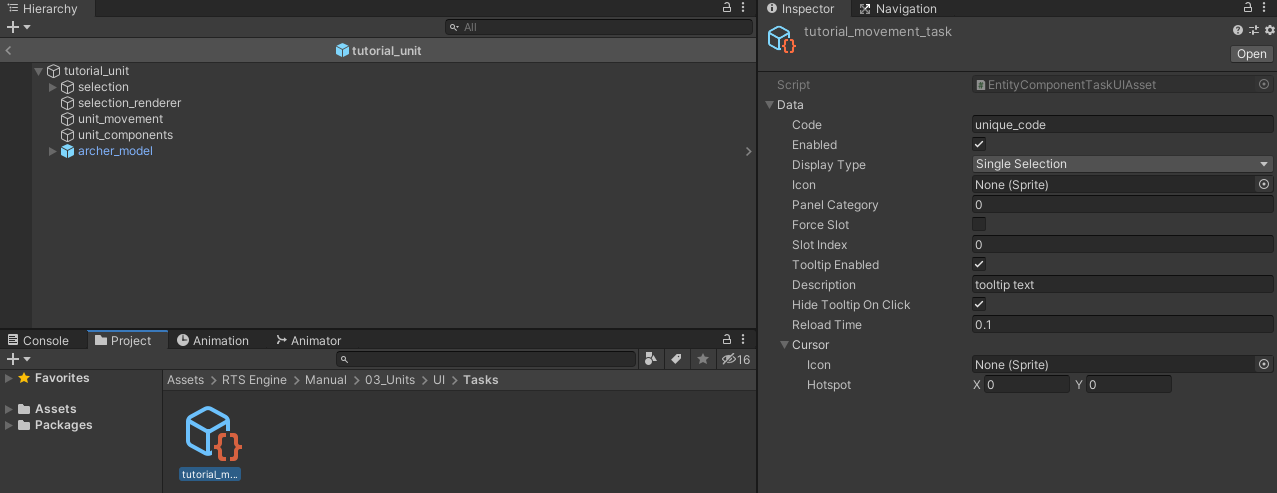
- Code: Set to a unique code that differentiates it from other task UI assets. This is important because if you have two different entity components attached to two different entities that use the same task UI asset (defined by its code) then only one task will appear in the tasks panel when both entities are selected and the task will launch both components. For example, different units can have different Unit Movement components attached to them but they can use the same task UI to launch a movement command on each individual Unit Movement component, when they are all selected.
- Enabled: Make sure this is enabled to allow the task to be drawn on the tasks panel.
- Display Type: Choose Hetero Multiple Selection. The Single Selection means that the task will be available only when the entity holding the component is selected with no other entities selected. Multiple Selection stands for allowing the task to appear when multiple entities, that have components using the same task, are selected. While Homo stands for a requirement of all entities being the same type, Hetero allows the task to appear even if entities that use the same task are of different types. We want the movement task to appear when multiple entities of different types are selected and therefore we pick the Hetero Multiple Selection option.
- Icon: Assign a Sprite that will be drawn on the task in the task panel. From the Demo files, we will go for cursorHand_grey (you can search for it in the Project tab).
Panel Category: In the first part, we went through task panel categories. We kept the default four task panel categories that came with the tutorial_map which we will be using. For the movement task, we can pick category of ID 3 which refers to the misc task panel category we have in the map scene.
Force Slot/Slot Index: These two fields allow you to pre-define where the task will be always drawn in the task panel. In the tutorial_map scene, we have six pre created task positions for the misc task panel category. We can enable the Force Slot field and assign Slot Index to 1 so that the movement task will always be drawn in the second position of the misc panel.
- Tooltip: The tooltip allows you to display an informative text regarding what the task does when the player hovers over an active task in the tasks panel. Enable Tooltip Enabled and fill in the task's Description. We also want Hide Tooltip On Click to be enabled so that the tooltip disappears when the player clicks on the task. For a task used to create units, we might want to keep the Hide Tooltip On Click disabled as we want to keep showing the task's description as long as the player's mouse is hovering the task in the panel. However, for the movement task, we might want to hide the tooltip as soon as the task is clicked by the player to provide a sense of activation for the task itself and allow the player to pick the movement's destination.
- Reload Time: This field is only relevant for tasks that require a time before they are completed. For example, tasks used to create units can have a timer that is started as soon as the player clicks on the task in the panel and when that timer is through, the task is marked as completed and the unit is then created. In the case of a movement task, this field is ignored by the Unit Movement component and the player is allowed to pick the movement's destination as soon as they click on the task in the panel.
- Cursor: When the player clicks on the movement task, they are then allowed to pick a destination. When doing so, this field gives you the option to change the mouse cursor's icon in order to highlight to the player that they are currently picking a target related to the task. For this purpose, we can assign the cursor's Icon to the same icon assigned to the task itself, which is the cursorHand_grey sprite. In case the hotspot of the cursor's icon is not centered then you can manually input it in the Hotspot field. In our case, the hotspot should be of value (12, 9) which fits the tip of the icon that we assigned.
- Control Type: Assign a Control Type to this task UI asset so that the local player can use the key assigned in the control type to enable the task.
This is how the inspector of the tutorial_movement_task UI task asset should look like after the modifications above.
Now, drag and drop the tutorial_movement_task asset into the Set Target Task UI field in the Setting Target tab of the Unit Movement component.
4. Testing the Movement Task
Now that the movement task is created and assigned. Start the game and select the tutorial_unit instances in the maps.
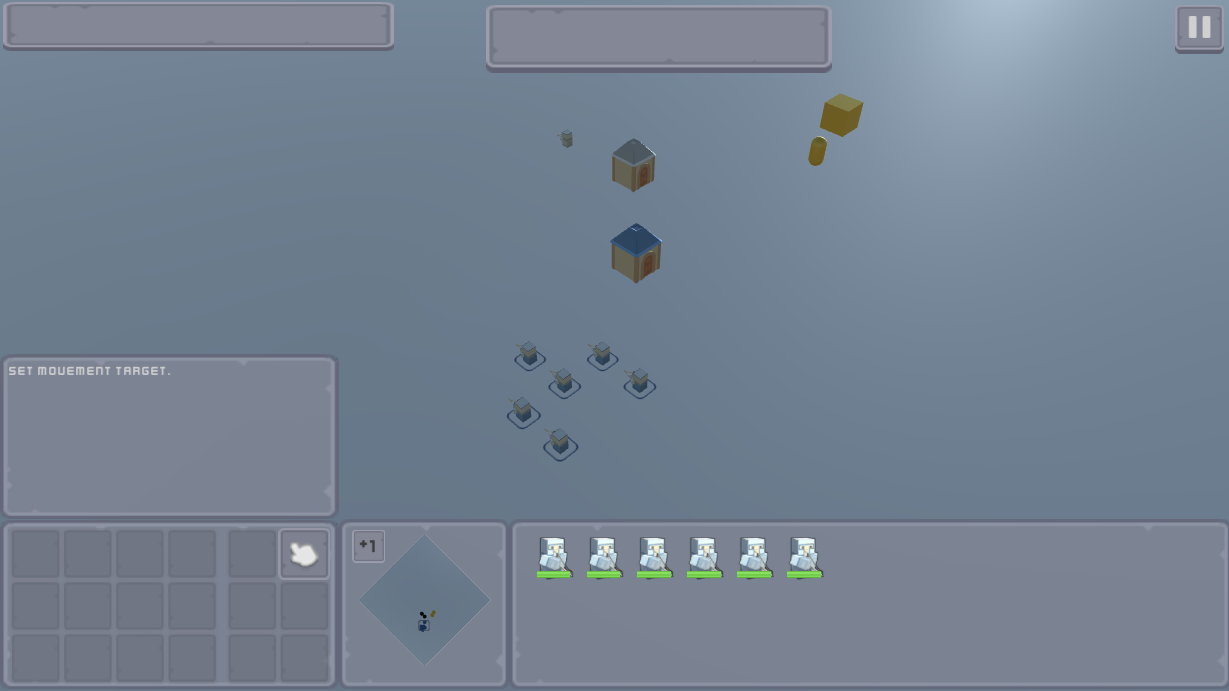
You can see that the movement task is now visible in the task panel category we assigned and that when hovering with the mouse over it, the tooltip is enabled with the task's description that we wrote for the tutorial_movement_task.
Now click on that task and the mouse cursor should change to the task's icon then you can right-click on a free position in the map and the units will pick that as their movement path destination and will start moving there!
Download Files
You can download the results of this tutorial here.