Setup Unit Movement
1. Unit Movement
In this tutorial, we will be using the tutorial_unit unit prefab created in the previous Create New Unit section. Open the unit prefab and navigate to the unit_movement child object.
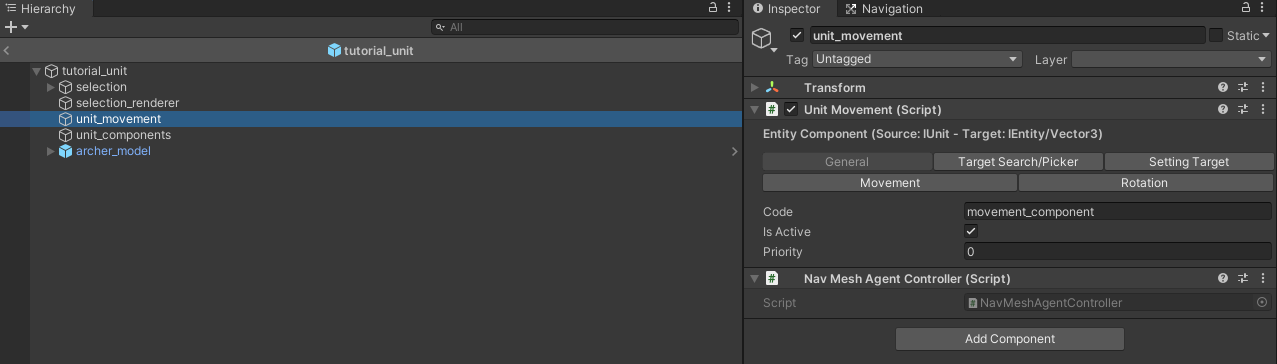
The Unit Movement component is the main component handling the movement of the unit.
In the beginning of this component's inspector, you can see:
Entity Component (Source: IUnit - Target: IEntity/Vector3)
This means that this component is attachable to entities of type IUnit (which refers to the interface used by unit entities) and that it can have IEntity (interface used on all entity types including units, buildings and resources) or Vector3 (position in the map) as its target. What this means is that the Unit Movement component allows a unit to move to a position in the map or to another entity. We will now go through its fields:
1.1 General Tab
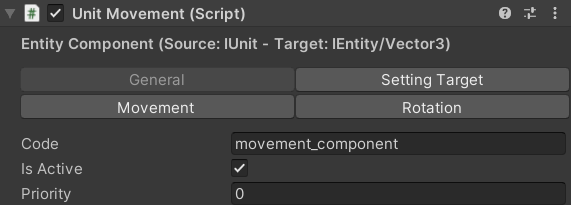
- Code: Provide a unique code that distinguishes this component from other entity components attached to the same unit.
- Is Active: Make sure this is active to enable the component.
- Priority: When an entity has multiple entity components that allow to have targets, the player can have the entity selected and then right-clicks on a target in the map to assign one of the components a target. This field defines the order in which the components will be considered to set the target. The component with the lowest priority value will be considered first and if it does not allow the target that the player sets, then the component with the next higher priority value will be considered next until one component accepts the target as valid. In our case, we only currently have the Unit Movement component as an entity component on the unit, therefore we can leave the priority set to 0.
1.2 Setting Target Tab
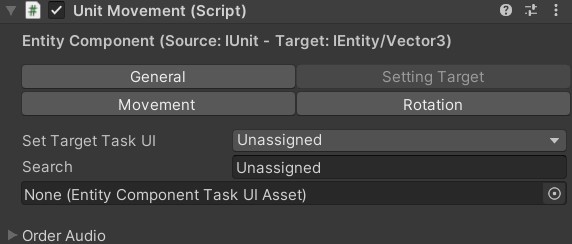
- Set Target Task UI: An entity component with an ability to set a target allows the player to set that target either by a right-mouse click on the target while the entity is selected or by a dedicated task that appears in the dedicated UI task panel when the entity is selected as well. For now we will leave this unassigned but we will come back to it in a later section of this tutorial.
- Order Audio: This field allows you to assign one or multiple audio clips where one is played when the player gives a movement command to the unit. If you have multiple audio clips to assign, then the Fetch Type field allows you to determine how the clip is chosen each time. The Cooldown field allows you to input a cooldown time for playing the audio clip. In case you do not want the movement audio order to be played each time when you are spamming a movement command to the unit, then a cooldown value of > 0 would allow for that.
1.3 Movement Tab
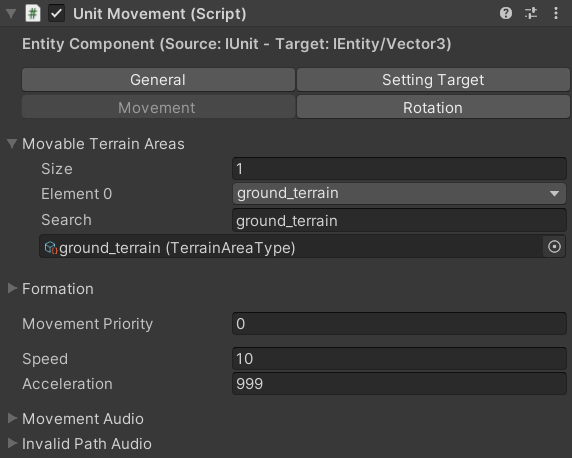
- Movable Terrain Areas: In the Setup Terrain tutorial, we went through creating terrain area types and the Terrain Manager component in the map scene. We created a ground_terrain area type as the only area type of the tutorial_map's terrain. In this field, we want to specify that this unit is allowed to move through that area type and therefore, we will search for the ground_terrain asset in the Project tab and assign it to this field (you can pick it from the dropdown menu in the field as well). You can also leave this field empty and that would mean that the unit will be able to move through any terrain area.
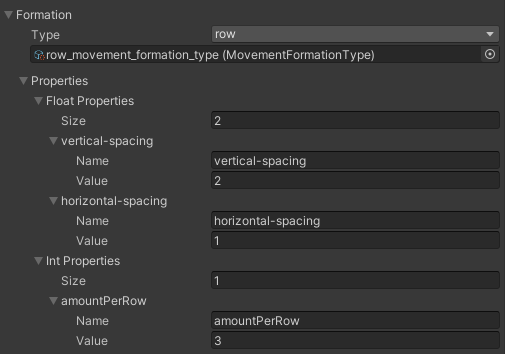
Formation: This field allows us to determine how target positions of multiple units of the same type will be generated when they are moved towards a destination in the map's terrain. There are two predefined formation types. You can also create your own custom formation type and write a script that allows us to generate the movement positions but we will not go through that in this tutorial. Instead we will go to the RTS Engine -> Core -> Movement -> Formations path within the Project tab and we will find two movement formation type assets: circular_movement_formation_type and row_movement_formation_type. The former will make units form a circle in the target destination while the latter will generate movement path destinations in a row form. For this tutorial_unit, we will go for the row formation. Therefore, drag and drop the row_movement_formation_type into the Formation Type field of the movement component (you can also pick it from the dropdown menu!). When the formation's Type is assigned, the Properties array field will display the properties/options of this formation that will be considered when generating the path destinations. By now, the Formation field should look like this:
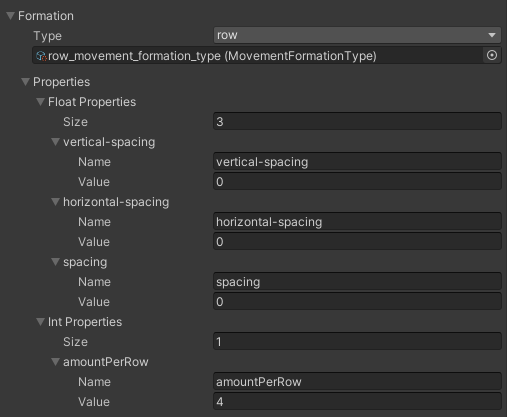
- Float Properties: These properties allow you to input float values. The vertical/horizontal-spacing properties define the vertical and horizontal spaces between the path destinations. If you are using the same value for both, you can just remove them and only keep the spacing property with that value. We will however have two different values for those two properties so go ahead and remove the spacing property. We will assign the vertical-spacing field to 2 and the horizontal-spacing property to 1.
- Int Properties: These properties allow you to input integer values. There is only one property here and it is the amountPerRow property. It defines the amount of path destinations to generate for each row. Set this to 3 for example.
The Formation field should look like this after our modifications:
Movement Priority: The lower the value this is, the more units of this type will be prioritized when generating the path destinations. When having two unit types that can move where the 1st type has a Movement Priority of 0 and the 2nd one has a Movement Priority of 1 and a mixed group of units of both types is commanded to move towards a position, then the units of the 1st type will be considered before those of the 2nd type when calculating the movement path destinations. In the case of using the same formation, say row formation for example, this means that the units of the 1st type will be in the front rows while units of the 2nd type will be in the back rows.
- Speed: Default movement speed of the unit. Set to 10 for example.
- Acceleration: Default acceleration of the unit's movement. In the the tutorial_unit's case, we do not want any latency between the player's movement command and the actual movement start, so we set this field to a high value like 999.
- Movement Audio: An audio looped as long as the unit is moving.
Invalid Path Audio: An audio played when the unit is commanded to move to a destination it can not move to. For example, when the destination lies in a terrain area not defined for the unit's movement or when no valid path can be established.
The Movement tab should look like this now:
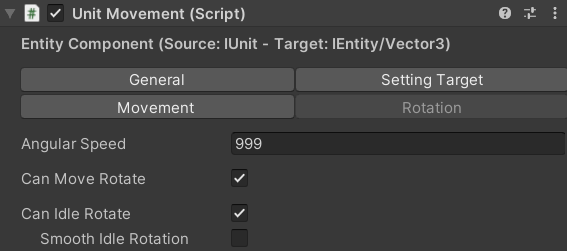
1.4 Rotation Tab
Enable Can Move Rotate to allow the unit to rotate while moving and set the movement rotation in the Angular Speed to a high value like 999 so that the unit rotates instantly without any latency. Additionally, enable the Can Idle Rotate and disable Smooth Idle Rotation so that the unit is able to rotate while it is moving and the rotation is instant. You can also enable Smooth Idle Rotation to allow the unit to smoothly rotate when it is moving and in that case, pick the speed of that rotation's in the Idle Angular Speed.
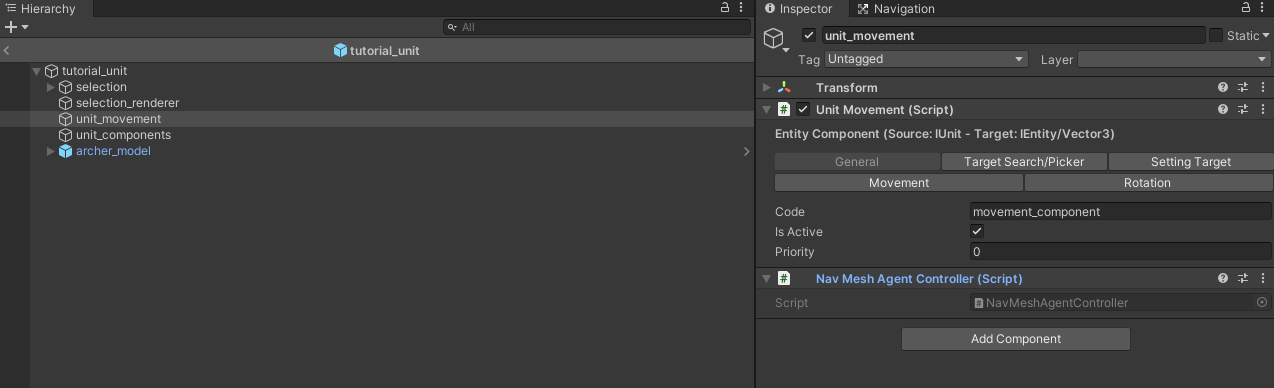
2. Nav Mesh Agent
The RTS Engine uses Unity's navigation mesh by default to handle pathfinding. In order to hook the Unit Movement component to that pathfinding system, you need to have the Nav Mesh Agent Controller component (which has no fields) attached to the same object, which is the unit_movement child object in this case.
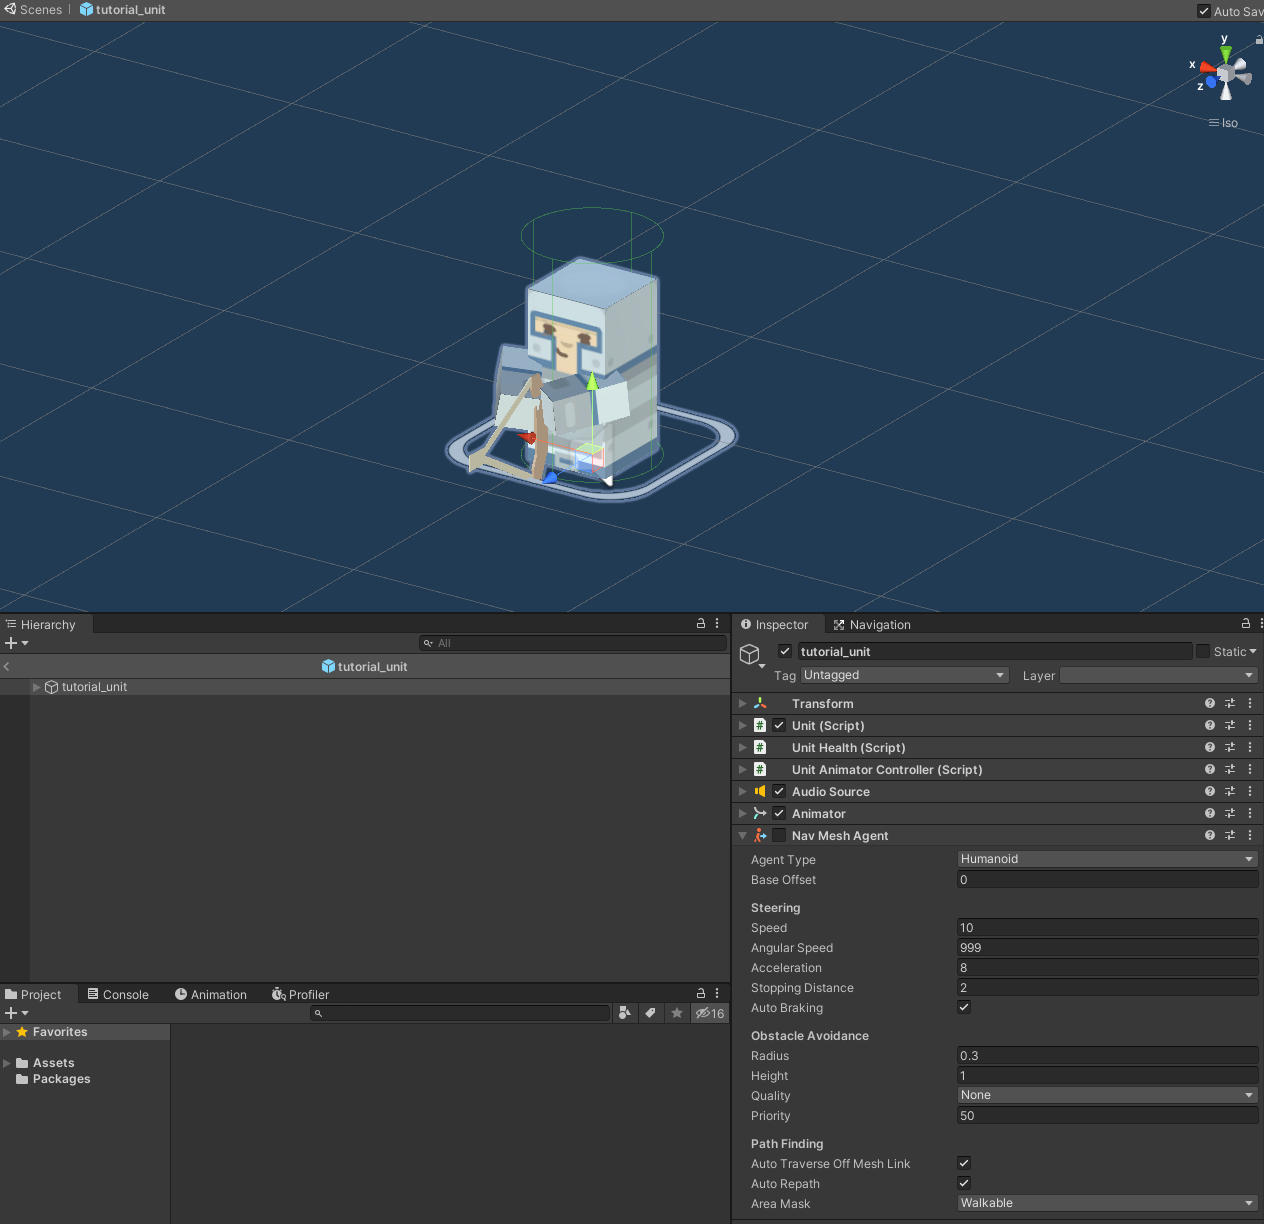
Now back to the tutorial_unit's prefab parent object: There should be a Nav Mesh Agent component which is the main component that Unity's navmesh uses to calculate paths and move the unit.
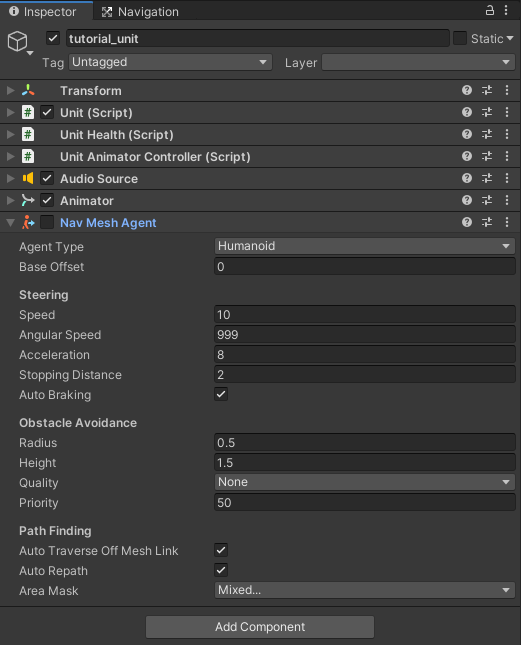
The Speed, Angular Speed and Acceleration fields will be overwritten by the values inputted in the Unit Movement component. The Stopping Distance field represents the distance at which the unit will stop before it reaches its exact destination and that will be overwritten by a value inputted in the Movement Manager component in the map scene (which we will get to next). Otherwise, here are the fields that you need to update in the Nav Mesh Agent component:
Obstacle Avoidance:
- Radius/Height: These two values determine the area that the unit will occupy within the navmesh. It is visualized by the semi-transparent green cylinder in the scene view. For example, for a Radius of 0.3 and a Height of 1, we will get this:
 The Radius field will then overwrite the Radius field of the Unit component on the same parent object of the unit prefab. In the previous tutorial, we mentioned that this field is unassignable directly in the Unit component.
 - Quality: At the moment, Unity's navmesh obstacle avoidance is not really ideal so having the Quality set to other than None will create issues with pathfinding especially when moving a large amount of units in close paths. This is subject to change in the future (please Unity). The RTS Engine supports other pathfinding systems (including the A* Pathfinding Project) which have better crowd control algorithms so check out the addons packages if you are interested!
- Priority: This only matters when the Quality is set to a value other than None, therefore this field is irrelevant.
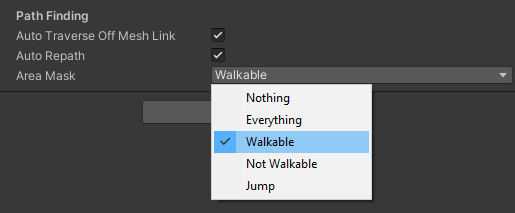
- Path Finding: Have Auto Traverse Off Mesh Link and Auto Repath enabled. And have the Area Mask field assigned to the navigation area assigned for the map's terrain. If you have been following the tutorials since the part where we setup the terrain in the tutorial_map scene then it should Walkable.
- Radius/Height: These two values determine the area that the unit will occupy within the navmesh. It is visualized by the semi-transparent green cylinder in the scene view. For example, for a Radius of 0.3 and a Height of 1, we will get this:
For more information regarding the fields of this component, check Unity's Nav Mesh Agent doc page.
3. Movement Manager
Now that the unit's movement is configured, go back to the tutorial_map scene in order to configure the movement related manager components before we actually add the unit to the map scene.
Navigate to GameManager -> Essential -> Movement. You should see four components attached to this object. We will now go through each one of them.
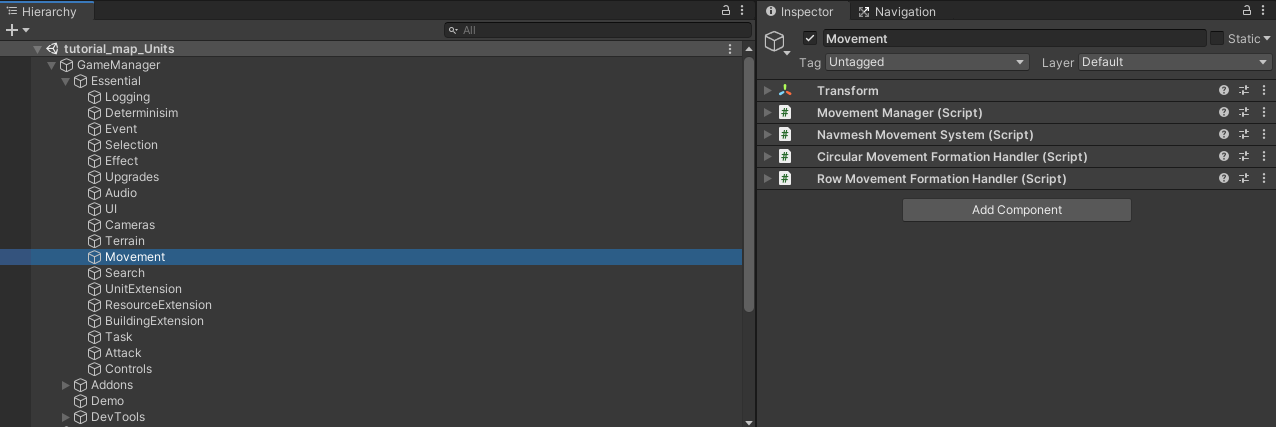
Movement Manager: The main manager component that handles unit movement.

- Stopping Distance: Determines the distance at which the unit stops before reaching its destination. Set to 0.2 for example.
- Movement Target Effect Prefab: An Effect Object prefab that appears to the local player when they command units to move within the terrain to mark the movement destinations. We have not gone through effect objects at this point so feel free to leave the default one (from the Demo files) assigned here or leave it unassigned.
Navmesh Movement System: In order to hook the Movement Manager component to Unity's navmesh system, this component is required to be attached within the same game object. It has no assignable fields.
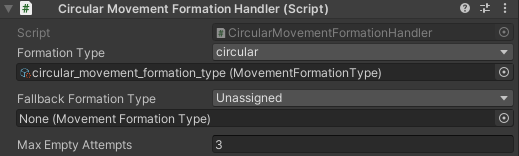
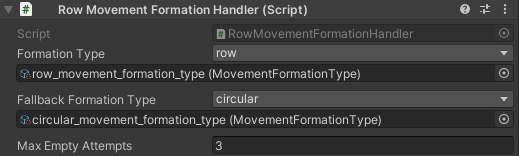
Movement Formation Handler: The other two components attached to the same object are the Circular Movement Formation Handler and Row Movement Formation Handler components. These two components handle generating path destinations for the default Circular and Row movement formation types discussed in the [Movement Tab](###1.4 Movement Tab) section above.
- Formation Type: We have the main formation type that the handler component is responsible for assigned to this field.
- Fallback Formation Type: When the handler component is unable to find suitable path destinations for a given formation after trying for Max Empty Attempts times (by default set to 3) and it has a formation type assigned to this field then it will call the handler of the fallback formation type to generate the path destination. For example, the circular formation handler does not have a fallback formation type but the row one has the circular formation handler as its fallback formation type.
When you create your own formation type, you need to create a component that handles generating path destinations for it but that is advanced and we will not be going through it in this tutorial.
In the next tutorial, we will be adding the tutorial_unit to the map scene.
Download Files
You can download the results of this tutorial here.