Building Placement Manager
Now that the tutorial_unit and tutorial_building are both configured to allow for building placement and construction. We finally have to configure the manager component responsible for building placement. This would be the Building Placement Manager component.
Load up the tutorial_building and you can find it attached under the path: GameManager -> Essential -> BuildingExtension.
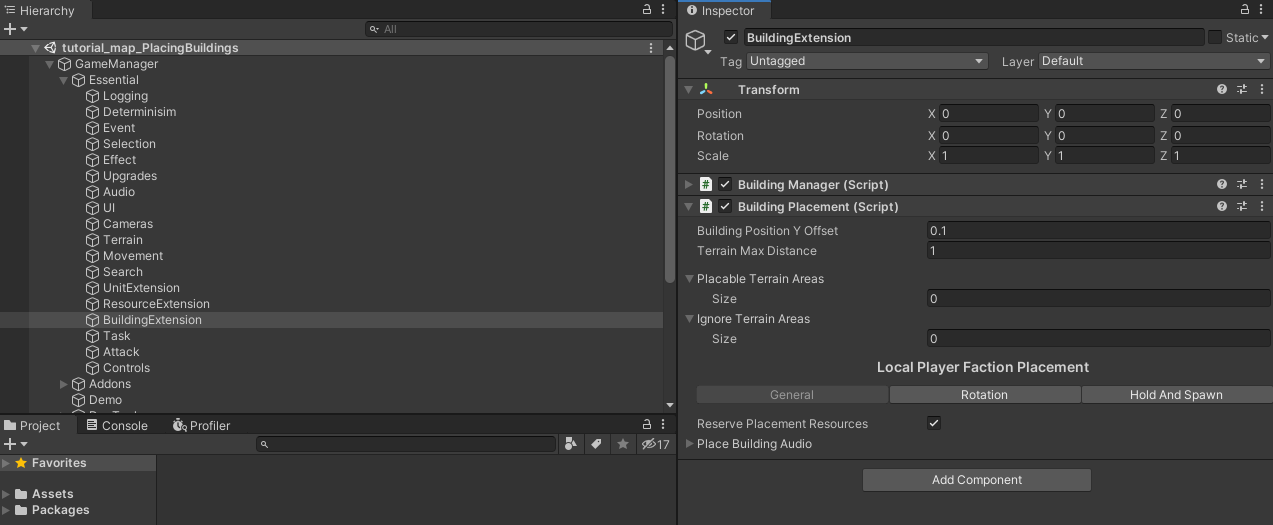
We will now configure the properties of this component to allow for building placement.
1. All Factions Building Placement
Properties at the top of the component inspector are ones that are valid for both the local player faction and NPC factions.
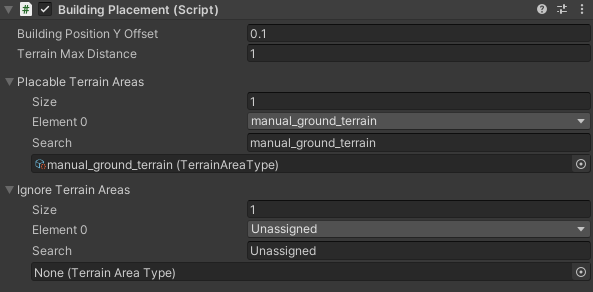
- Building Position Y Offset: This value will be added to the building's position on the Y axis when it is placed. For the tutorial_building, a value of 0.1 would allow it to have its selection renderer object slightly on top of the terrain.
- Terrain Max Distance: This defines the maximum distance allowed between the building to place and the terrain area it can be placed on. A value of 1 would suffice in this case.
- Placable Terrain Areas: When this array field is empty, you will not be able to place any building on the map. Populate this array with the Terrain Area Types on which the player is allowed to place buildings. In the case of the tutorial_scene, this would be the ground_terrain area type.
- Ignore Terrain Areas: Building placement instances will ignore collision with objects of layers assigned to the terrain areas in this array field.
2. Local Player Faction Building Placement
The following properties in the inspector are specific to the local player's faction building placement.
1. General Properties

- Reserve Placement Resources: Reserve resources that will be used to place the placement buildings so that the player faction does not consume them before the placement is completed.
- Place Building Audio: Audio clip to play when the player places a building.
2. Rotation Properties
When placing a building, you can rotate it to a different angle from the one assigned in its prefab. The following properties allow you to configure building rotation on placement:
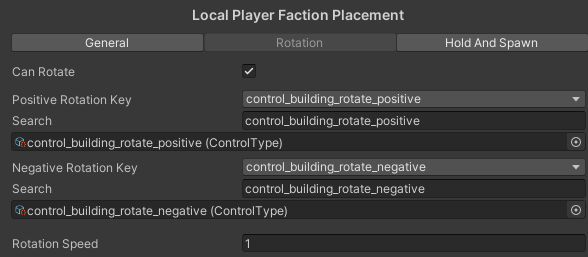
- Can Rotate: Enable to allow for rotating buildings while placing them.
Positive/Negative Rotation Key: These two fields allow to define the keys that the player can hold down in order to change the building's rotation in the positive and negative directions respectively while placing it.
The keys in the RTS Engine are defined using the Control Type scriptable objects. In order to create one, right click on the project tab then choose Create -> RTS Engine -> Control Type.
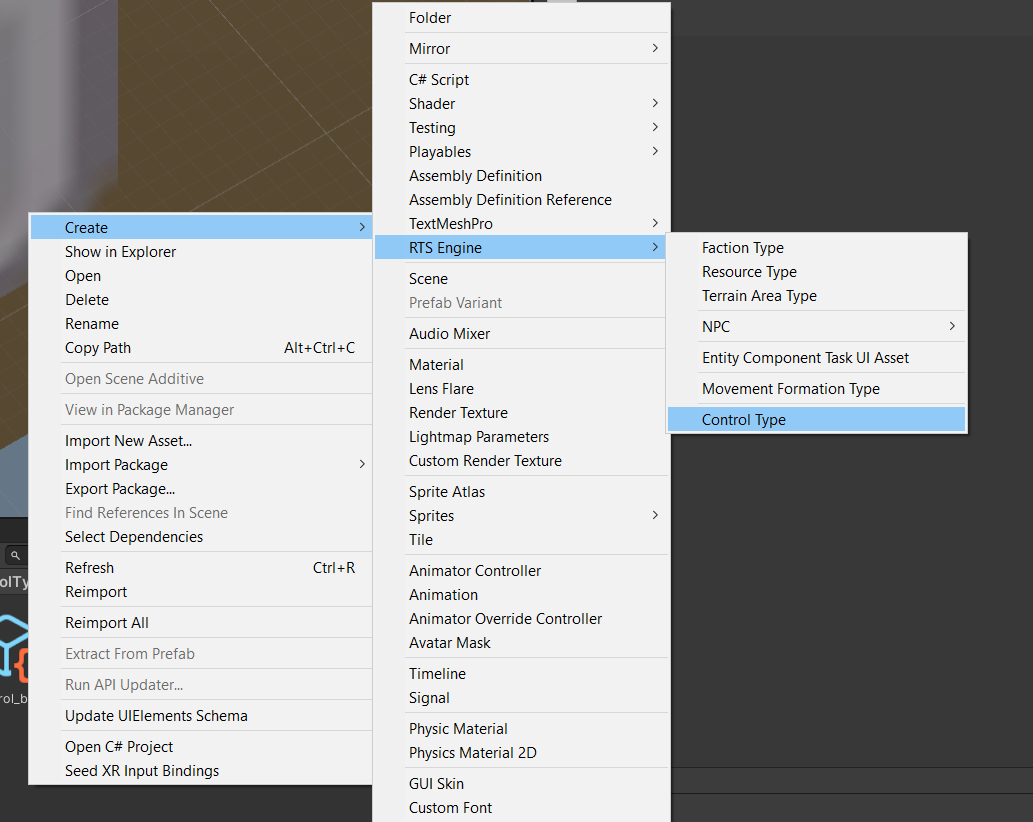
Then modify the control type by specifying the following:
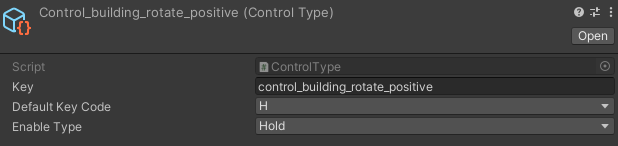
- Key: Unique code per control type.
- Default Key Code: The default key code assigned to the control type.
- Enable Type: If the key will be used for enabling a state then set the enable type to an option other than none, this way the controls manager will keep track of the enable state of the control type. We would use a Hold type of enabling for the rotation keys. The other option would be Toggle which activates or deactivates the key enabled state with a single press. By default the Positive/Negative Rotation Key fields are assigned with pre-created control types with H/G default key codes respectively.
- Rotation Speed: How fast does the building rotate when the player is holding down the positive or negative rotation keys?
3. Hold And Spawn Properties
When the player is placing a building, they can hold down a specific key to allow them to keep placing the same building type multiple times consecutively without having to click on the placement task every time, as long as the building's placement requirements are met for each new instance to place. This feature is called Hold And Spawn.
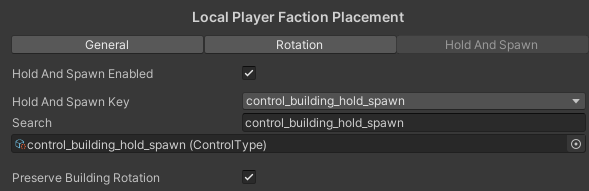
- Hold And Spawn Enabled: Have this feature enabled to allow for multiple consecutive building placement.
- Hold And Spawn Key: A Control Type that defines the key to hold down to enabling multiple consecutive placement of the same building type.
- Preserve Building Rotation: Enable to allow each new placement building instance to have the same rotation as the last placed instance in the same hold and spawn chain.
4. Testing
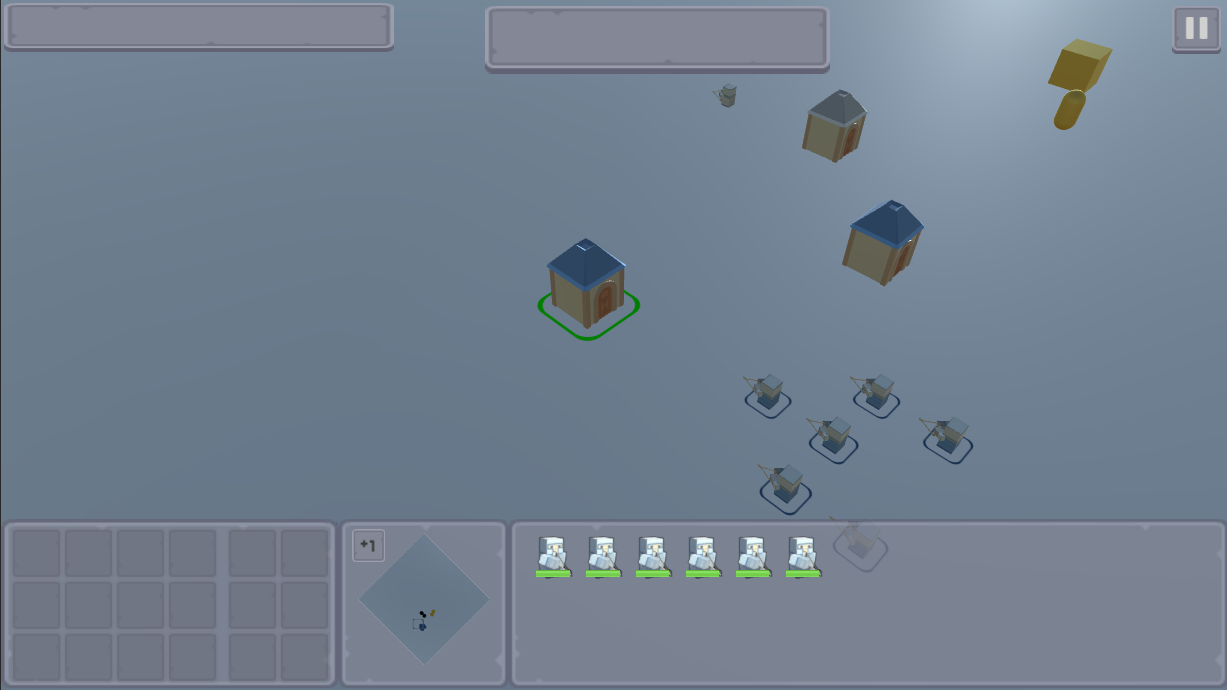
Start the tutorial_map scene and select the spawned tutorial_unit instances. In the task panel, you would see the tutorial_building placement task. Hover over it to see the tooltip description text.
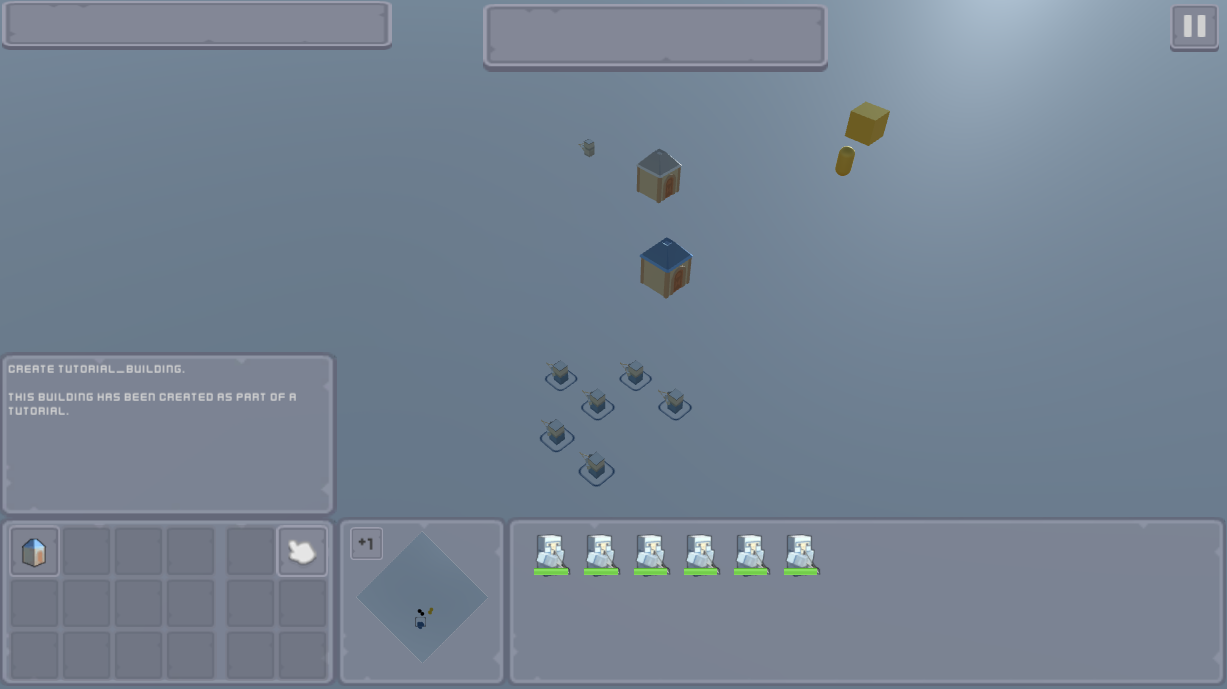
Now click on the task and a placement instance of the building would be visible. This placement instance follows your mouse movement and the selection renderer would be colored in green when the building can be placed in the position the mouse is at or red if it can not be placed in that position, which can be due to missing placement requirements, incompatible terrain area or just because it is colliding with an obstacle. An example of the latter would be when you want to place the building in the middle of the tutorial_unit instances.
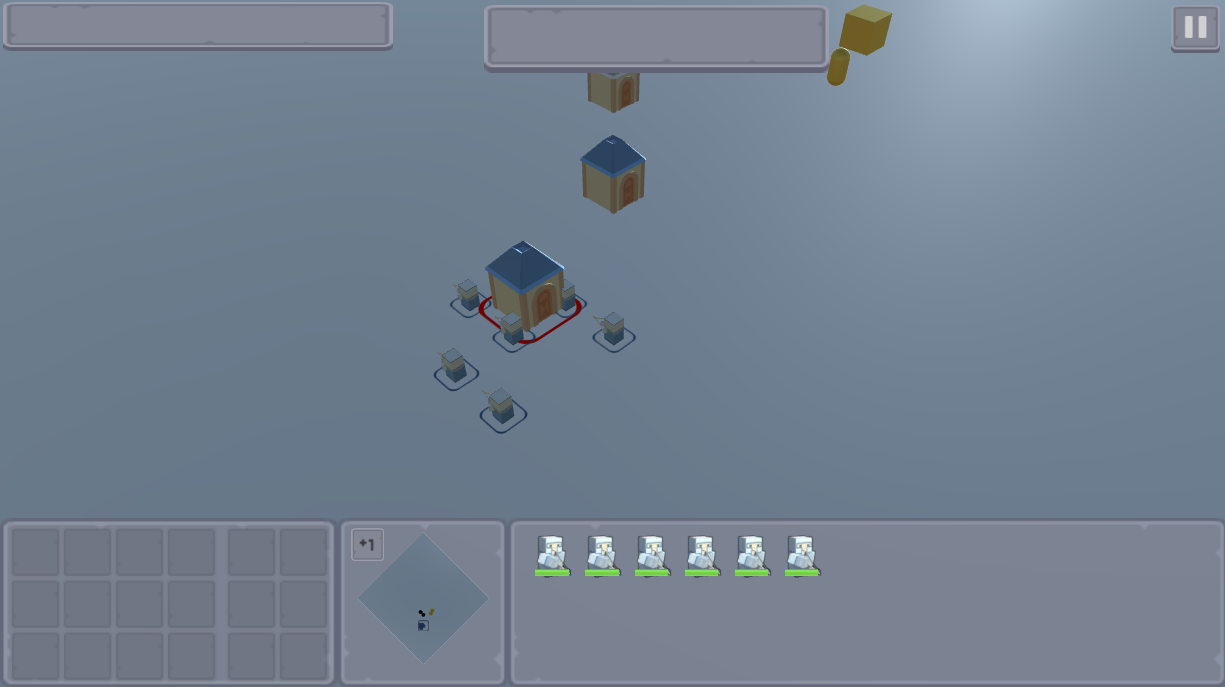
Now find a suitable position for the building to place and press on the left-mouse button to confirm its placement.
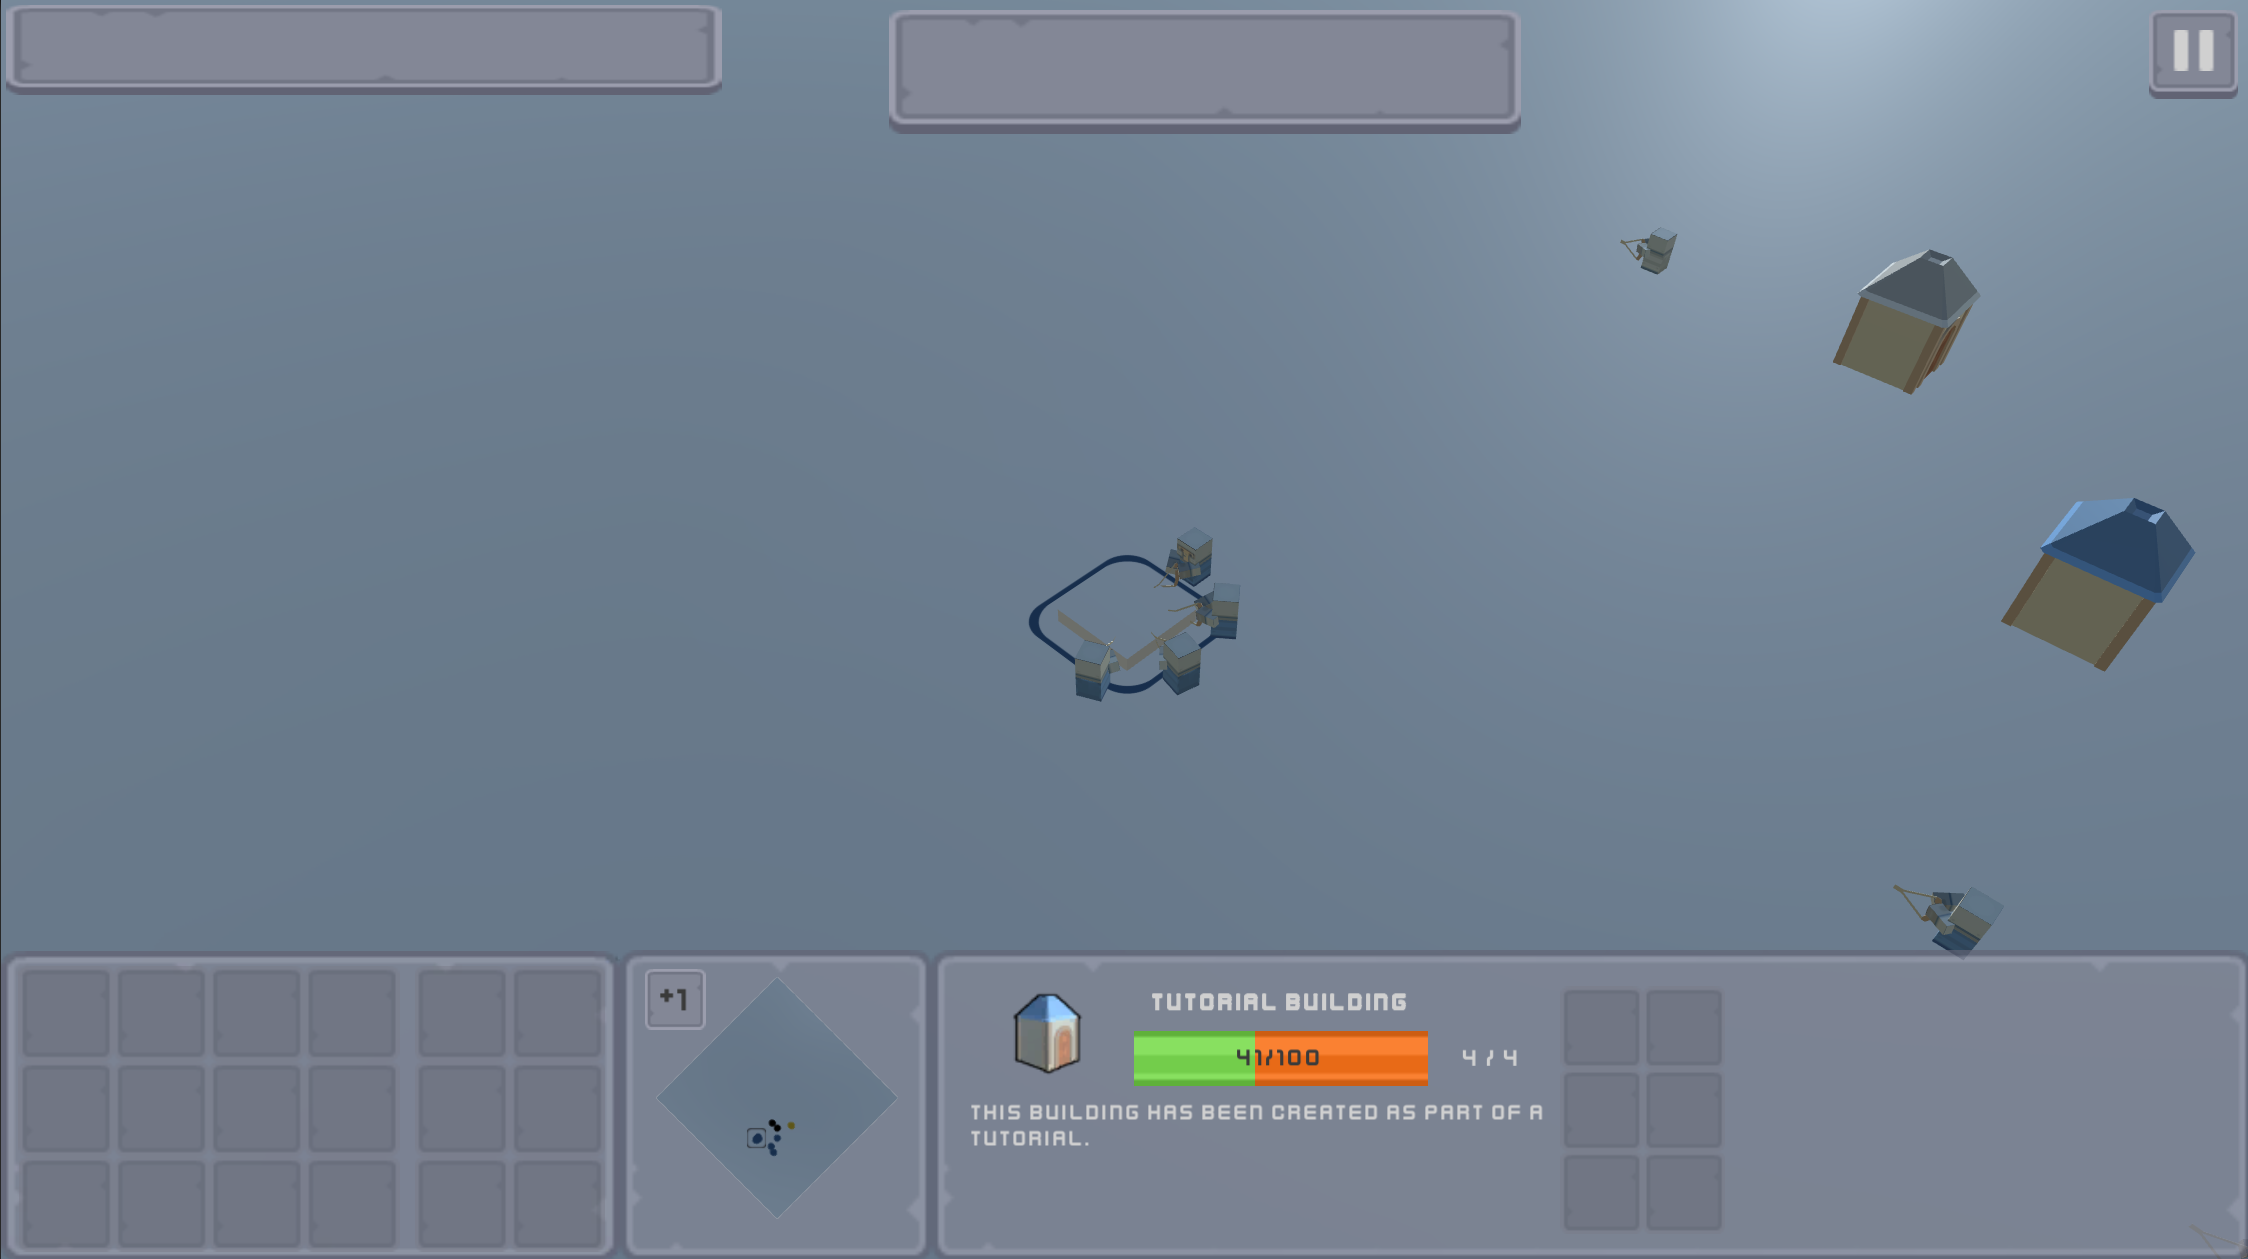
Once the building is placed, you will see its construction model and then only four of the selected units will move to construct it since we have set the building's maximum amount of workers to four. Once the units are within range of the building, they would start constructing it until it reaches maximum health and becomes fully functional.
Finally, you can hold down the Hold And Spawn key (Left Shift by default) and you'd be able to place multiple buildings as long as you are holding that key.
Download Files
You can download the results of this tutorial here.