Explore Advanced Attack Options
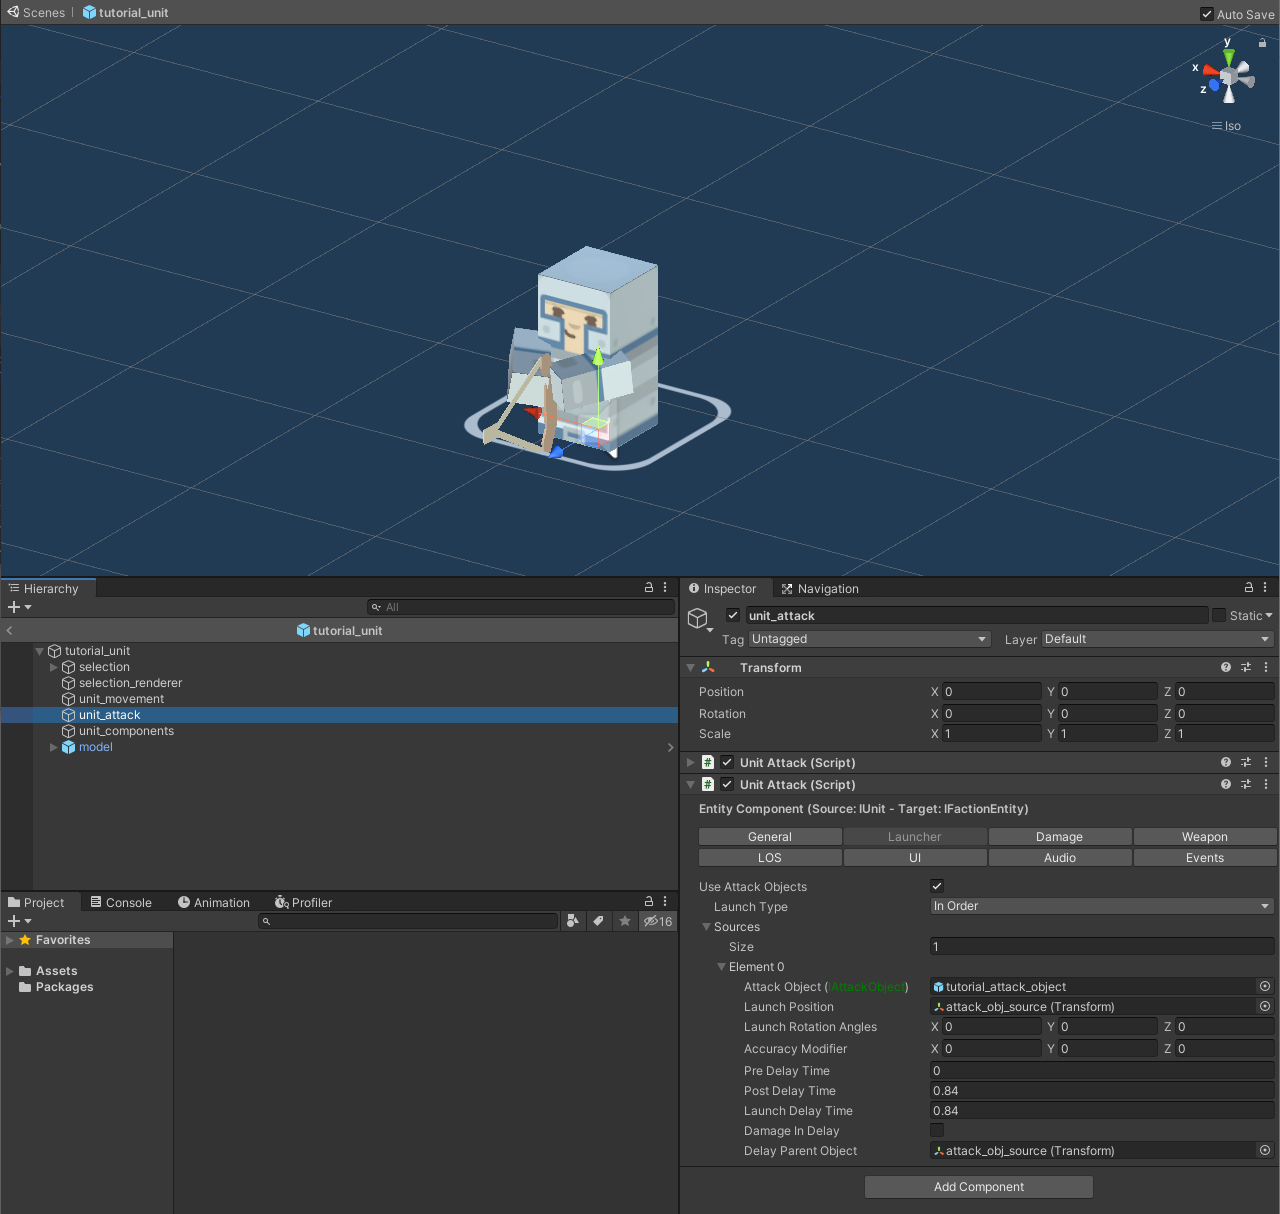
In the tutorial_unit prefab under the unit_attack child object and specifically the attack component that shoots off arrows from a long range (added in a previous part). In this section, we will explore options that the combat system can offer in the RTS Engine and we will implement examples of these options on the tutorial_unit. For each upcoming paragraph, revert back to the current state of the tutorial_unit attack components.
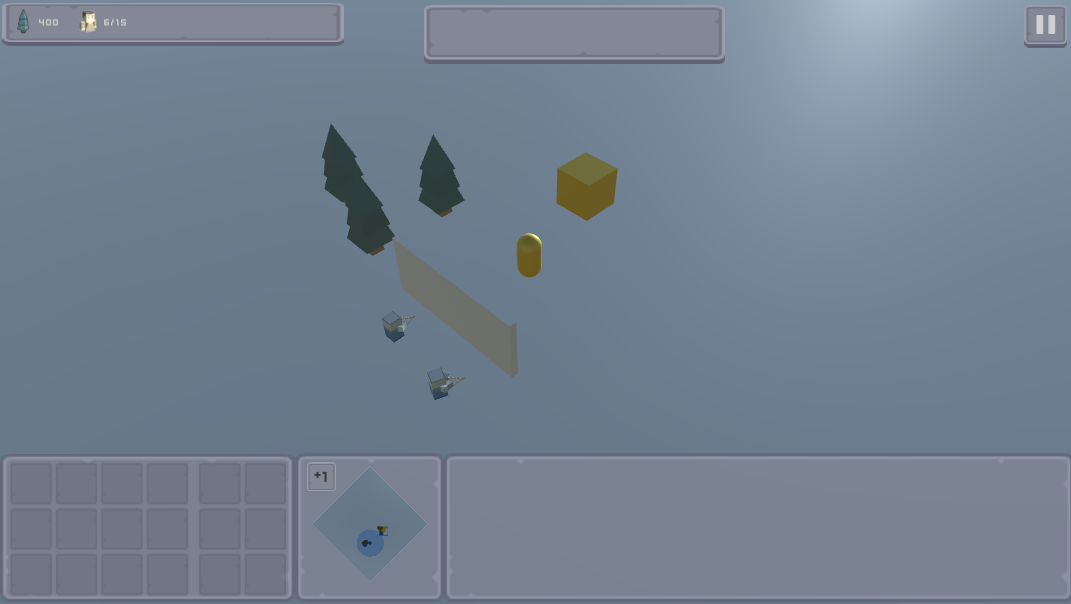
1. Area of Effect
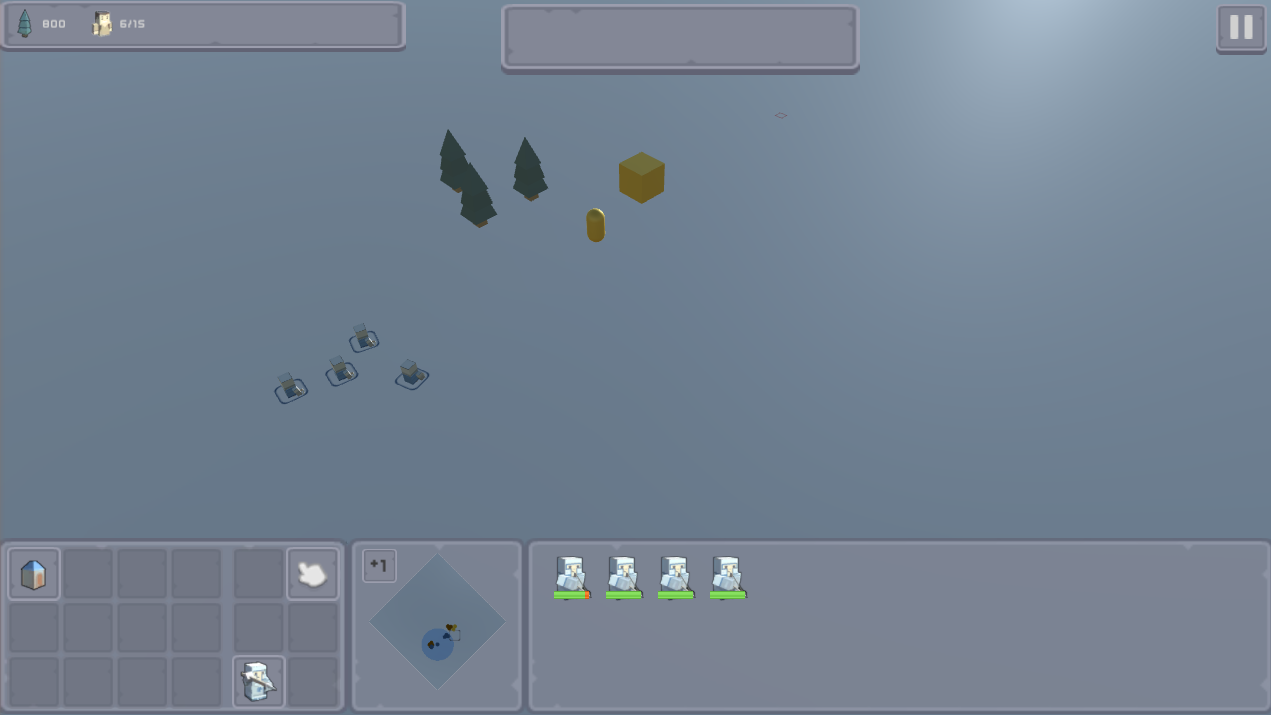
Open the Damage Tab of the attack component and enable the Area Attack Enabled field to allow for the attack to deal damage to faction entities within a certain range. This should make the Area Attack Data array field appear.

Add two elements to the Area Attack Data field. We define the elements with an increasing range size. The first element can have a range of 2 and a damage of 25 for both units and buildings. The second element can have a range of 5 and a damage of 10 points for both units and buildings. This means when enemy faction enemies are closer to position where the attack landed, the more damage they would receive.
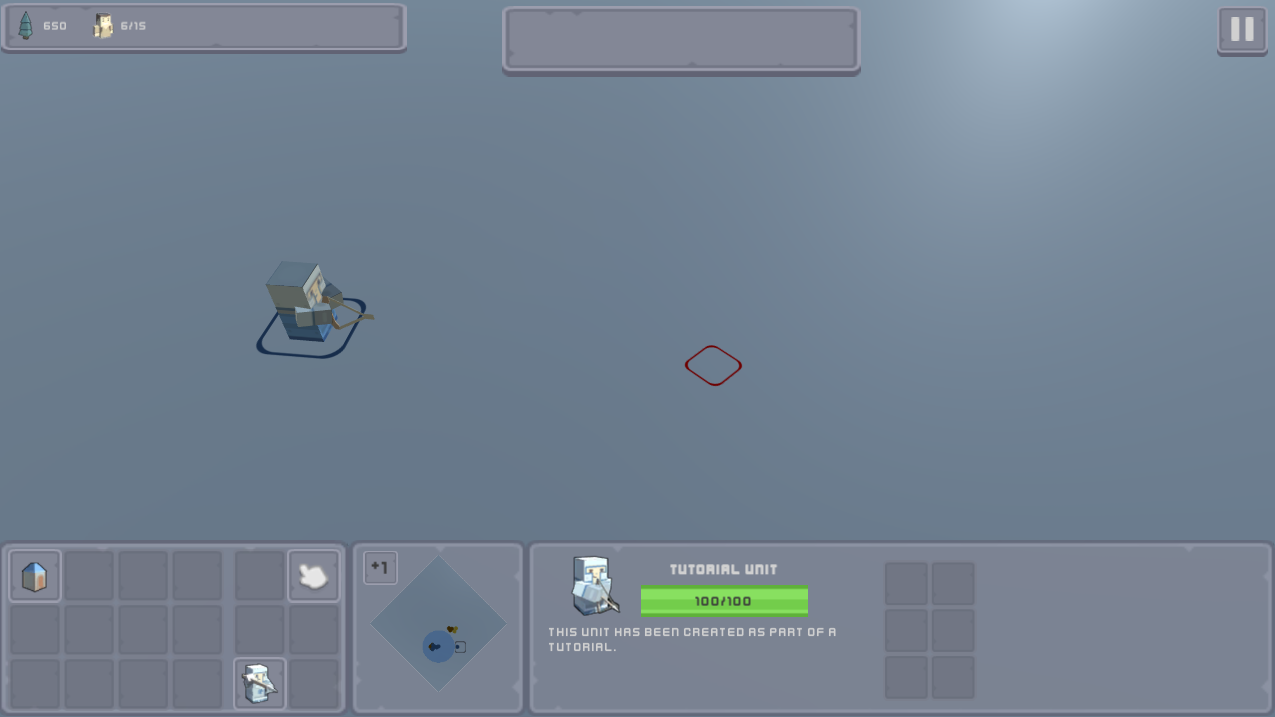
Now start the tutorial_map scene and test it out.
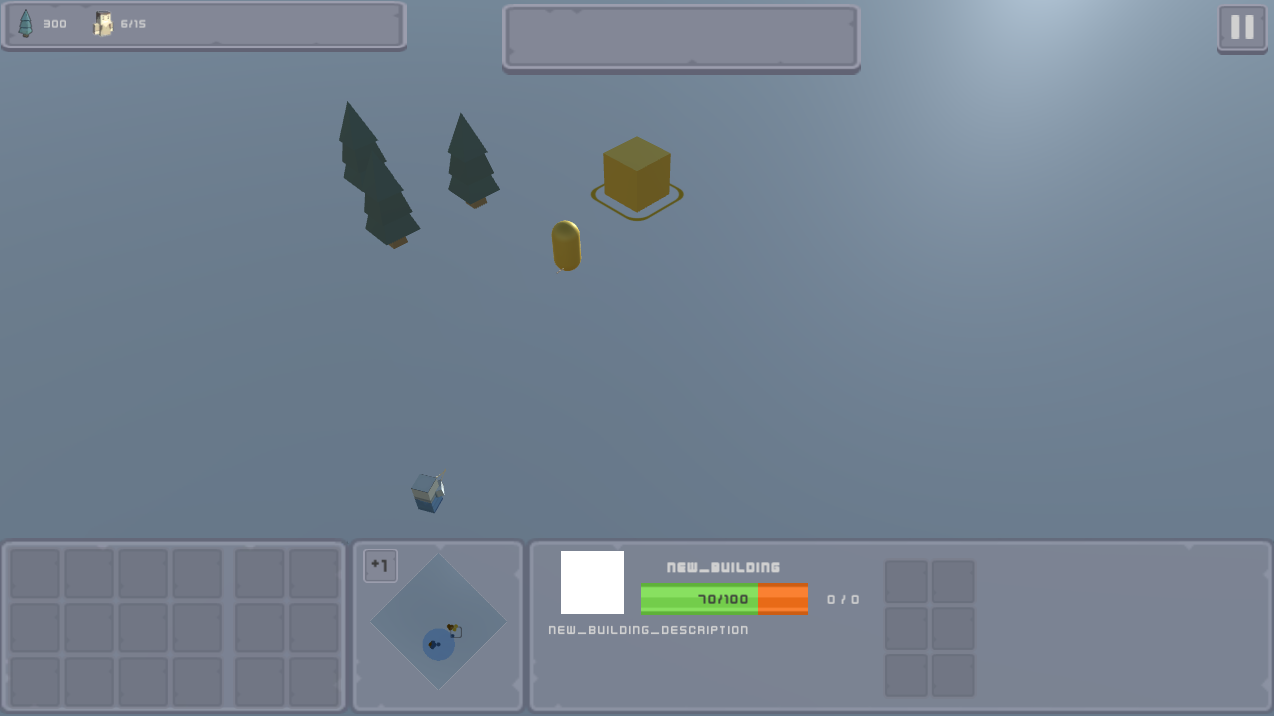
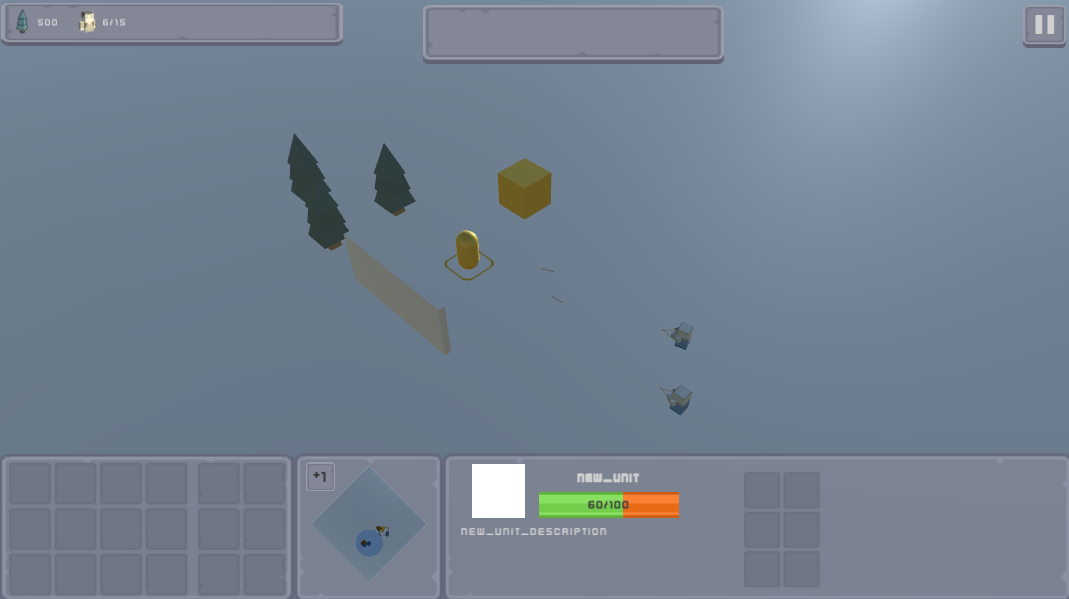
In the above setup, the tutorial_unit is engaging in combat with the enemy unit (yellow capsule) and whenever it deals 25 points of damage to it when the arrow reaches the unit. The enemy building (yellow cube) gets damaged as well but with lesser value of 10.
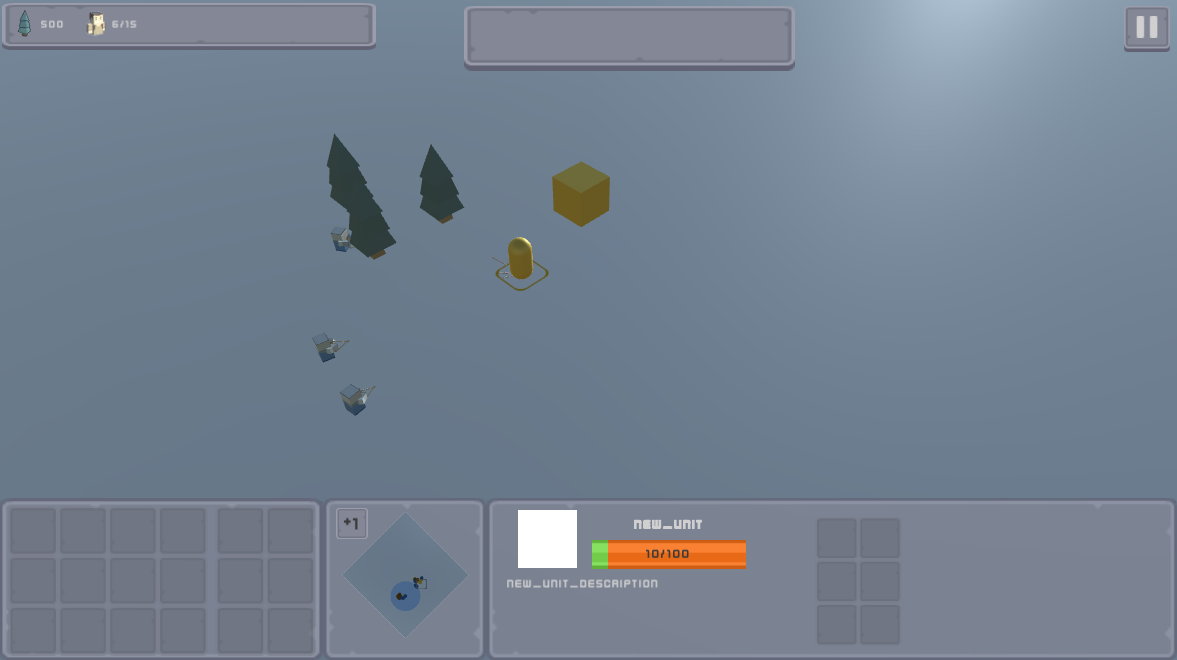
2. Damage over Time (DoT)
Open the Damage Tab of the attack component and enable the DoT Enabled field to allow for the attack to deal damage over time to the faction entities it deals damage to. This should make the DoT Data array field appear which defines the parameters for the DoT.
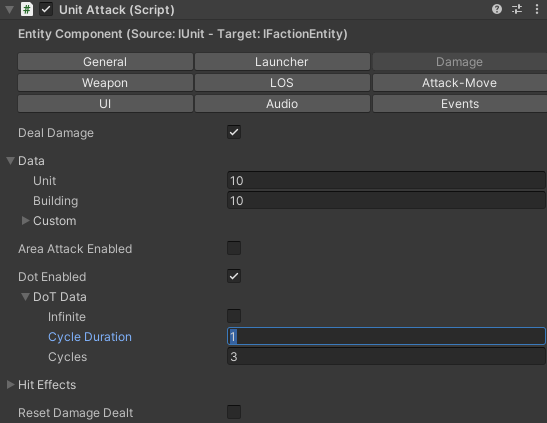
- Infinite: When enabled, the damage over time will not stop until the faction entity it is targeted at is dead. In our case, keep this disabled.
- Duration: When the DoT is finite, this field defines the total duration of the DoT. Pick a value such as 3 (seconds).
- Cycle Duration: This field defines how often damage is dealt to a faction entity during the duration of the DoT. Set this value to 1 (second). This means that there are three damage cycles for the DoT.
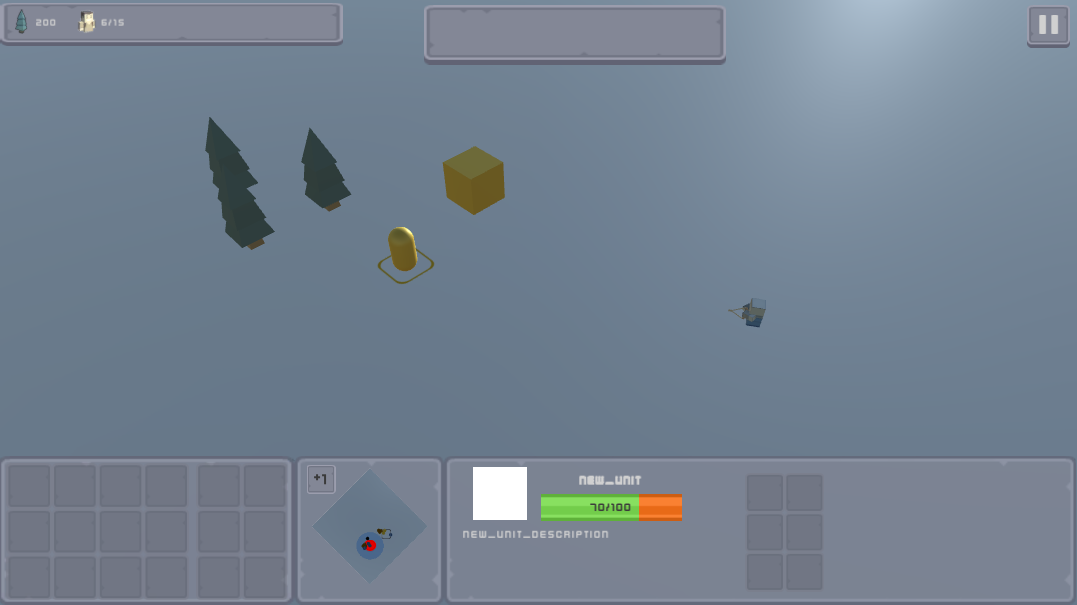
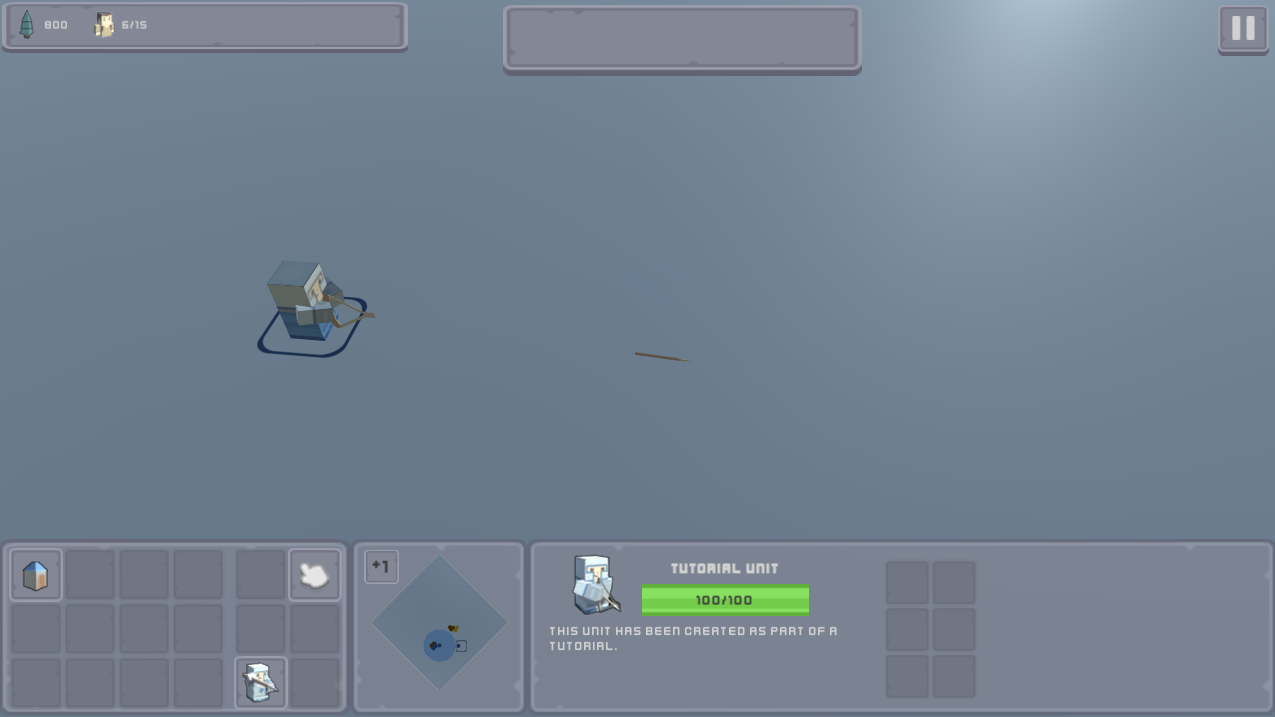
Now start the tutorial_map scene and select a tutorial_unit instance and command it to attack an enemy entity then as soon as the first arrow hits, move the unit away to stop attacking and then select the enemy entity and see its health still decreasing over time until the DoT stops after taking a total of 30 damage points.
3. LOS
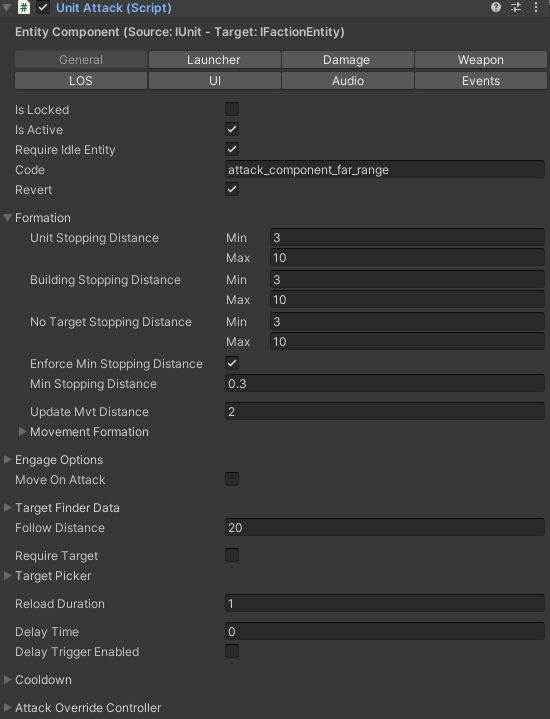
The LOS Tab allows you to force the attacker entity to rotate and be within a specific angle of its target in order to launch an attack iteration.
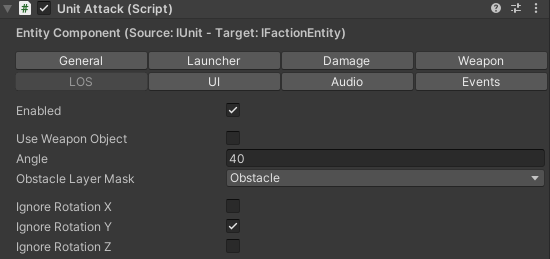
Enabled: Make sure this field is enabled.
Use Weapon Object: The attack component in the Weapon Tab allows for a child object of the attacker entity to be assigned as a Weapon Object which would then be allowed to rotate independently of the attacker entity to face target entities. When that is the case, you can enable this option to take into account the weapon object used in the attack component when calculating whether the attacker is in line of sight of a target to launch an attack iteration. In this case, we do not have a weapon object assigned, therefore we leave this field disabled.
Angle: How wide is the line of sight angle (in degrees) of the attacker? the smaller, the closer the attacker must face its target to engage it.
Obstacle: Define layers for obstacles that block the line of sight. For example, you can use the default Obstacle layer which we will use in testing later.
Ignore Rotation X/Y/Z: Freeze calculating rotation in the look at vector on the X/Y/Z axis? We want to fix the rotation on the Y axis to suit the model used from the demo files.
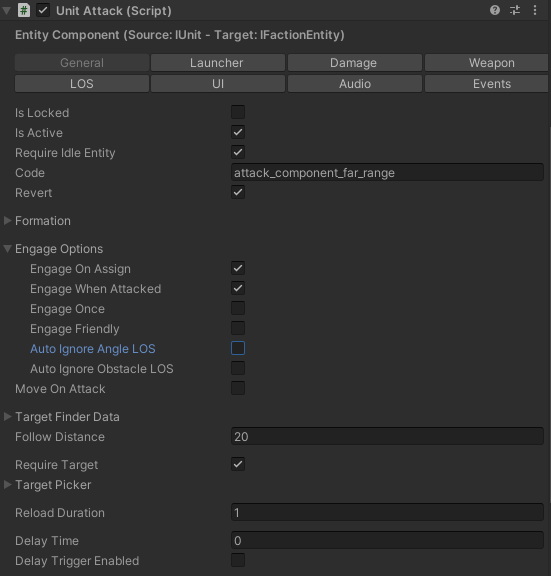
In the General Tab of the attack component, go ahead and disable the Auto Ignore Angle LOS option in the Engage Options field. This means that the attacker unit will not auto-engage with the target unit unless it is within it sees it within an angle of 40 degrees as we setup the LOS configurations earlier. Also notice that Auto Ignore Obstacle LOS is disabled. That option means that if there is an obstacle between the target and the attacker which blocks the LOS of the attacker then it will not auto-engage in attacking the target entity. Additionally, make sure the Target Finder Data is enabled.
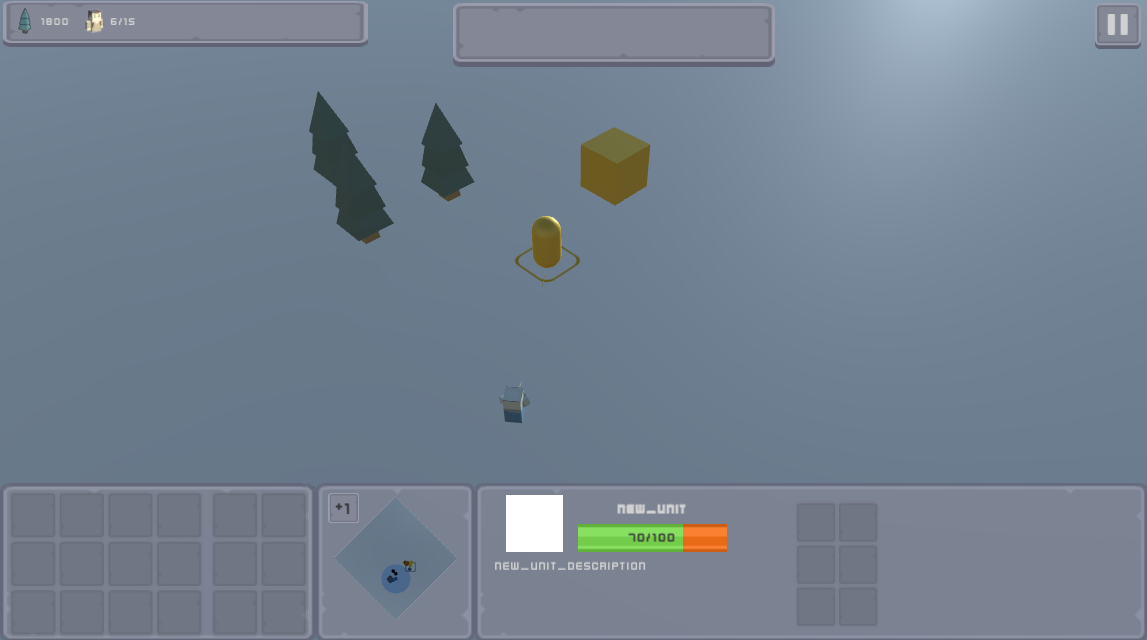
Play the scene and move the tutorial_unit instance to an enemy faction entity and make it face the other of it just like the screenshot below and you'd notice that the attacker unit does not engage in an attacking the entity even though it is within its range but only because it is not within its LOS.

Now turn the unit around and make it face the enemy faction entity without actually commanding it to attack and allowing the auto-target engagement to spot it and attack it.
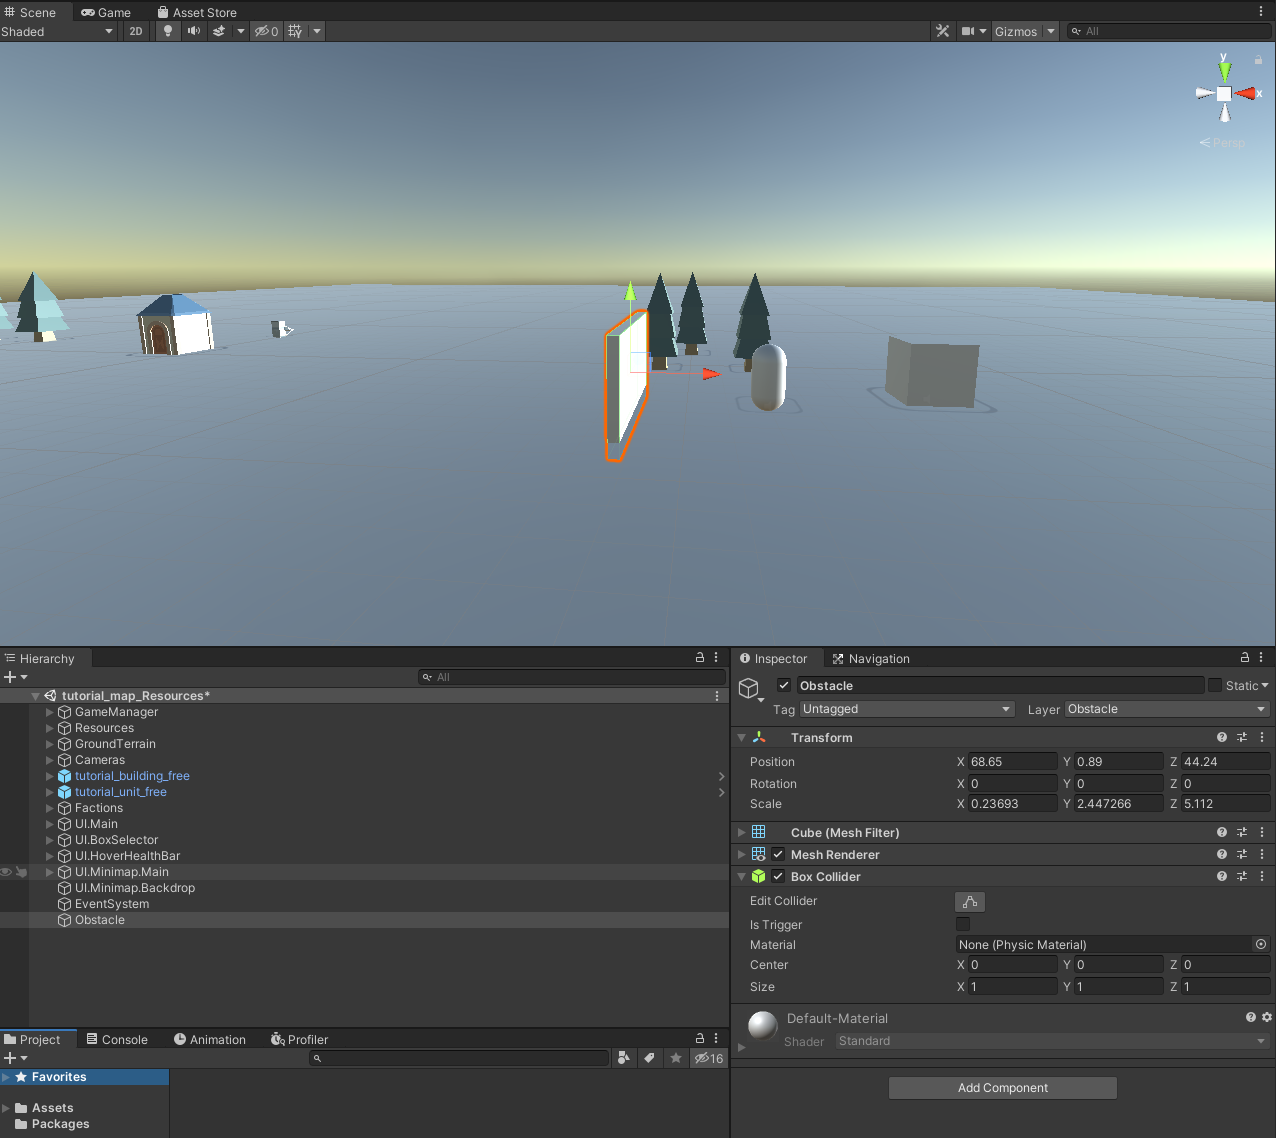
Next create a Cube object in the scene and set it up like the screenshot below so that it acts as an obstacle that protects an enemy faction entity. Make sure it has a collider component and that its layer is assigned to Obstacle which is the layer we defined in the LOS obstacles layer mask in the attack component.
Launch the scene again and move tutorial_unit instances towards the enemy faction entity but keep them behind the obstacle object and you'd notice that they can not auto-engage.
Now move the attacker units around the obstacle putting the enemy entity into their LOS with no obstacle obstruction and allow the auto-engagement mechanic to start attacking it.
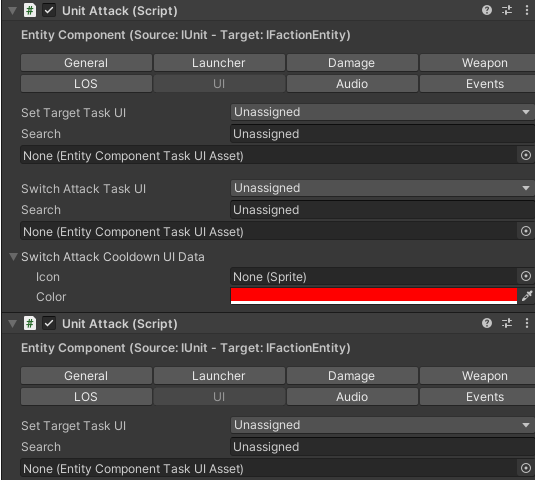
4. Switching Attack Type
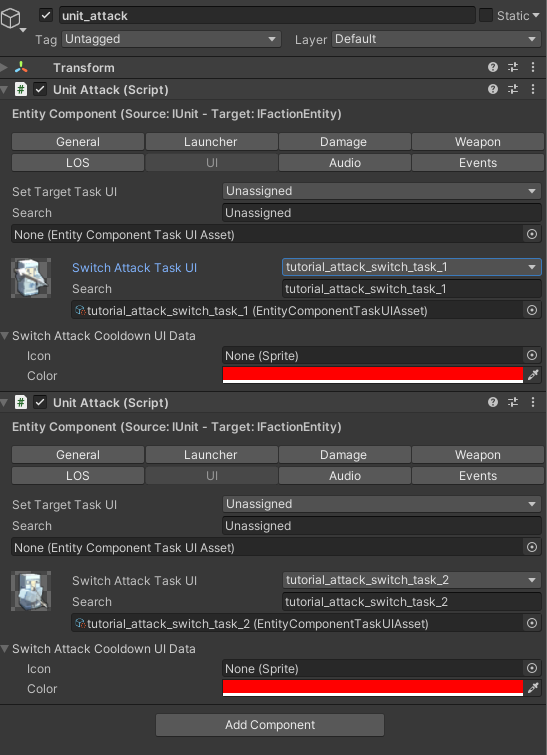
For both attack components attached to the tutorial_unit prefab. Open the UI tab where you can find the Switch Attack Task UI task field.
We will be creating two new Entity Component Task UI Assets by right-clicking in the project tab and navigating to Create -> RTS Engine -> Entity Component Task UI Asset to create the first one. Handling component task UI assets and everything related to setting up tasks in a scene was covered in a previous section so we will not be covering it in details here.
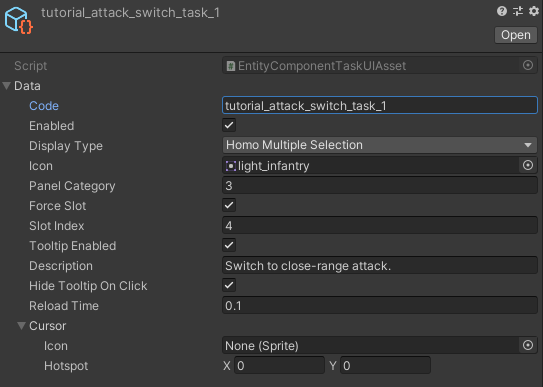
For the first entity component task UI, set the following properties as the screenshot below:
And for the second one, set the properties as the next screenshot:
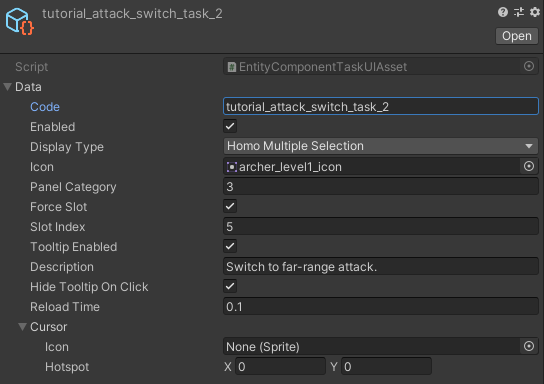
The two UI task assets we created have the codes tutorial_attack_switch_task_1 and tutorial_attack_switch_task_2.
Back in the tutorial_unit attack components inspector view, assign the two UI task assets, one for each of the Unit Attack Switch Attack Task UI fields in the UI Tab.
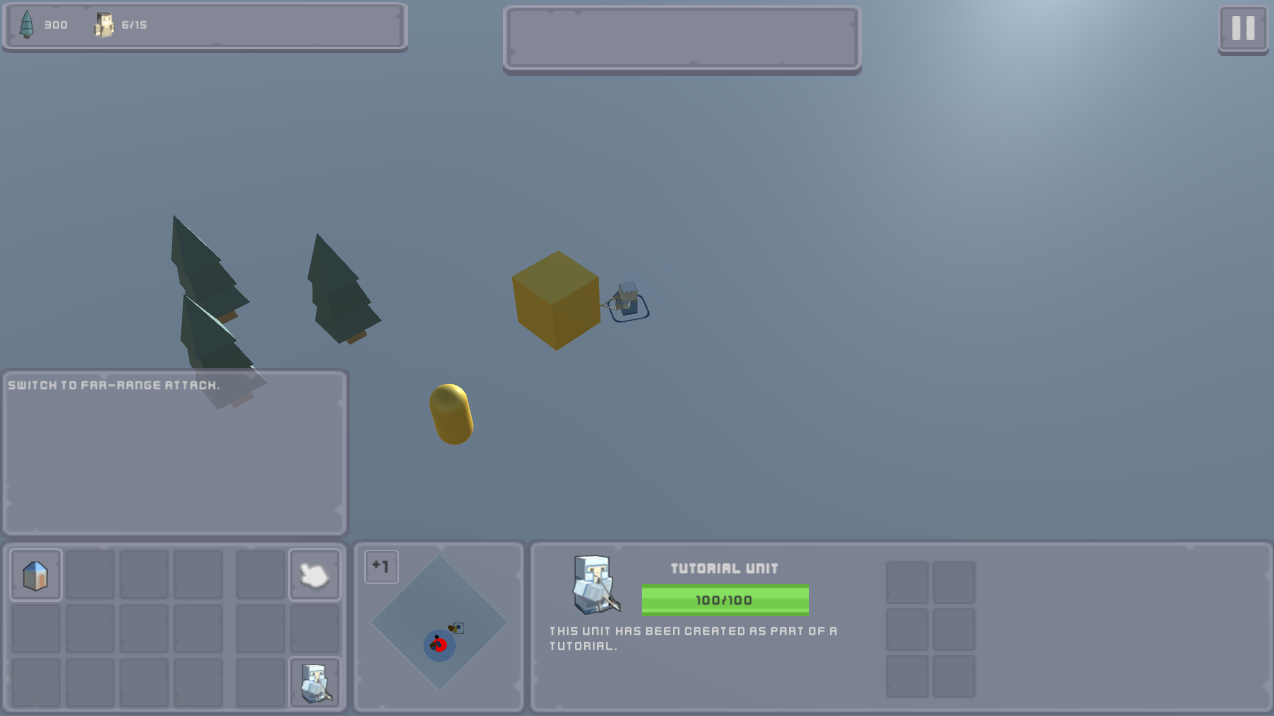
Now start the tutorial_map scene. Select a tutorial_unit instance and make it attack a target faction entity then switch the attack type while it is attacking it.
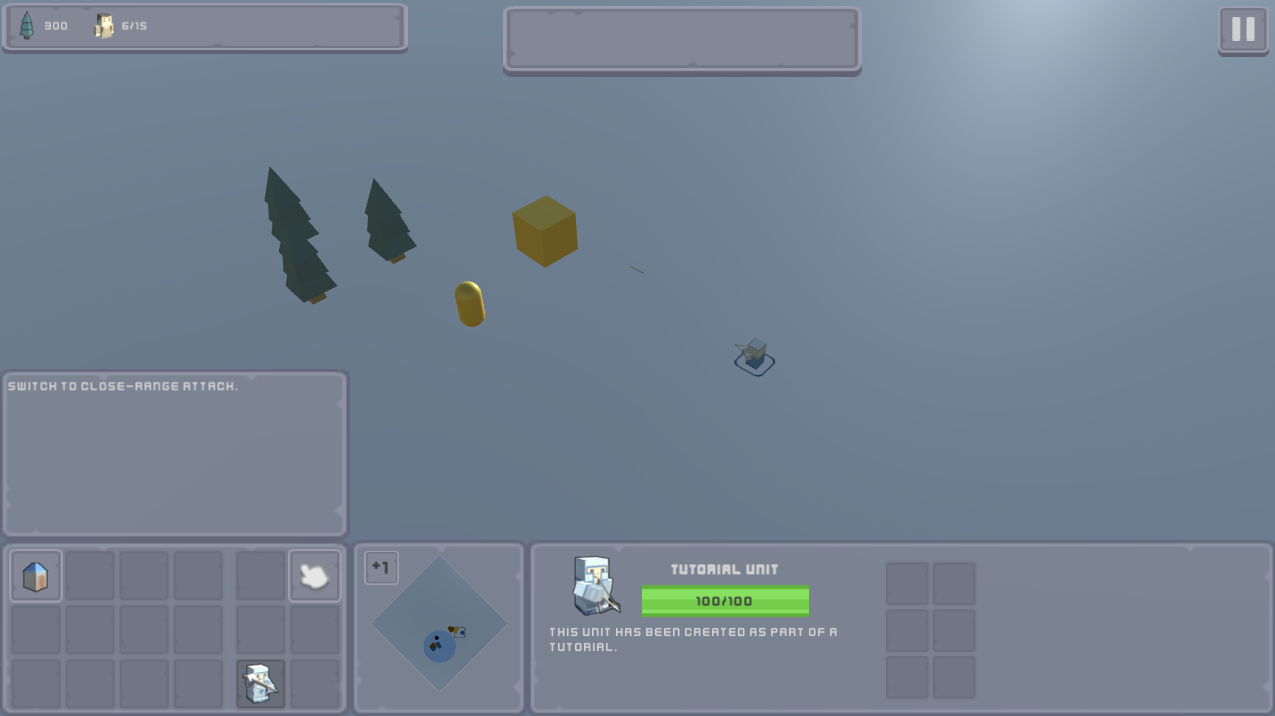
Notice how the attacker unit switches from its far-range attack with the arrow to its close-range melee attack while it immediately moves closer to the target faction entity so that it accommodates for the newly enabled attack's stopping distance. The attack switch UI task of the deactivated component is now enabled while the one of the activated component is hidden.
5. Attack Move
An attack-move is a feature that allows attacker units that are moving towards a destination to stop their movement when they encounter an enemy faction entity on their path, attack the enemy entity and then continue on its path if it is able to defeat it. This is enabled by commanding attacker units to move to a destination while holding down a certain key.
Navigate to the tutorial_unit's Unit Attack component inspector in the Attack-Move tab:
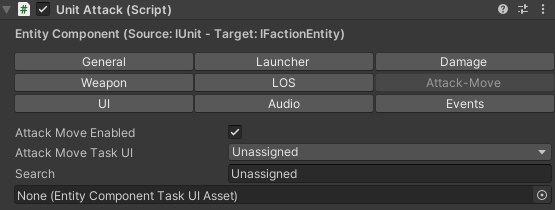
Make sure the Attack Move Enabled to enable attack-move commands in regards to the attack component.
The first possibility to enable an attack-move command is through a dedicated task in the task panel that appears when the attacker unit is selected. The latter requires creating Entity Component Task UI to be then assigned to the Attack Move Task UI field.
An alternative to launching attack move commands is by holding a key while giving a movement command to selected units. This is what we will demonstrate in this example.
In the tutorial_map scene, navigate to the Attack Manager component in the following hierarchy path: GameManager -> Essential -> Attack. This component manages launching attacks alongside other features such as the attack move option.
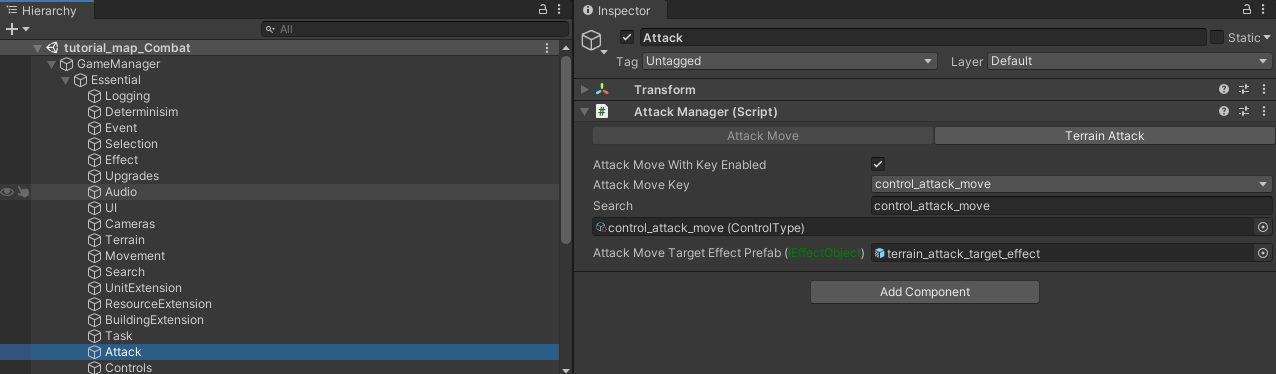
In the inspector view, find the Attack Move properties:
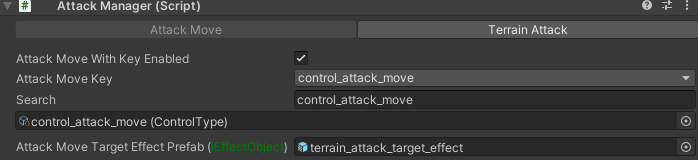
Attack Move With Key Enabled: Make sure this field is enabled.
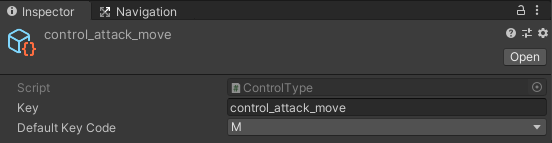
Attack Move Key: A Control Type, introduced in [a previous section](xref:PlacingBuildings_BuildingPlacementManager#Rotation Properties / Control Types), that defines the key needed to be held down when a movement command is given to attacker units. By default it is assigned to the key M:
Attack Move Target Effect Prefab: Indicator effect that appears on the terrain when one or multiple units are ordered to move towards a position with move attack enabled. Leave the default one assigned.
Now start the tutorial_map scene, select one or multiple instances of the tutorial_unit entities and command them to move towards an enemy faction entity but past it while holding down the move-attack key, assigned to M by default.
If you are still using the default movement marker effect objects that flash on the movement path destination on the terrain then you will notice that the color for the movement flashing effect object is the one assigned to the Attack Manager instead of the one assigned in the Movement Manager component. When the attacker units move close to the target enemy entities, they stop and they engage in attacking them.
6. Terrain Attack
A terrain attack allows for the attacker entity to launch an attack directed at one of the terrain objects in the map instead of requiring an enemy faction entity as a target. This can be useful for area of effects attacks that you can launch on the ground for example.
Open the tutorial_unit prefab and navigate to the attack component and update the following fields in the General Tab:
- Formation -> No Target Stopping Distance: Set to (3, 10) to allow the entity to stand in the range of minimum 3 and maximum 10 when attempting to launch a terrain attack.
- Require Target: Disable this field to define that the attack component does not require a target to launch an attack, allowing for a terrain attack.
In the tutorial_map scene, navigate to the Attack Manager component in the following hierarchy path: GameManager -> Essential -> Attack. This component manages launching attacks alongside other features such as the terrain attack option.
In the inspector view, find the properties in the Terrain Attack tab:
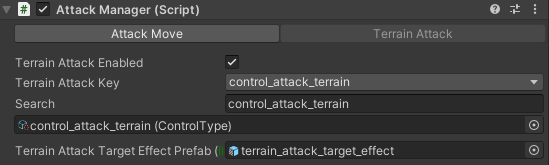
- Terrain Attack Enabled: Make sure this option is enabled.
- Terrain Attack Key: A Control Type, introduced in [a previous section](xref:PlacingBuildings_BuildingPlacementManager#Rotation Properties / Control Types), that defines the key needed to be held down when a terrain attack command is given by clicking on a terrain object with the right mouse button. By default it is assigned to the key T.
- Terrain Attack Target Effect Prefab: Indicator effect that appears on the terrain when one or multiple units are ordered to perform a terrain attack. Leave the default one assigned.
Now start the tutorial_map scene, select one or multiple instances of the tutorial_unit entities, hold down the terrain attack key (T by default), and right-mouse click on an empty position in the terrain.
That would trigger the terrain attack effect on the position in the terrain and the unit would then launch only one iteration of its attack towards that position.
Download Files
You can download the results of this tutorial here.