Create Entity Upgrade
Upgrades can be applied on faction entities (units and buildings) and they can be applied on the whole faction entity (entity upgrade) or just a component that belongs to it (entity component upgrade). In this tutorial, we will be setting up an upgrade for a unit entity and create and handle the task that launches and triggers the entity upgrade.
1. Create Entity Upgrade Target
Find the tutorial_unit prefab and clone it or create a variant off it. In this example, we will be creating a variant and calling it tutorial_unit_upgraded. Open the new unit prefab and configure its main attributes on the Unit component to differentiate it from the tutorial_unit prefab.
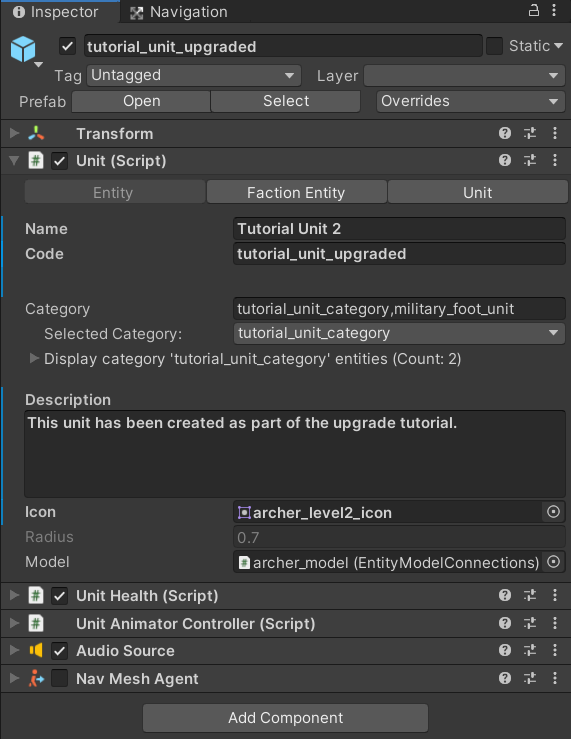
- Code: Make sure a new unique code is given to the upgraded unit prefab.
- Change other fields as you wish. In the example above, only the Name, Description and Icon fields have been changed so that we can recognize the upgraded unit type when selecting it through the drawn UI elements. For the icon, you can use the archer_level2_icon sprite from the demo files.
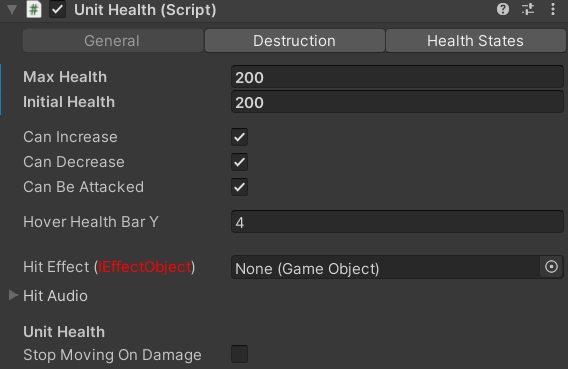
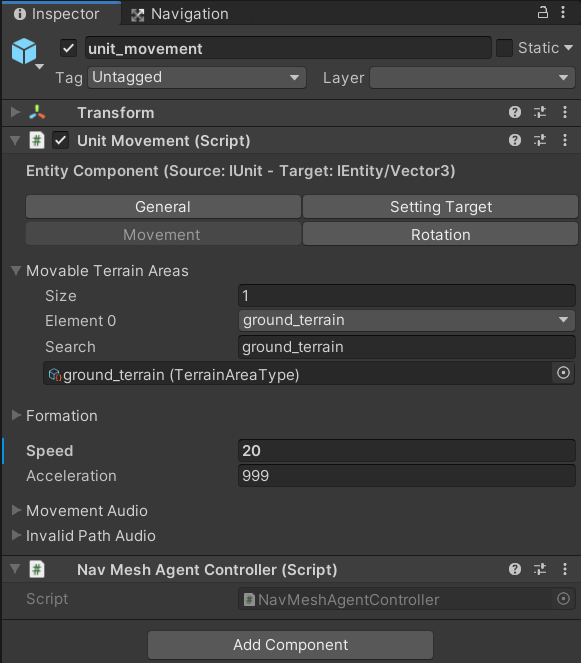
Next, you can go ahead and modify the tutorial_unit_upgraded as you see fit. In this example, only the maximum health in the Unit Health and movement speed in the Unit Movement are updated. We now have the upgrade target set up.
2. Add Entity Upgrade Component
Now back to the tutorial_unit prefab, open it and add the Entity Upgrade component to its parent object.
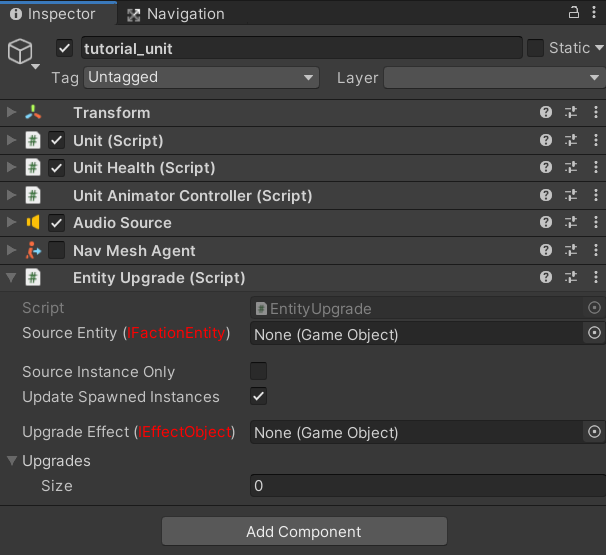
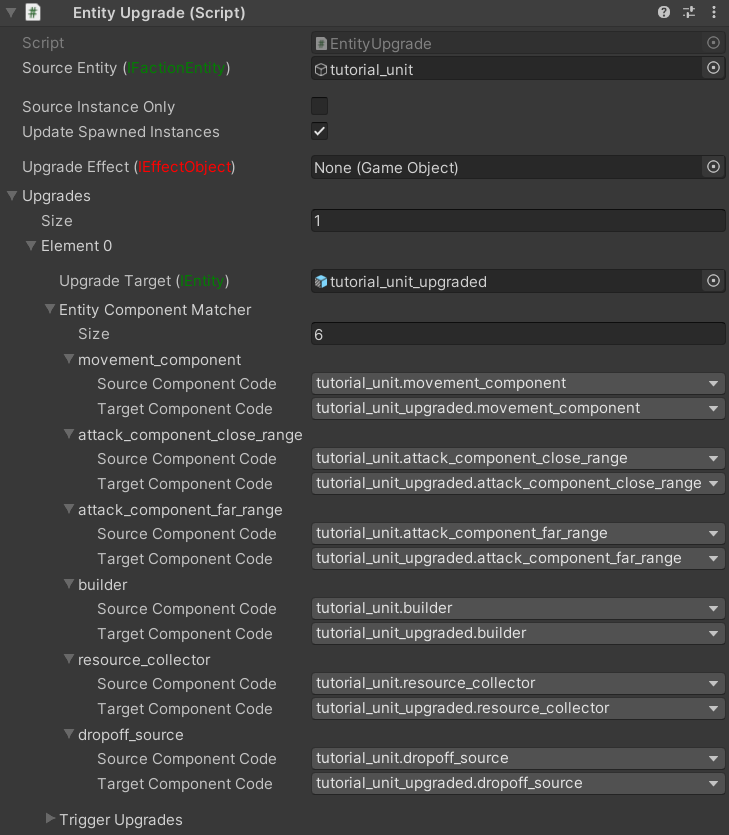
We will update the fields of the component like the following:
- Source Entity: Drag and drop the tutorial_unit prefab into this field to mark it as the upgrade source.
- Source Instance Only: Enable if you only want to have the upgrade launched on the one instance that holds this component and leave it disabled to enable the upgrade on the source entity type as a whole. The latter would disable the Unit Creator unit creation tasks that can create this unit type and enable any ones that allow to create the target creation task. For this guide's sake, we will leave this option disabled.
- Update Spawned Instances: Enable this option to immediately upgrade all already-created instances of the source entity type when the upgrade is completed. Or have it disabled to keep the old source entity instances. For this guide's sake, we will leave this option enabled.
- Upgrades: This fields allows us to define all of the possible upgrades that can be launched from this upgrade component. In this case, we only want to define one upgrade target, so add one element to this array field and let's define it:
- Upgrade Target: Drag and drop the tutorial_unit_upgraded unit prefab.
- Entity Component Matcher: When an entity is upgraded, this component allows to transfer relevant data from an entity component in the upgrade entity to an entity component in the upgrade target. Example of the data that can be transferred is any target that the source entity can have on an attack or builder component or the amount of collected resources that are stored on a drop off source component. Define the entity component matcher elements like the screenshot below.
Please note that if the tutorial_unit_upgraded prefab is a variant of the tutorial_unit prefab then the Entity Upgrade will also be added to the tutorial_unit_upgraded prefab as well so make sure to open that prefab and remove it in that case.
3. Add Upgrade Launcher
The Upgrade Launcher is a component that can launch pending tasks that execute upgrades. We will now set up this component on the tutorial_building to execute the upgrade of the tutorial_unit that we defined above.
Open the tutorial_building prefab, navigate to the building_components child object and attach the Upgrade Launcher to it and let's start configuring it.
3.1 General Tab

- Code: Assign a code to the entity component, unique within the entity.
- Is Active: Make sure this is enabled.
3.2 Tasks Tab
In the Tasks tab, we can define the actual tasks that would appear on the tutorial_building task panel when it is selected to allow for launching upgrades.
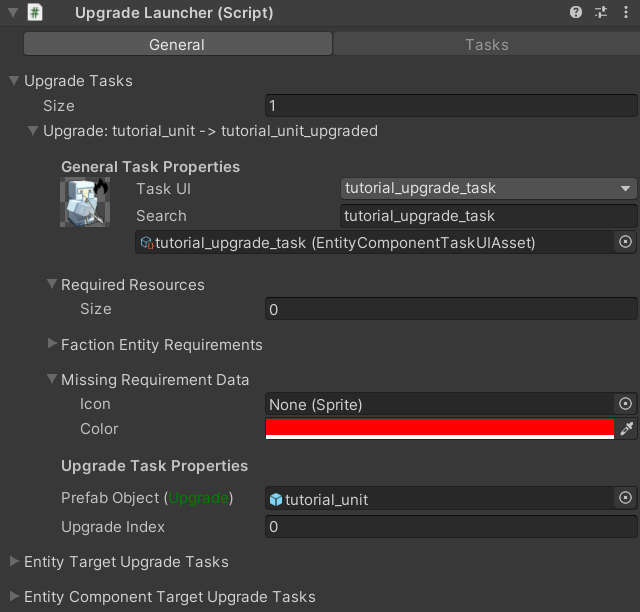
Go ahead and and add one new element to the Upgrade Tasks array:
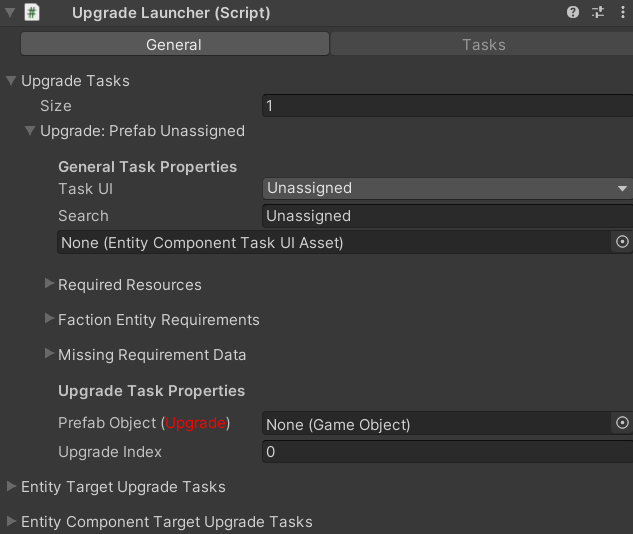
3.2.1 General Task Properties
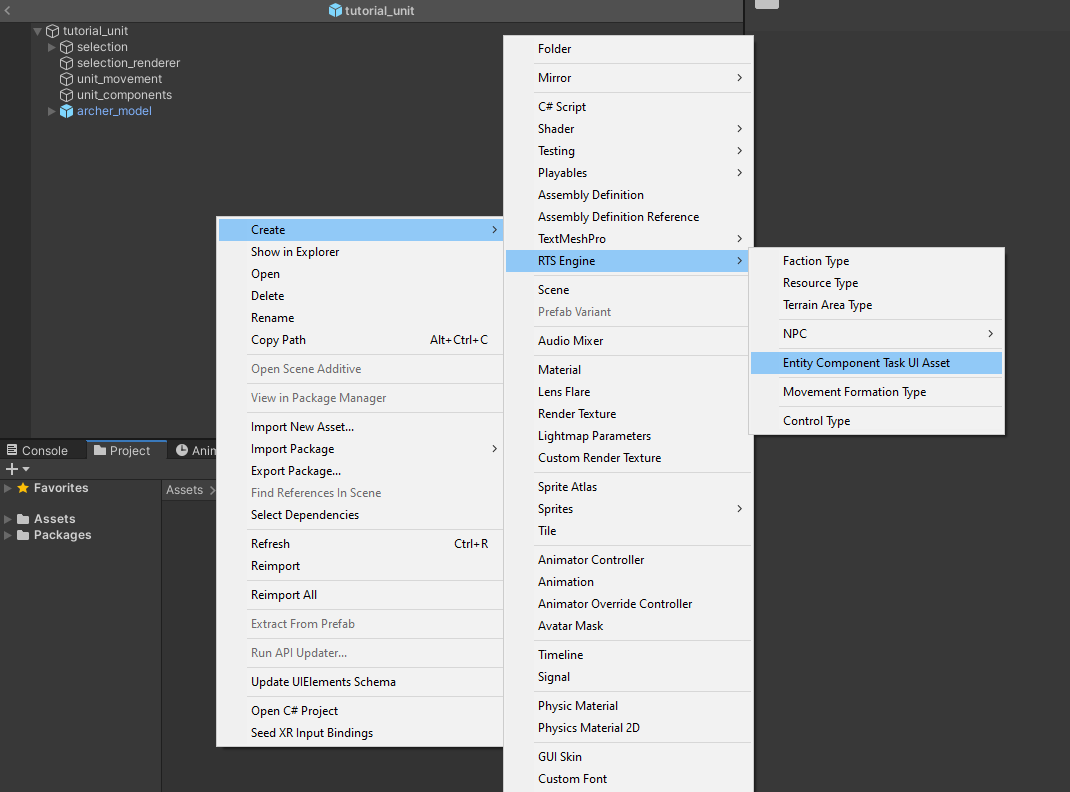
- Task UI: In the Add Movement Task tutorial, we went through creating an Entity Component Task UI asset which defines data required to draw a movement task in the task panel for the tutorial_unit. The process of defining the UI data for the upgrade execution task is fairly similar. Therefore, we will not be covering the creation of the UI task data in the same details so make sure to refer back to that tutorial for more details.
Right click on the Project tab and Create -> RTS Engine -> Entity Component Task UI Asset and call it tutorial_upgrade_task.
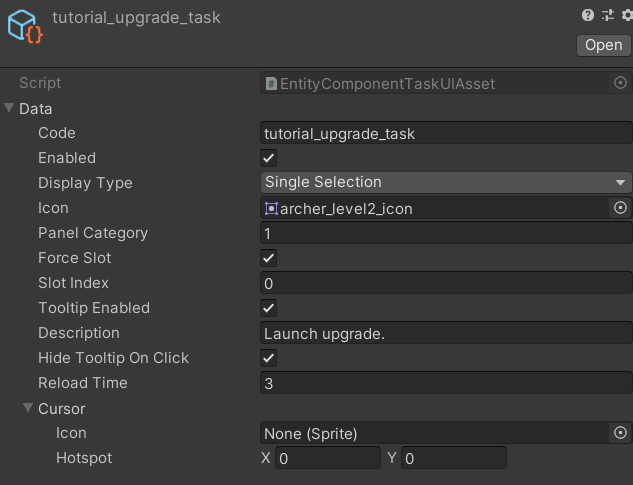
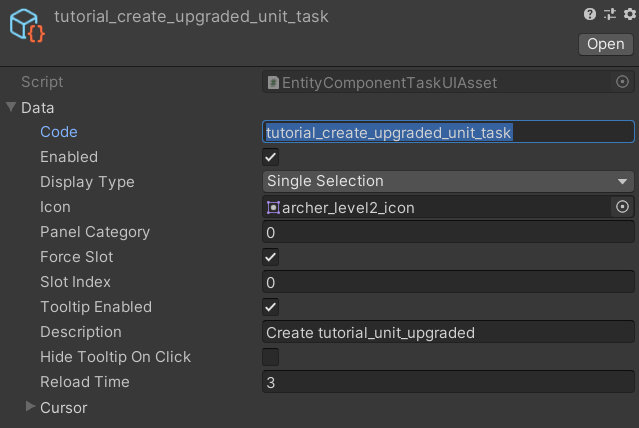
 Select the newly created asset and input its fields with the following:
- Code: Set to a unique code that differentiates it from other task UI assets, such as tutorial_upgrade_task.
- Enabled: Make sure this is enabled to allow the task to be drawn.
- Display Type: Choose Single Selection because we want the task to be drawn only when the tutorial_building is the only selected entity.
- Icon: This is the icon of the upgrade task that will be drawn on the task panel. Since we will be upgrading the tutorial_unit to the tutorial_unit_upgraded then we can use the latter's icon as the icon for this task as well.
- Panel Category: In the tutorial_map created and configured in the past tutorials, we kept the four default task panel categories. We can set this value to 1 which means that the task will be drawn on the second category of the tasks panel.
- Force Slot/Slot Index: We want to have this task drawn on the first task slot of the second task panel category, therefore we set the Slot Index field to 0 (first slot) and enable the Force Slot field. This is of course only an example of how you can configure these two fields.
- Tooltip: The descriptive text that appears when the player hovers their mouse over the task can be assigned in the Description field. Make sure that Tooltip Enabled is enabled for the text to actually appear and enable the Hide Tooltip On Click field so that the tooltip is hidden as soon as the player clicks on the upgrade task since it is not launchable multiple times.
- Reload Time: This field represents the time that is required between launching the upgrade task and the upgrade being executed. This field is only relevant for pending tasks which is the case for upgrade tasks. Assign 3 to this field so that it takes only 3 seconds for the upgrade to complete.
- Cursor: This field is irrelevant for the unit creation tasks. You can checkout the Add Movement Task tutorial where more details are provided on the use case of this field.
This how the inspector of the tutorial_upgrade_task UI task asset should look like after the modifications above. Now drag and drop it into the Task UI field, find and select it in the dropdown menu of that field or search for it in that field and select it.
- Required Resources: Leave this array to keep things simple and so that the upgrade task would not cost anything.
- Faction Entity Requirements: This field allows you to define a series of faction entities (units or buildings) that the faction slot must have created prior to attempting to launch the upgrade task. This is especially useful when one of the requirements in your game is having certain units or buildings created and available for a faction before being able to launch upgrades on those faction entity types. To keep the tutorial simple, we will also be keeping this array empty.
- Missing Requirement Data: This field affects the visual aspect of the task on the task panel when the player does not have the required resources or faction entity requirements to launch it. The Icon field allows to change the icon defined in the task UI asset in case the requirements are not met. When the Icon field is not assigned, the Color is then used to change the color of the original task UI to indicate to the player that the launch requirements are not met. In this case, we will want to have the task icon appear in red color when requirements are lacking. Therefore, keep the Icon field empty and set the Color field to red (make sure that the alpha channel is not 0 so that the task icon does not become entirely transparent).
3.2.2 Upgrade Task Properties
- Prefab Object: Drag and drop the tutorial_unit prefab that has the Entity Upgrade into this field. This will fetch the upgrade component attached to the unit.
- Upgrade Index: The Entity Upgrade allows to define multiple potential upgrades in an array. This field defines the index of the target upgrade to launch using this task. In this guide, [we only defined one target upgrade element](##2. Add Entity Upgrade Component) that upgrades tutorial_unit to tutorial_unit_upgraded so make sure the index is set to 0, signifying the first element.
This is how the Tasks tab look after the above modifications:
4. Configure Unit Creator
In a previous tutorial, we added and configured the Unit Creator to allow for the creation of the tutorial_unit. We will now define a task that only gets enabled when the upgrade defined above is executed so that we can use the same component to create new instances of tutorial_unit_upgraded.
In the tutorial_building prefab on the building_components child object, expand the Unit Creator component in the inspector and navigate to the Tasks tab.
In the Upgrade Target Creation Tasks, add a new element. This array field should include tasks that are initially disabled but will get enabled if the unit they can create has been enabled after an upgrade is executed. Similarly the tasks in the Creation Tasks array that can create the upgrade source will be disabled when the upgrade is executed. So you can look at this as a replacement for the previous unit creation task that has been upgraded.
Go ahead and a create the Entity Component Task UI asset that will be used to create the tutorial_building_upgraded. Let's call it (and assign it the code) tutorial_create_upgraded_unit_task and have its field configured as shown below:
Now in the Unit Creator inspector of the tutorial_building, configure the task accordingly:
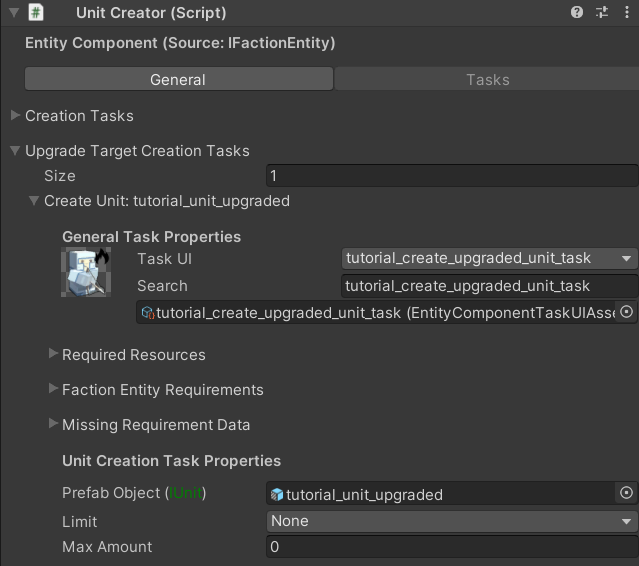
- Task UI: Drag and drop the tutorial_create_upgraded_unit_task task UI asset into this field.
- Prefab Object: Drag and drop the tutorial_unit_upgraded unit prefab object into this field.
5. Testing
Open the tutorial_map and notice the following:
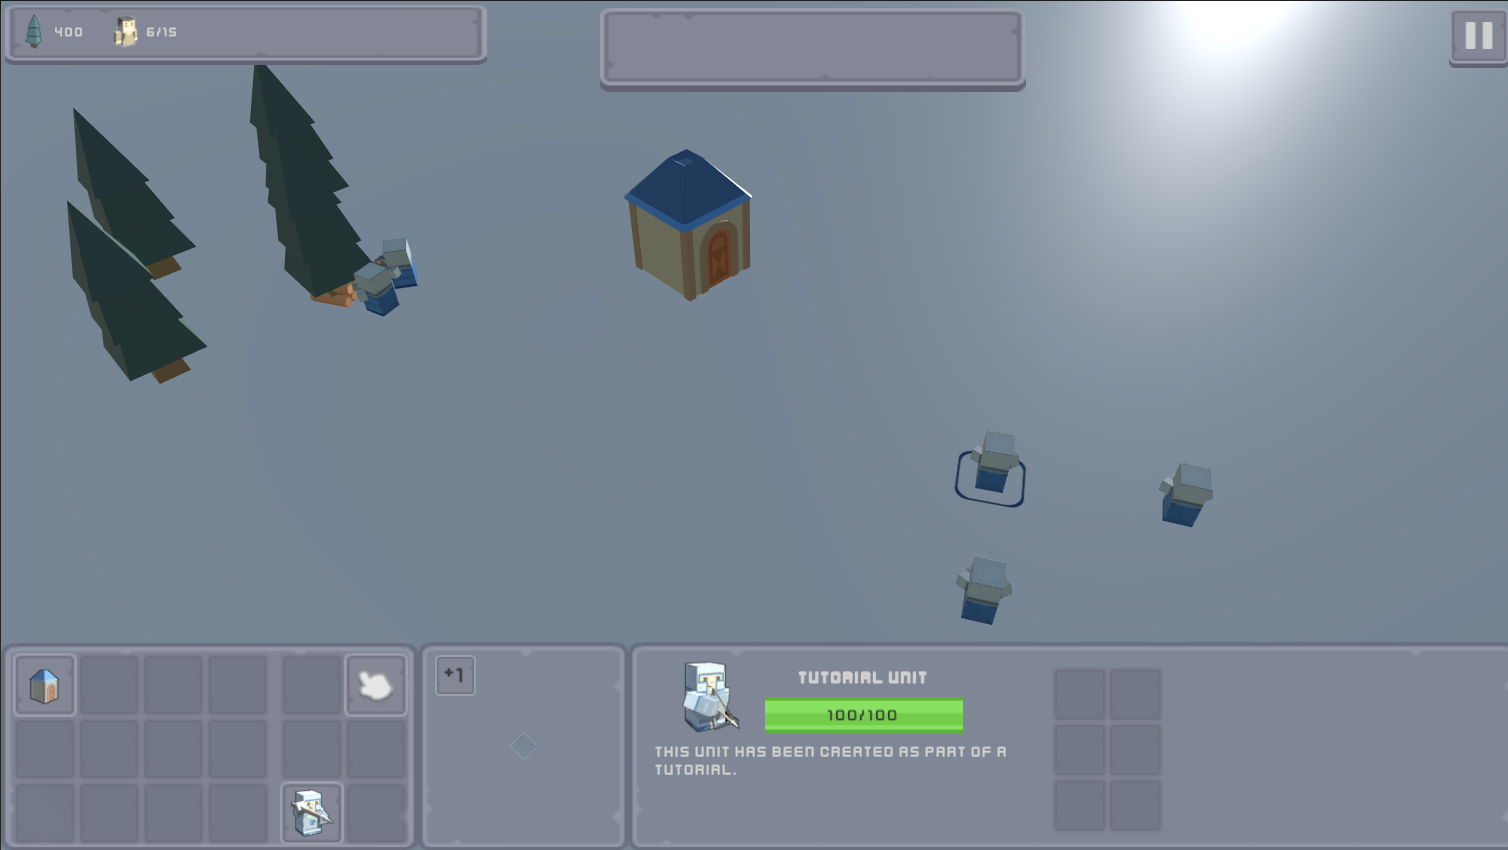
We have a bunch of instances of the tutorial_unit which is our upgrade source.
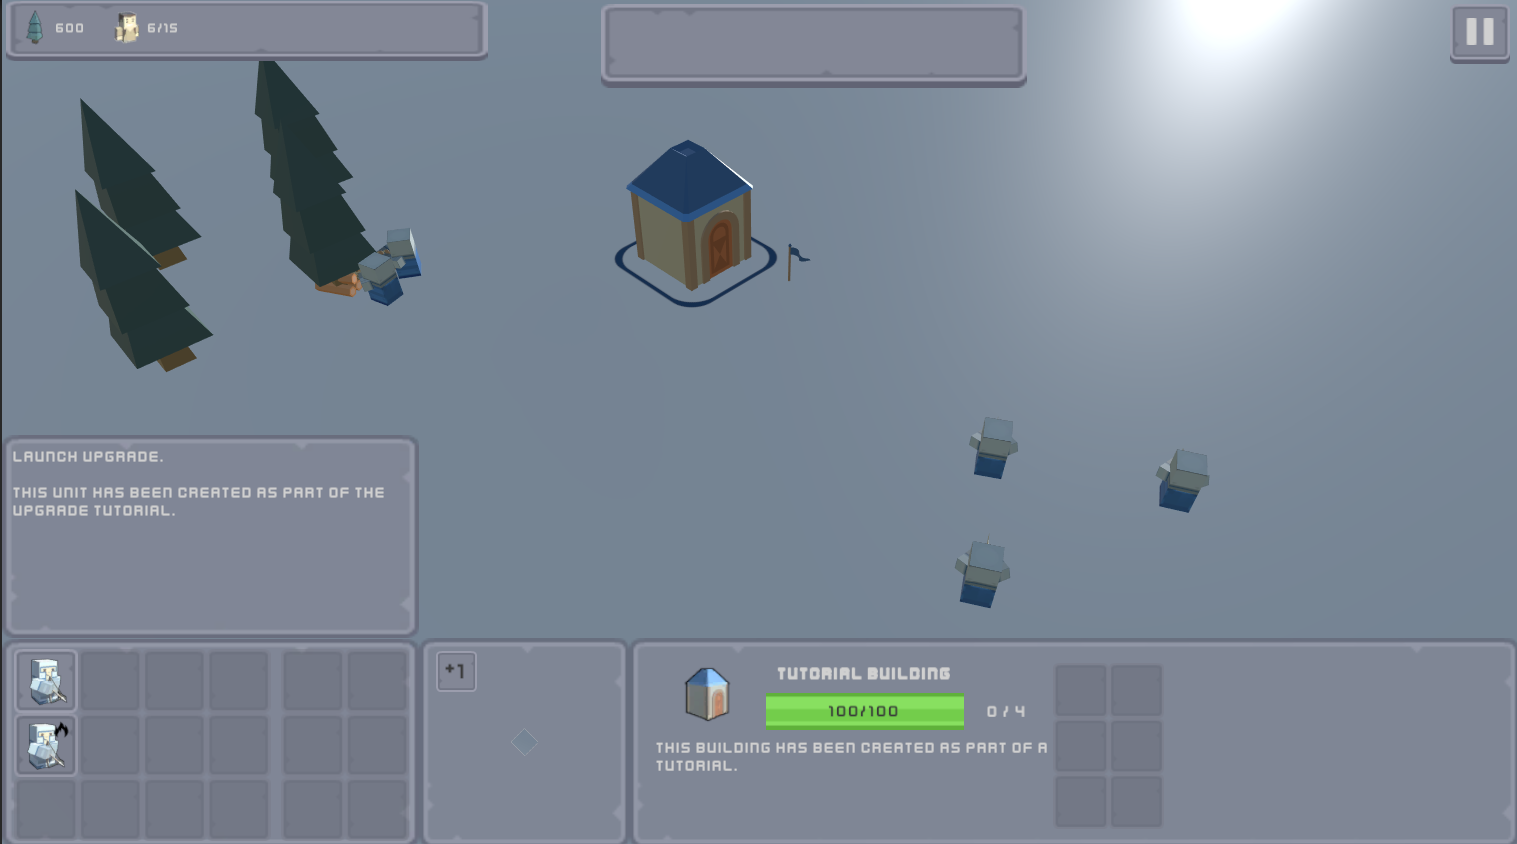
When selecting the tutorial_building instance in the map, you can now see, along with the unit creation task for the tutorial_building, a second task that allows us to launch the entity upgrade where its description includes the description of the target upgrade unit, the tutorial_unit_upgraded.
Click on the upgrade task to launch it.
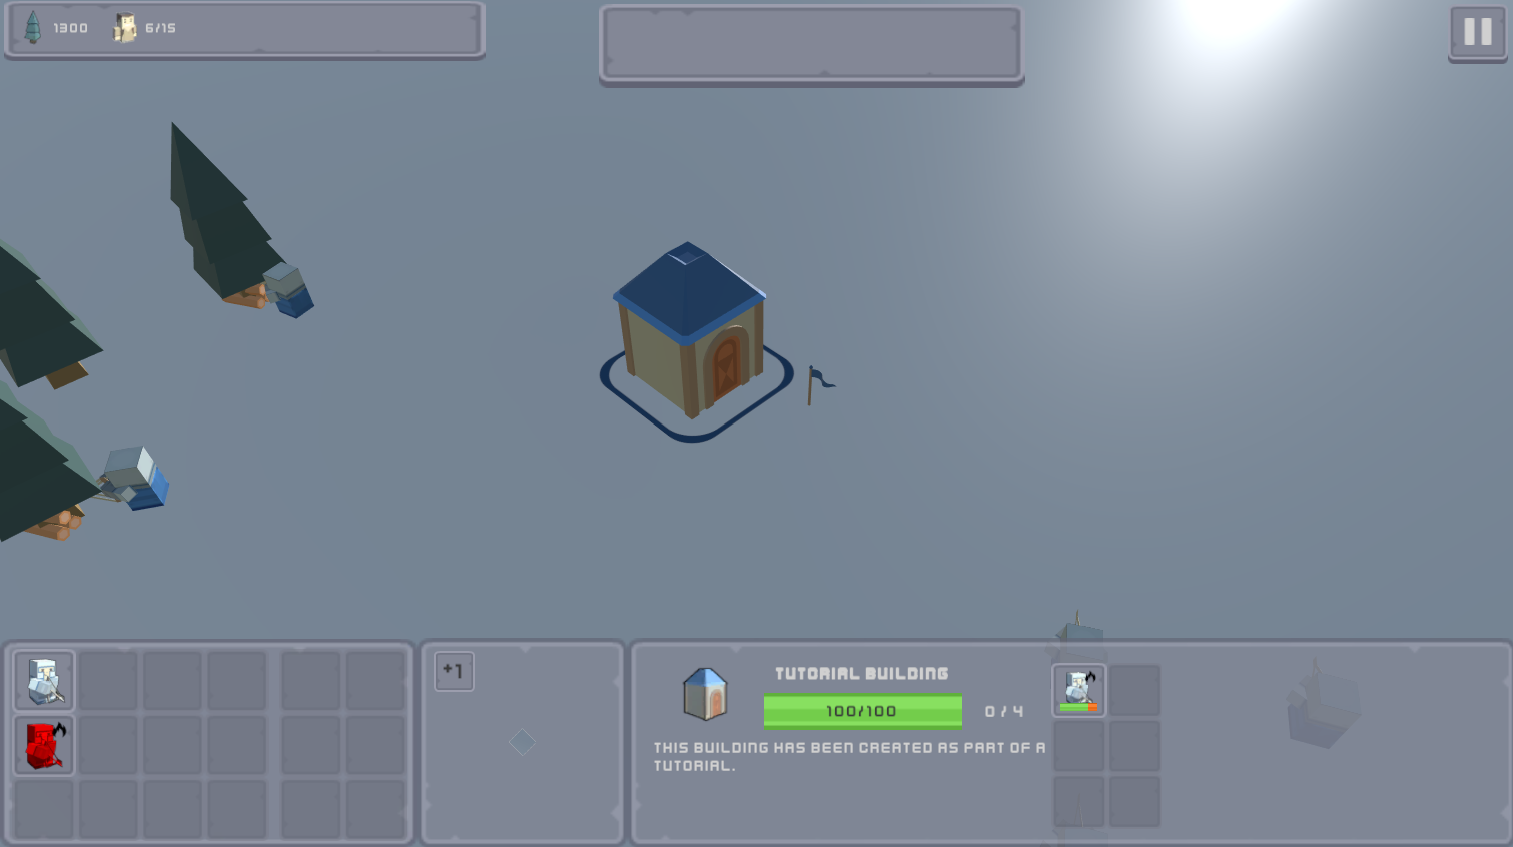
You can notice that the upgrade task is now in the pending tasks panel while the task panel shows the icon of this task as red signifying that it is currently in progress and can not be launched twice.
When the upgrade task completes its execution, it would appear from the building's task panel. In addition, the tutorial_unit creation task is also disabled and is now replaced by the tutorial_unit_upgraded creation task.
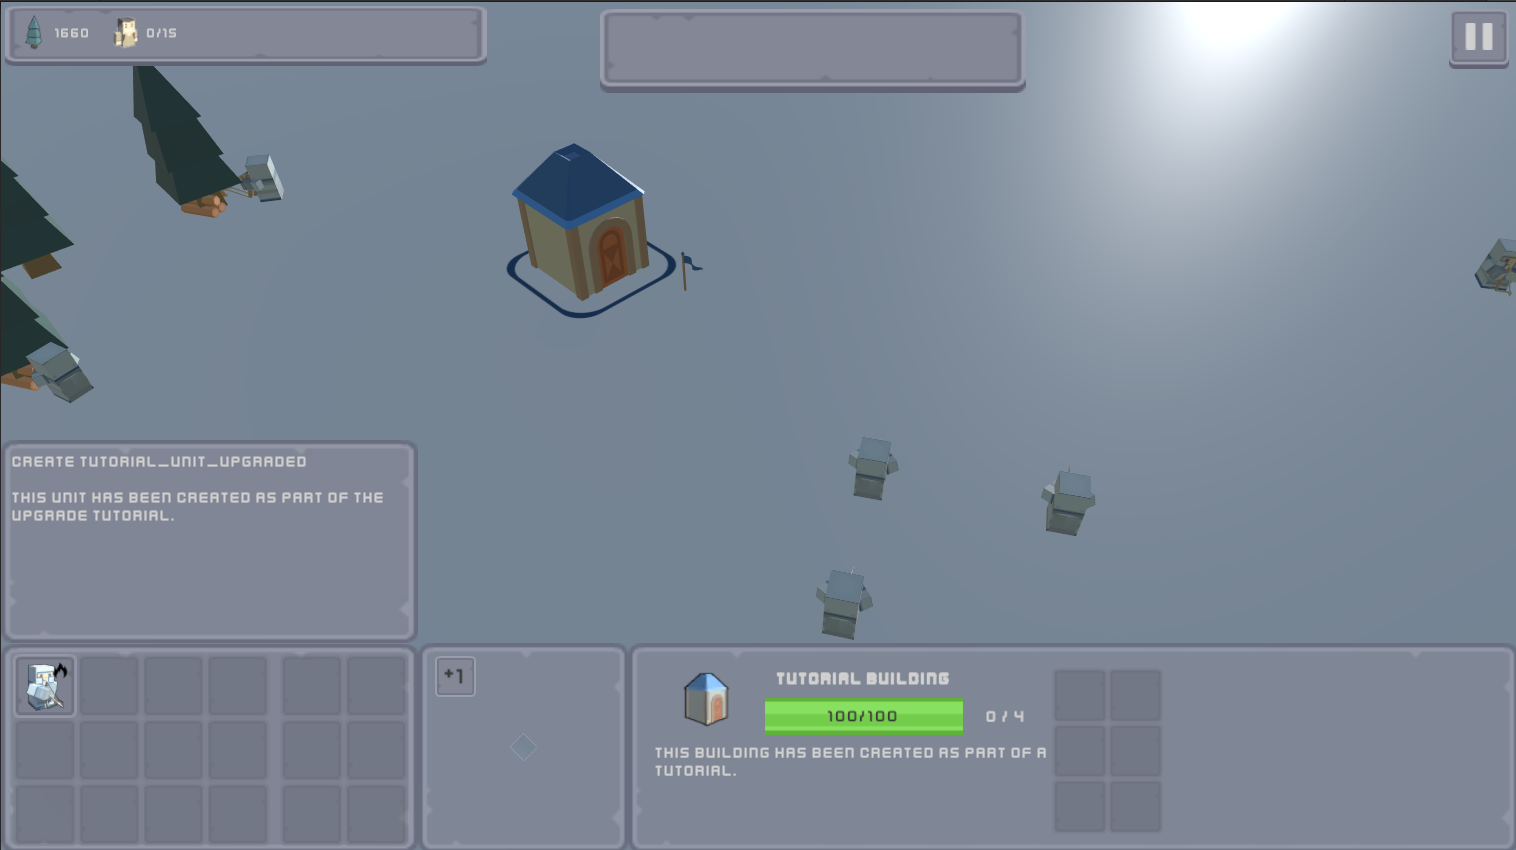
The instances of the tutorial_unit have been also destroyed and replaced by instances of the upgrade target type tutorial_unit_upgraded and if the older instances were executing a task such as movement or collecting resources, you'd notice that the upgraded instances will continue doing the same tasks.
Download Files
You can download the results of this tutorial here.