Create an Entity Component
This guide provides an introduction for creating entity components, which are components that can be attached to children objects of an entity prefab to handle a behavior for the entity.
In this guide, we will go through the creation of an Entity Seller component that allows the player to sell a faction entity and destroy it and get resources for it. It would have the following characteristics:
- Can be attached to faction entities only. So only on units and buildings that belong to a faction slot.
- Allows to draw a task when the faction entity it is attached to is selected.
- Allows to destroy the faction entity that it is attached to when the task it draws is launched and awards resources to the faction owning it.
1. Create the EntitySeller Component
In the project tab, create a new C# script under the name of EntitySeller and open the new script in your editor.
using UnityEngine;

public class EntitySeller : MonoBehaviour
{
    // Start is called before the first frame update
    void Start()
    {

    }

    // Update is called once per frame
    void Update()
    {

    }
}
The IEntityComponent interface is what allows a component that is attached to an entity's child object to be recognized by the entity. It implements the following interfaces:
- IMonoBehaviour: Requires the interface to be attached on Unity MonoBehaviour components.
- IEntityPostInitializable: Allows the entity component to be initialized from the IEntity instance it is part of right after the entity completed its own initialization phase.
Now we can either implement the interface in our new EntitySeller component or we can simply make the EntitySeller derive from EntityComponentBase, an abstract class that implements all the properties and methods of the IEntityComponent interface and exposes overridable properties and methods for the class it extending.
Go ahead and make EntitySeller extend the EntityComponentBase abstract class and remove the default Start and Update Unity methods.
using RTSEngine.EntityComponent;
using UnityEngine;

public class EntitySeller : EntityComponentBase
{
}
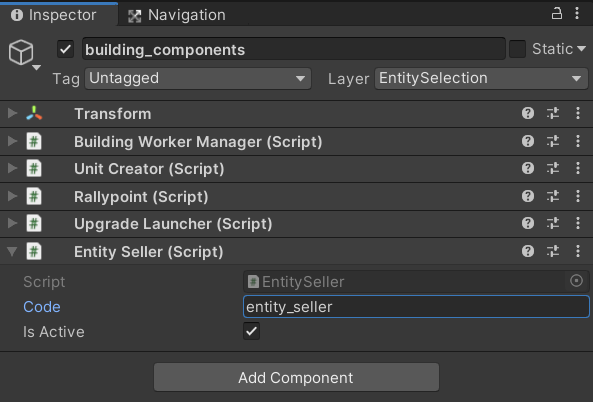
At this stage, you can add the EntitySeller component to one of your unit or building prefabs child objects. You can then set a unique code for the component, something like entity_seller should do. And make sure that the Is Active field is enabled.
2. Entity Type Check
Now back to the code editor. First thing we want to add is to make sure that this entity component is attached to faction entities, so just buildings or units. We need to check this when the component gets initialized by the entity it is attached to. Therefore, we need to override the provided OnInit() method from EntityComponentBase parent class which provides us with a property called Entity of type IEntity, assigned at the base initialization method. You can use the helper IsFactionEntity() helper method on that property which returns true only if the entity is a unit or a building.
using UnityEngine;

using RTSEngine;
using RTSEngine.EntityComponent;

public class EntitySeller : EntityComponentBase
{
    protected override void OnInit()
    {
        if(!Entity.IsFactionEntity())
        {
            Debug.LogError($"[EntitySeller] This component can only be attached to unit or building entities!", gameObject);
            return;
        }
    }
}
3. UI Handling
Now let's make this component show a task on the task panel when the faction entity it is attached to is selected.
Go ahead and add the taskUI field of type EntityComponentTaskUIAsset which allows to input a task UI asset file from the project tab that defines the data of the entity sell task.
[SerializeField]
private EntityComponentTaskUIAsset taskUI = null;
Then override the OnTaskUICacheUpdate() method from the base class. This method is called by the base class every time it requests the UI tasks data of the component to be refreshed. For example, when an entity is selected, the task panel UI handler calls OnTaskUIRequest() on the entity's entity component instances which if they use this base class, it would make a call to the OnTaskUICacheUpdate() to refresh the task UI data. Here you can utilize the RTSHelper.OnSingleTaskUIRequest() static method as the code below. The latter helper method provides a shortcut for handling the logic of telling UI components what task to show in case of one single task in an entity component. It runs checks on the validity of the task UI asset and whether the entity is able to launch tasks or not using the provided entity component.
protected override bool OnTaskUICacheUpdate(List<EntityComponentTaskUIAttributes> taskUIAttributesCache, List<string> disabledTaskCodesCache)
{
    return RTSHelper.OnSingleTaskUIRequest(
        this,
        taskUIAttributesCache,
        disabledTaskCodesCache,
        taskUI);
}
Next override the OnTaskUIClick() method from the base class. That method gets called from the task panel UI handler after the player clicks on a task that belongs to the entity component. Here we only have one task but for extra safety (in case you are adding more tasks in the future), we do a check on the validity of the task UI asset and then compare the attributes of the clicked task to the assigned task in the taskUI field.
- We use IsValid() to check for the validity of the taskUI field instead of comparing it with null. This is the standard way to do validity checks in the RTS Engine as it covers interface type fields that, even when the underlying object that they are connected to is destroyed, the reference to the interface is not immediately destroyed.
- The taskAttributes EntityComponentTaskUIAttributes parameter has a data field that itself contains a string code field that holds the defining code of the task UI that has been clicked.
public override bool OnTaskUIClick(EntityComponentTaskUIAttributes taskAttributes)
{
    if (taskUI.IsValid() && taskAttributes.data.code == taskUI.Key)
    {
        Debug.Log("Sell faction entity here!");
        return true;
    }

    return false;
}
At this point, the EntitySeller component looks like the following:
using UnityEngine;

using RTSEngine;
using RTSEngine.EntityComponent;
using RTSEngine.UI;
using System.Collections.Generic;

public class EntitySeller : EntityComponentBase
{
    [SerializeField]
    private EntityComponentTaskUIAsset taskUI = null;

    protected override void OnInit()
    {
        if(!Entity.IsFactionEntity())
        {
            Debug.LogError($"[EntitySeller] This component can only be attached to unit or building entities!", gameObject);
            return;
        }
    }

    protected override bool OnTaskUICacheUpdate(List<EntityComponentTaskUIAttributes> taskUIAttributesCache, List<string> disabledTaskCodesCache)
    {
        return RTSHelper.OnSingleTaskUIRequest(
            this,
            taskUIAttributesCache,
            disabledTaskCodesCache,
            taskUI);
    }

    public override bool OnTaskUIClick(EntityComponentTaskUIAttributes taskAttributes)
    {
        if (taskUI.IsValid() && taskAttributes.data.code == taskUI.Key)
        {
            Debug.Log("Sell faction entity here!");
            return true;
        }

        return false;
    }
}
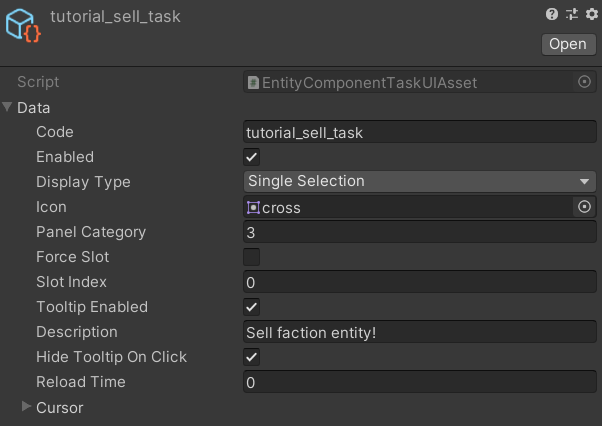
Now that we have the UI handling logic down, we can go back to the Unity editor, create a new Entity Component Task UI asset file for the sell task. In the Add Movement Task tutorial, we went through creating an Entity Component Task UI asset in details so check that guide for a full detailed walkthrough on this asset file and its field. Go ahead and create the asset file in the project tab and call it tutorial_sell_task and assign its fields like the following:
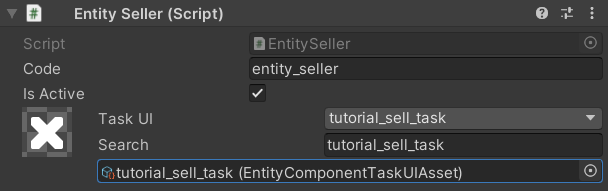
Now back to the EntitySeller component inspector and assign the tutorial_sell_task to the Task UI field.
When you launch the game and select the entity that has this component attached, you can now see the sell task on the task panel and when clicking on it, the Debug statement should be printed on the console.
4. Entity Destruction and Awarding Resources
Now it is time to replace that Debug statement with the actual entity selling logic.
In the top of the class, add the following fields:
[SerializeField]
private ResourceInput[] sellResources = new ResourceInput[0];

protected IResourceManager resourceMgr { private set; get; }
- sellResources array field of type ResourceInput would display in the inspector an array where each element allows to input a resource type and amount. This would be the resources that we will award to the faction when selling the faction entity.
- resourceMgr of type IResourceManager, the interface of the Resource Manager service that handles faction resources. It includes a method that we want to use to add resources to a faction slot.
Next we want to grab the resourceMgr service and we do that as part of the OnInit() method. We do that using the GetService() method of the gameMgr field of type IGameManager that has been already set by the base class.
protected override void OnInit()
{
    if(!Entity.IsFactionEntity())
    {
        Debug.LogError($"[EntitySeller] This component can only be attached to unit or building entities!", gameObject);
        return;
    }

    resourceMgr = gameMgr.GetService<IResourceManager>();
}
And finally, in the OnTaskUIClick() method we add the two following lines:
public override bool OnTaskUIClick(EntityComponentTaskUIAttributes taskAttributes)
{
    if (taskUI.IsValid() && taskAttributes.data.code == taskUI.Key)
    {
        resourceMgr.UpdateResource(Entity.FactionID, sellResources, add: true);
        Entity.Health.Destroy(upgrade: false, null);
        return true;
    }

    return false;
}
- We call the UpdateResource() method on the resourceMgr and provide it with the entity's faction ID and the sellResources fields.
- We call the Destroy() method on the health component of the entity which is accessed through the Health property of the Entity instance.
The whole class now looks like this:
using UnityEngine;

using RTSEngine;
using RTSEngine.EntityComponent;
using RTSEngine.UI;
using System.Collections.Generic;
using RTSEngine.ResourceExtension;

public class EntitySeller : EntityComponentBase
{
    [SerializeField]
    private EntityComponentTaskUIAsset taskUI = null;

    [SerializeField]
    private ResourceInput[] sellResources = new ResourceInput[0];

    protected IResourceManager resourceMgr { private set; get; }

    protected override void OnInit()
    {
        if(!Entity.IsFactionEntity())
        {
            Debug.LogError($"[EntitySeller] This component can only be attached to unit or building entities!", gameObject);
            return;
        }

        resourceMgr = gameMgr.GetService<IResourceManager>();
    }

    protected override bool OnTaskUICacheUpdate(List<EntityComponentTaskUIAttributes> taskUIAttributesCache, List<string> disabledTaskCodesCache)
    {
        return RTSHelper.OnSingleTaskUIRequest(
            this,
            taskUIAttributesCache,
            disabledTaskCodesCache,
            taskUI);
    }

    public override bool OnTaskUIClick(EntityComponentTaskUIAttributes taskAttributes)
    {
        if (taskUI.IsValid() && taskAttributes.data.code == taskUI.Key)
        {
            resourceMgr.UpdateResource(Entity.FactionID, sellResources, add: true);
            Entity.Health.Destroy(upgrade: false, null);
            return true;
        }

        return false;
    }
}
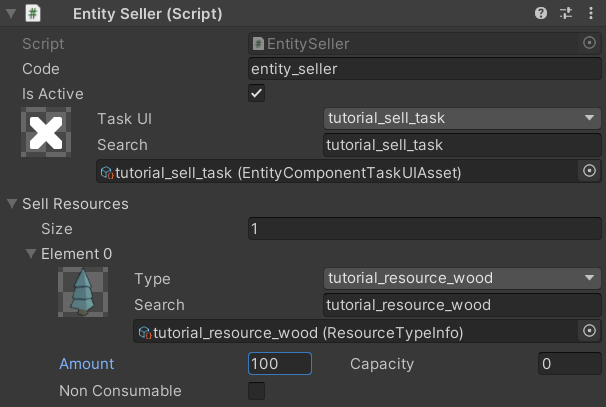
And that is it! You can now go back to the inspector and assign the resources that you want to award the faction after it sells the entity.
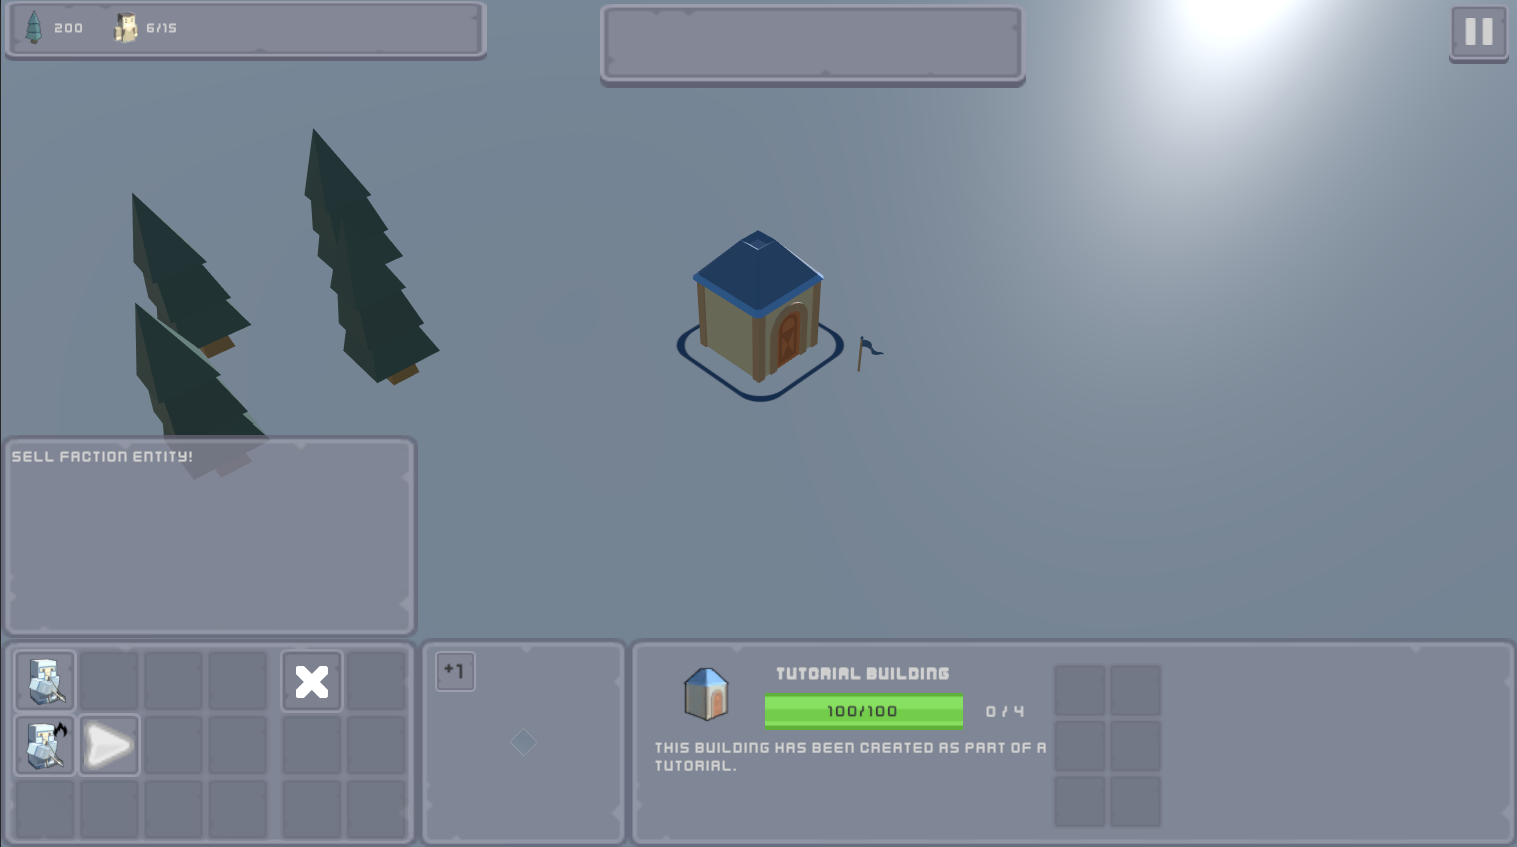
Now you can launch the game and select the entity with the EntitySeller component, click on the sell resources task which would add resources to your faction slot and destroy the entity as a result!
Download Files
You can download the results of this tutorial here.