Create Resource Entity
A resource entity is an entity that can be collected by a unit in the game in exchange for resource points that are awarded to the unit's faction.
1. Create Resource Prefab
To create a new resource entity, open the RTS Engine top bar menu and click on New Resource.
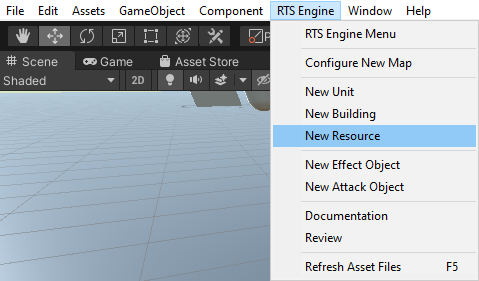
This would launch the resource creation in the RTS Engine Editor window.
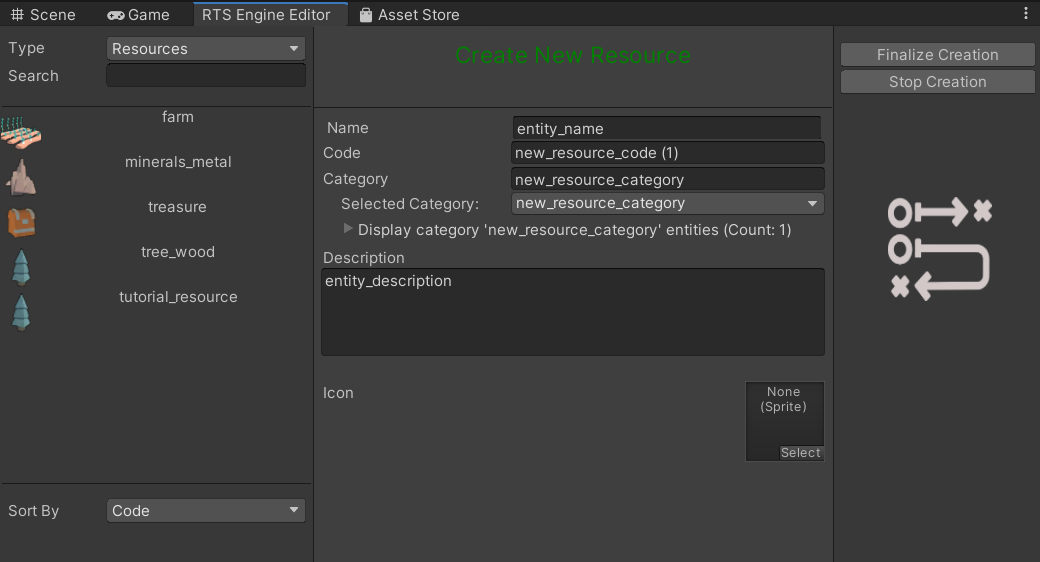
From this window, you can pick the following initial properties of the new resource:
- Name: This is the name that appears on UI elements, when the resource is selected for example.
- Code: Provide a unique identifier code for the resource. For example: tutorial_resource.
- Category: Assign one (or multiple) category for the resource that allows it to belong to certain groups of other entities (which must not only include resource types as categories can be shared between different entity types). To assign multiple categories, make sure to separate them with a comma (',') with no spacing. We will go with: tutorial_resource_category. When you assign a category or set of categories to an entity, you can browse through them and display the other entities that share the same category.
- Description: This is the description that appears on UI elements, when the resource is selected for example.
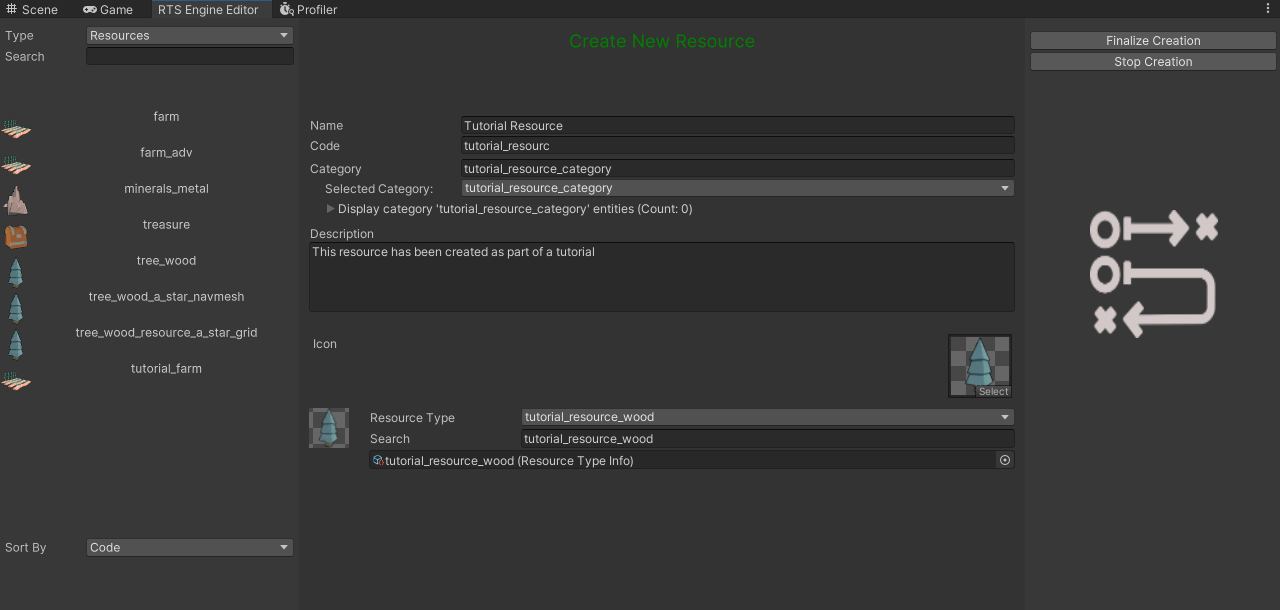
- Icon: To identify the resource visually within the UI elements, we can assign a Sprite asset to it in this field. For example, we can use the demo tree resource icon. Search for wood_icon in the Project tab and assign it to this field.
- Resource Type: This field defines the resource type that the resource entity will be used for. Assign the tutorial_resource_wood type to this field.
After picking the initial properties, click on the Finalize Creation button on the top right corner of the RTS Engine Editor window.
The new resource prefab is now located under the path: Assets/Resources/Prefabs, which is the default path for newly created entity prefabs. The new entity prefab's name is set after its unique code. If you wish to move the prefab into a different path, make sure that the new path always ends with ../Resources/Prefabs. The latter requirement allows the RTS Engine to cache entity types and make them available for editor components to have a richer user-experience while creating your RTS game with the Unity editor.
Additionally you can cancel the creation of the new entity prefab by clicking on the Cancel Creation button on top right corner of the same editor window.
Next, either double click on the prefab in the Project tab to open it or find it in the RTS Engine Editor entities list in the left side bar (it should be automatically selected after you finalize its creation) and click on Edit in Prefab to open it.
Please notice that the pivot point of the parent game object of the resource is set to the bottom of the object. By default, this is the case where you create a new entity through the RTS Engine menu so make sure this remains unchanged.
We will go through the main components and structure of a RTS Engine resource prefab.
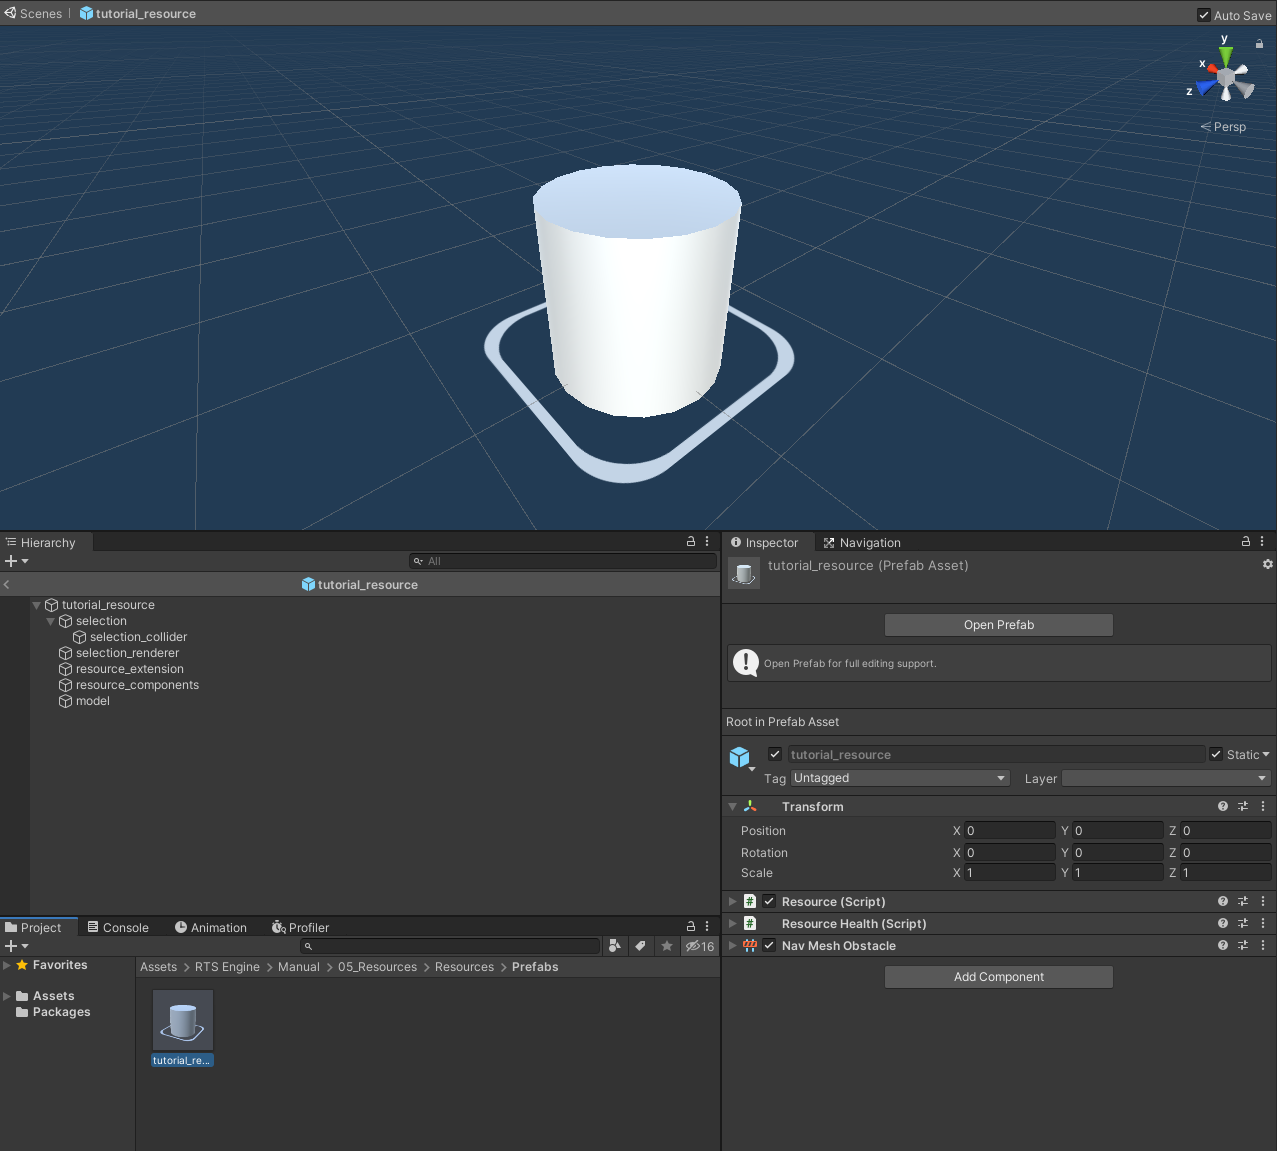
2. Resource Component
The Resource component is the main component of a resource entity, it defines the resource type and its general configurations. This component must be attached to the resource prefab's parent object. Expand this component and let's look at its fields.
2.1 Entity Tab
We will start by looking at the Entity tab which is a tab that holds fields shared by buildings, units and resources.
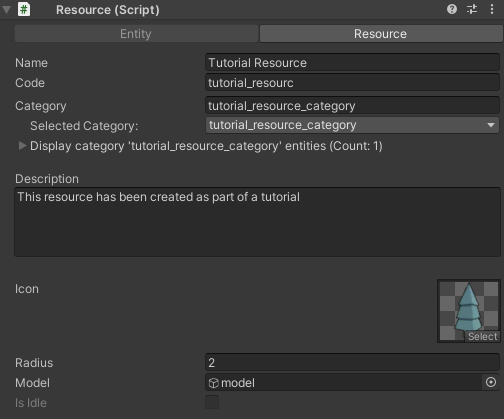
- Name, Code, Category, Description and Icon fields have been already set in the RTS Engine Editor window when creating the new entity prefab but you can still modify them here.
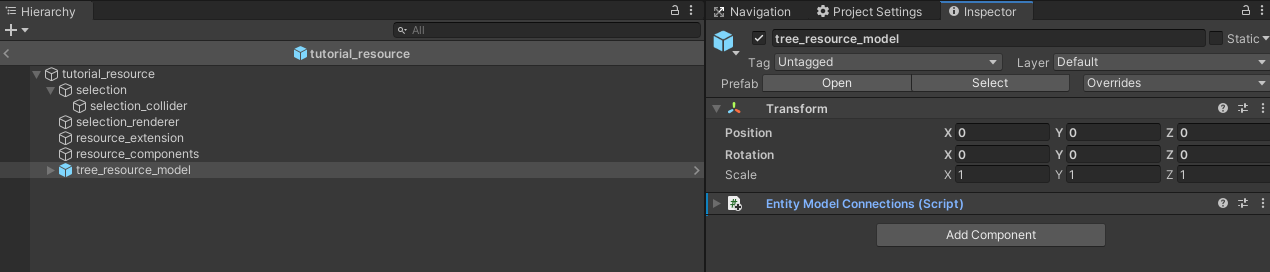
Model: The resource requires to have a model child object. By default this is assigned to the cylinder model. If you have access to the Demo files, search for the tree_resource_model object in the Project tab in order to use one of the demo's resource models. Select it and drag it as a child of the new resource's prefab.
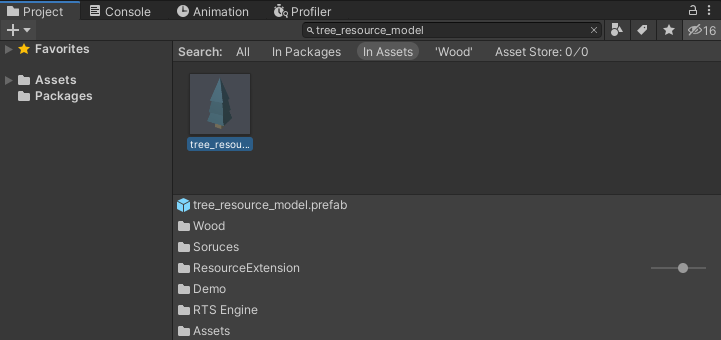
Set the position of the tree_resource_model child object to (0, 0, 0) to center it. Then remove the default cube building model and assign the tree_resource_model object to the Model field of the Resource component.
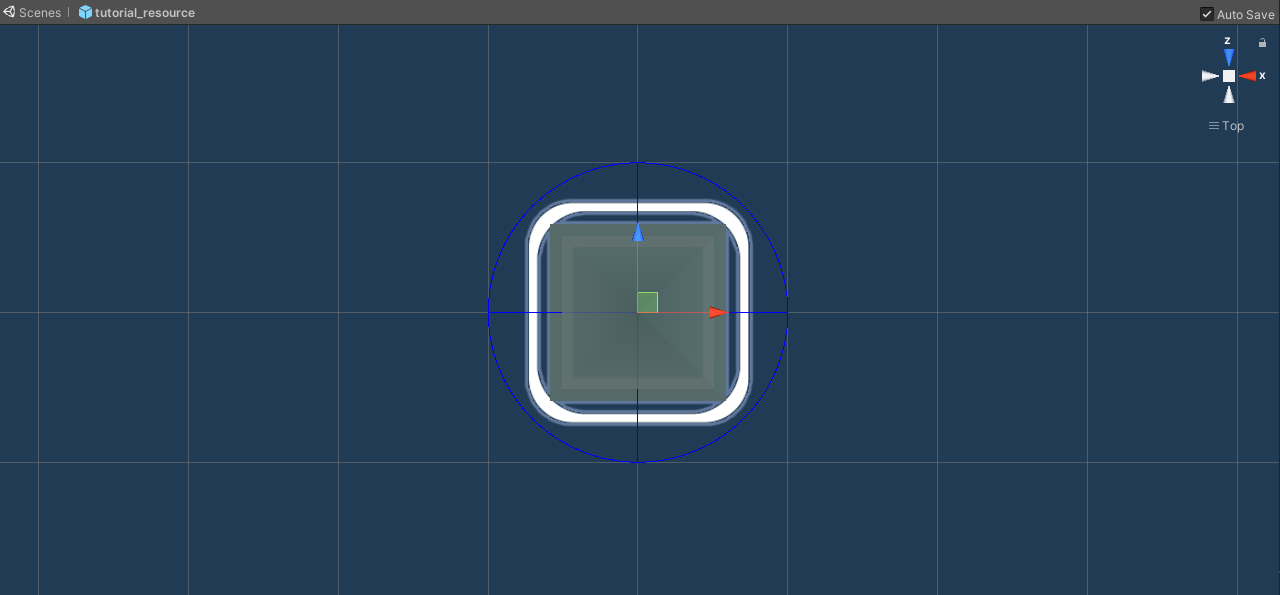
- Radius: This field defines the range that the resource entity is supposed to occupy within the map. When the resource is selected, a blue Gizmo sphere in the scene appears to show you the size defined by the radius that the resource entity will occupy. This radius value is useful when defining the ranges from which other entities can interact with this resource. For this new resource, we will change the radius value to 1.
The Entity tab of the Resource component should look like this now:

2.2 Resource Tab
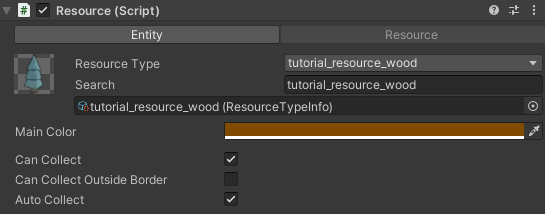
This tab has fields dedicated for resource entities only.
- Resource Type: This field defines the resource type that the resource entity will be used for. Assign the tutorial_resource_wood type to this field if not already assigned.
- Main Color: Since units and buildings are colored by their faction colors, you can pick a color from this field for each resource entity. For example, you can opt for a brown color since this entity represents a wood resource.
- Can Collect: Make sure that this field is enabled so the resource can be collected.
- Can Collect Outside Border: For testing purposes, keep this field disabled. Since the tutorial_map already makes use of a Border for the local player faction, we want to test resource collection in and outside the faction's territory.
- Auto Collect: When enabled, resource collectors are able to collect this resource and add resource points directly to their faction. When disabled, resource collectors must collect and then drop off this resource at a drop-off point for the resource to be added to their faction. For now, we will enable automatic resource collection and we will disable it at a later point to introduce resource drop-off with more details. So make sure this field is enabled.
3. Resource Health Component
The Resource Health component is the second required component of a resource prefab that must be attached to the parent object of the resource's prefab. For resource, health points are the resource points that can be collected from it by a faction.
3.1 General Tab
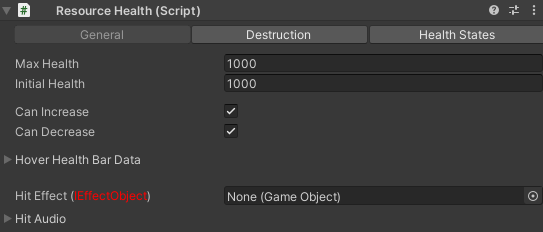
- Max/Initial Health: Update both field to 1000. This means that the resource entity will spawn with 1000 points tutorial_resource_wood points that can be collected by a unit.
- Can Increase/Decrease: We will keep those enabled as we do not want to lock the resource's health update either by increasing or decreasing. Some specific use cases might require you to disable one of these options so it completely depends on the behavior you want from the resource.
3.2 Destruction Tab
- Destroy Object/Delay: We want this option enabled as we want to destroy the resource's entity object when it is empty (health reaches zero). The delay option allows to set time before the object is actually destroyed (during which the resource state would remain as Dead and will not be usable), which allows you to run a destruction animation or effect. In this case, we will keep it simple and leave the delay at 0 seconds so that the resource gets immediately destroyed.
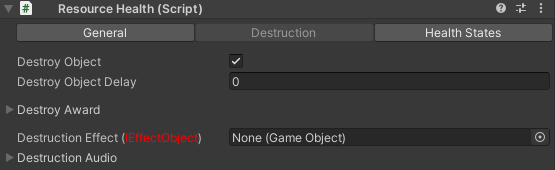
3.3 Health States Tab
We will not be assigning health states for this resource to keep things simple, but check the explanation in the Create New Building tutorial where health states are thoroughly explained.
For resources, a special Collected State is available that is triggered when the resource gets collected for the first time. We will use this field to change the resource's model to a different when a unit first starts collecting it. If you are using the tree model from the demo files then you already have the post-collection model for it as its child object. This is how the Collected State field should look like after assigning the model_collected to the Hide Child Objects field and the model_uncollected to the Show Child Objects field.
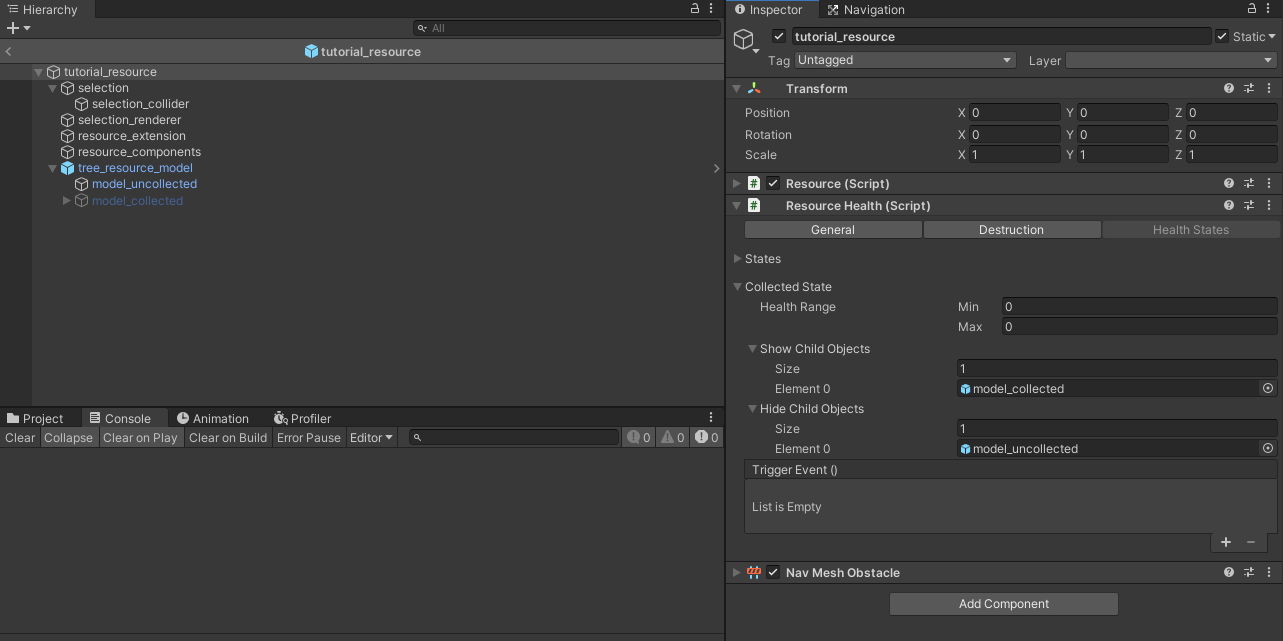
4. Other Main Object Components
The other components that are attached to the resource's entity main prefab object are the following:
- Nav Mesh Obstacle: In order to allow the resource to make a whole into the navigation mesh of the terrain, you need to add the Nav Mesh Obstacle component to the parent resource's object and enable Carve on it. Then make sure that the Center and Size fields cover the territory that the building will occupy within the navigation mesh of the terrain which will block unit movement through that area. In this case, a good value for the Center field would be (0, 0.5, 0) and (1, 1, 1) for the Size field.
That is it for the resource's parent object. Next we will explore some of the essential components in the children objects.
5. Resource Selection
5.1 Selection Component
The resource selection allows to define what colliders are used to detect the player's mouse click in order to have the resource selected when the game is running.

The main component in the selection process is the Resource Selection component which is placed under the selection child object of the resource prefab.
- Is Active: Make sure this option is enabled so that the building is selectable.
Selection Colliders: This array field defines the colliders used to select the resource. You can have multiple colliders, placed on multiple child objects of the resource prefab, that allow the selection of a single resource. The latter is useful when you have a complex resource model structure which the simple collider types can not cover. Each collider object must have the following:
- Collider component.
- Entity Selection Collider component.
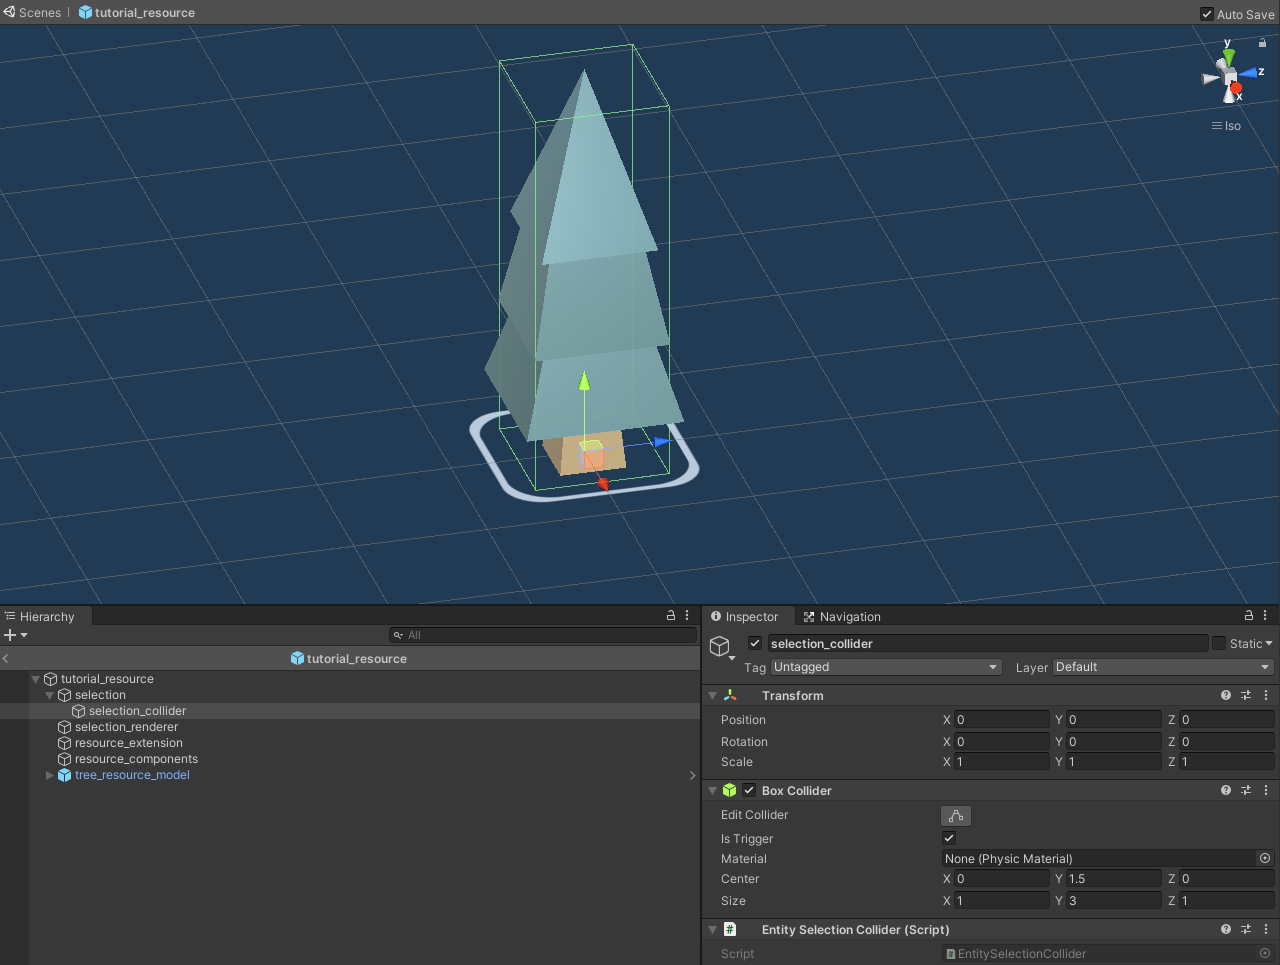
In the case of this simple tutorial_resource, we have one collider object with a Box Collider of center (0,1.5,0) and size (1, 3, 1) which fits the model we used. Now make sure that this collider object is added to the Selection Colliders field of the Resource Selection component.
5.2 Selection Renderer
We can have a visual representation to indicate when the resource is selected. This is exactly the job of the selection_renderer child object. It includes a Mesh Renderer component which is enabled when the resource is selected and disabled when it is not. This is the task of the Entity Selection Renderer component which is attached to the selection_renderer child object:
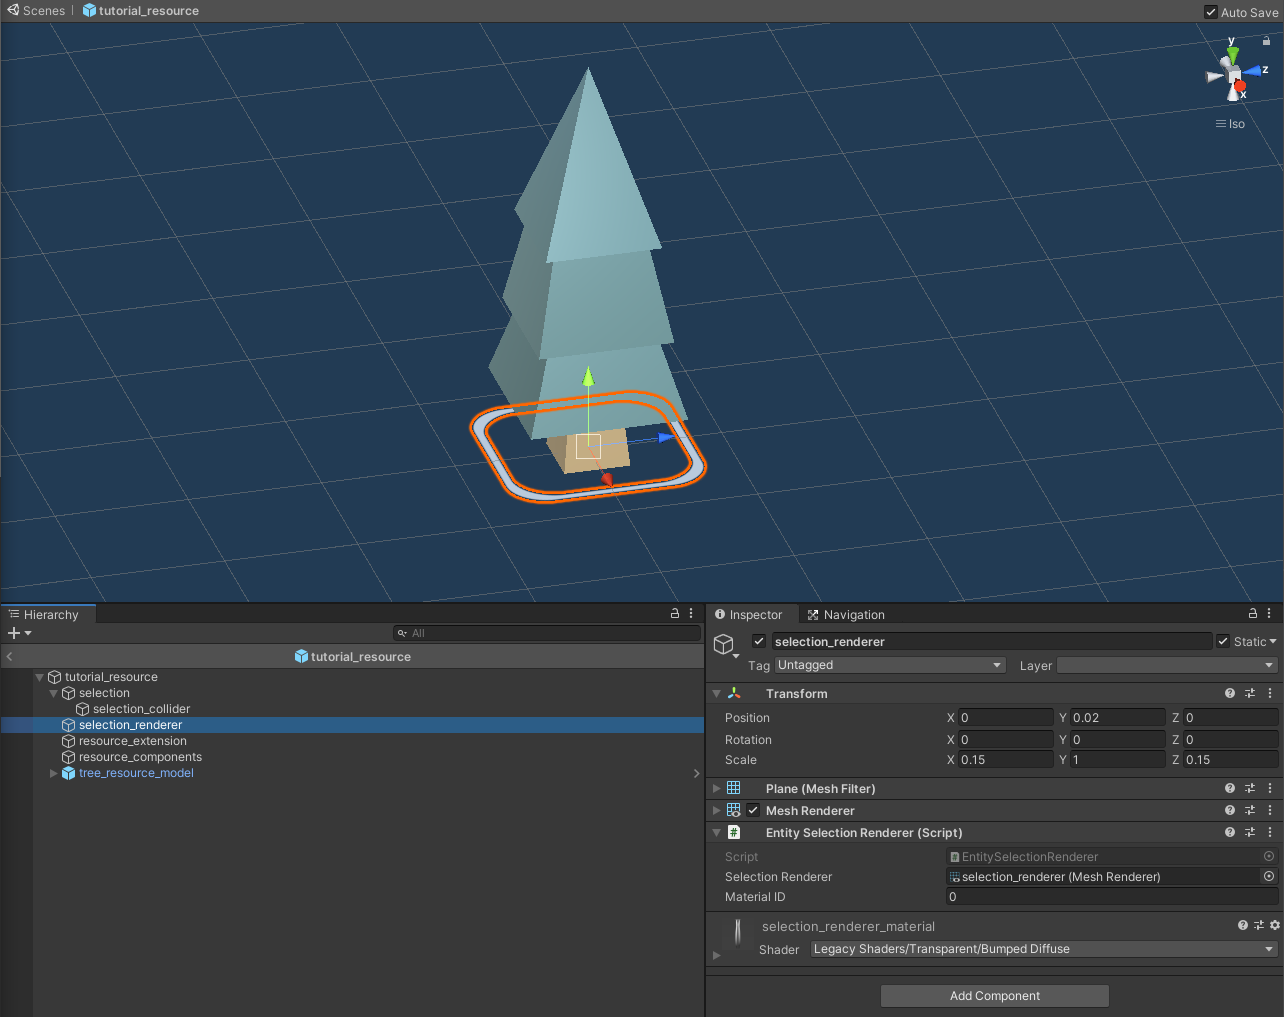
- Selection Renderer: Drag and drop the Mesh Renderer component into this field, to be enabled or disabled when the resource is selected or not selected respectively.
- Material ID: The selection renderer is colored using the faction color that the resource belongs to. This field defines the index of the material that will be colored on the Mesh Renderer component. In the case of the tutorial_resource's selection renderer, there is one material and therefore we keep this value set to 0.
6. Resource Extension
The purpose of the resource_extension child object is to have a collider with Is Trigger enabled so that buildings are not placed within collision of the resource object. In this tutorial_resource case, a (0, 1.5, 0) Center and a Size of (1.2, 3, 1.2) would be suitable.
7. Resource Worker Manager
You can find the Resource Worker Manager component attached to the resource_components child object. This component is responsible for allowing resource collector units to collect from the resource.
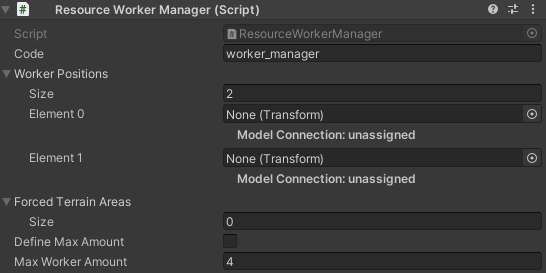
- Code: Assign a unique code to this component. For example "worker_manager".
- Worker Positions: The size of this array represents the maximum amount of collector units that can work at the same time to collect this resource. When you leave the elements of this array empty, then the worker units will pick the closest position to collect the resource in relation to their position and the resource entity's position. When assigned with Transforms, the elements of the array would represent static positions that the units need to reach to start collecting the resource. In this tutorial's case, we are not using static worker positions so leave the elements of this array empty but assign its size to 2 for example.
- Forced Terrain Areas: When you have static worker positions (elements in the above array are assigned), then you can define Terrain Area Types to make sure that the static worker positions are specific terrain areas when the resource is placed. Since we are not using static worker positions then we can also leave this field unassigned.
- Define Max Amount / Max Worker Amount: Enable the Define Max Amount option to allow to set the maximum amount of workers independent of the 'Worker Positions' field. When enabled, the field Max Worker Amount would represent the maximum amount of collectors allowed to gather from the resource entity at the same time. The amount of this field must be lower than the size of the 'Worker Positions' array.
Next we will add the tutorial_resource to the tutorial_map scene.
Download Files
You can download the results of this tutorial here.