Setup Resource Collector Unit
A unit is only able to collect resources from a resource entity if it has the Resource Collector component attached.
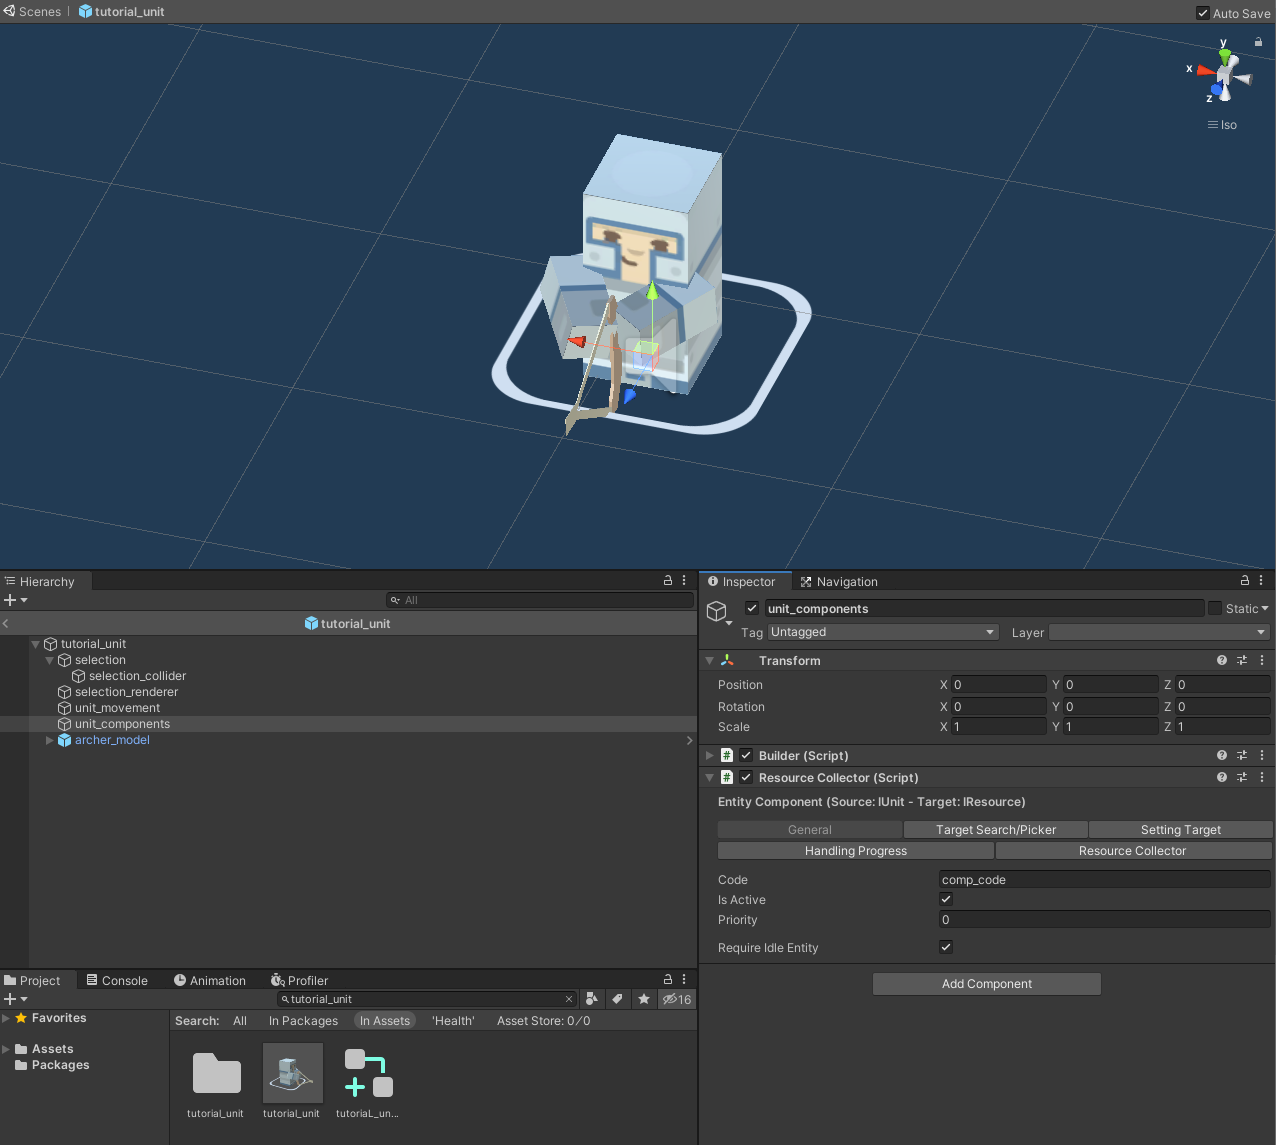
Open the tutorial_unit prefab and navigate to its unit_components child object then add the Resource Collector component to it.
In the beginning of this component's inspector, you can see:
Entity Component (Source: IUnit - Target: IResource)
This means that this component is attachable to entities of type IUnit (which refers to the interface used by unit entities) and that it can have IResource (interface used on resource entities) as its target. Let's go ahead and start configuring it.
1. General Tab
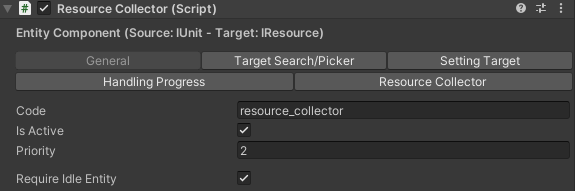
- Code: Pick a code that is unique among other components attached to the entity.
- Is Active: Make sure this is enabled.
- Priority: The other entity components that allow for a target that is attached to the tutorial_unit, if you have been following the beginner tutorials in order, are the Unit Movement and Builder components configured in [this part](xref:uid: Units_SetupUnitMovement) and this part respectively of the beginner's tutorials. We set the Priority of setting the movement target to 0 and we will be keeping it as the one with the top priority and we had set the priority of the Builder component as 1, therefore we set this field here to 2 so that setting a resource collection target has the third highest priority when the local player right clicks on a target when selecting the tutorial_unit. What this means is that the movement will be considered for setting the target before the builder is when the player has the unit selected and uses the right-mouse click to set a target.
- Require Idle Entity: Enable this field to enforce that the unit must be idle and not have any other components with active targets when it is collecting a resource.
2. Target Search/Picker Tab
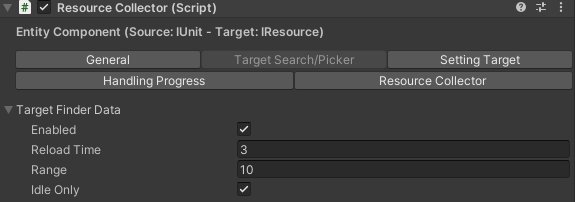
- Target Finder Data: This field allows the resource collector to automatically look for resources to collect from within a specific range without the player commanding them to do so. When enabled, you need to set the following properties:
- Reload Time: Period of time (in seconds) before the unit searches automatically for a target in its range.
- Range: The size of the target search range.
- Idle Only: When enabled, the automatic target search executed by this component can only happen if the entity is idle, meaning that no other target component attached to the entity has an active target.
3. Setting Target Tab
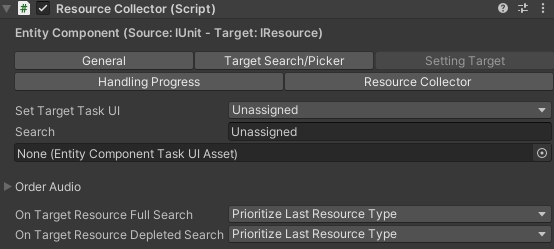
- Set Target Task UI: An entity component with an ability to set a target allows the player to set that target either by a right-mouse click on the target while the entity is selected or by a dedicated task that appears in the dedicated UI task panel when the entity is selected as well. The data that defines the task are assigned here. We went through setting up such a task in the Add Movement Task section. However we will leave this component without a dedicated target assignment task.
- Order Audio: This field allows to assign one or multiple audio clips where one is played when the player assigns a new target. If you have multiple audio clips to assign, then the Fetch Type field allows you to determine how the clip is chosen each time. The Cooldown field allows you to input a cooldown time for playing the audio clip. In case you do not want the target assignment order audio to be played each time when you are spamming it, then a cooldown value of > 0 would allow for that.
- On Target Resource Full Search: Define an extra condition for the next target auto-search when the last player assigned target resource reaches maximum collector capacity. The search's center in this auto-search will be the position of the target resource that hit max capacity and the range is the same as the regular collector's range. The following options are available:
- None: No extra condition.
- Prioritize Last Resource Type: Prioritize searching for resources of the same type as the last target.
- On Target Resource Depleted Search: Define an extra condition for the next target auto-search when the last player assigned target resource is depleted (reaches 0 health).. The search's center in this auto-search will be the position of the target resource that was depleted and the range is the same as the regular collector's range. The following options are available:
- None: No extra condition.
- Prioritize Last Resource Type: Prioritize searching for resources of the same type as the last target.
4. Handling Progress Tab

- Progress Duration/Max Distance: When the resource collector has a target resource to collect entity, it gets a position assigned around that building to move to before starting to construct. The resource collector is only allowed to collect the target resource entity as long as it stays within the target resource entity's radius plus the value assigned in the Progress Max Distance field, which we will be setting to 1 to make sure that the collector stays close to the resource it collects from. The collection occurs periodically where the period is assigned in the Progress Duration field and for every period, X units of the target resource entity is collected. In this tutorial, we will set the Progress Duration to 1 second. The X is set in the next tab because it can depend on the Resource Type that the target resource entity is representing.
5. Resource Collector Tab
For each Resource Type that the unit can collect, you need to define an element for it in the Collectable Resources array field. Since we only have the tutorial_resource_wood type until now, let's add one element to the array in the inspector:
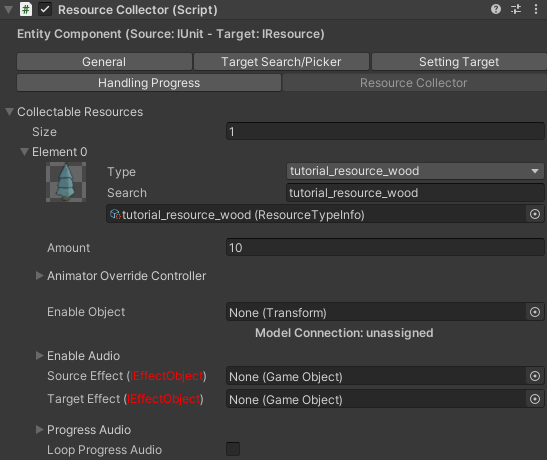
- Type: Assign the tutorial_resource_wood resource type here to define that the tutorial_unit can collect the wood resources we created.
- Amount: Every Progress Duration (assigned in the [Handling Progress](#Handling Progress) tab), the amount in this field is collected by the unit. In this case, we can assign it to 10.
- Animator Override Controller: To make the tutorial_unit have a unique animation that plays while it is actively collecting from a target resource of the type assigned above (while in progress mode is enabled), we need to assign it a full animator override controller that replaces the default one only when the collection is in progress. We went through creating the animator override controllers for units in the unit creation tutorial in full details. But in short, find a path in the project tab and right click then choose: Create -> Animator Override Controller and assign the EmptyInProgressAnim with an animation clip to play for the resource collector while it is actively collecting. We will leave it as unassigned to keep things simple for now.
- Enable Object: A child object of the unit can be assigned in this field which will be enabled when the entity is actively collecting the resource of the type assigned in the above field.
- Enable Audio: This audio clip is played when the player starts collecting the target resource of the type assigned above.
- Source Effect / Target Effect: Effect objects that appear on the source (resource collector unit) and target (resource entity that is being collected) when the collection is in progress.
- Progress Audio: What audio clip to play when the unit is actively collecting/dropping the resource? Enable the Loop Progress Audio to allow the progress audio to loop during the duration where the unit is collecting and have it disabled to play the audio clip every time the collector gathers resource units.
6. Testing
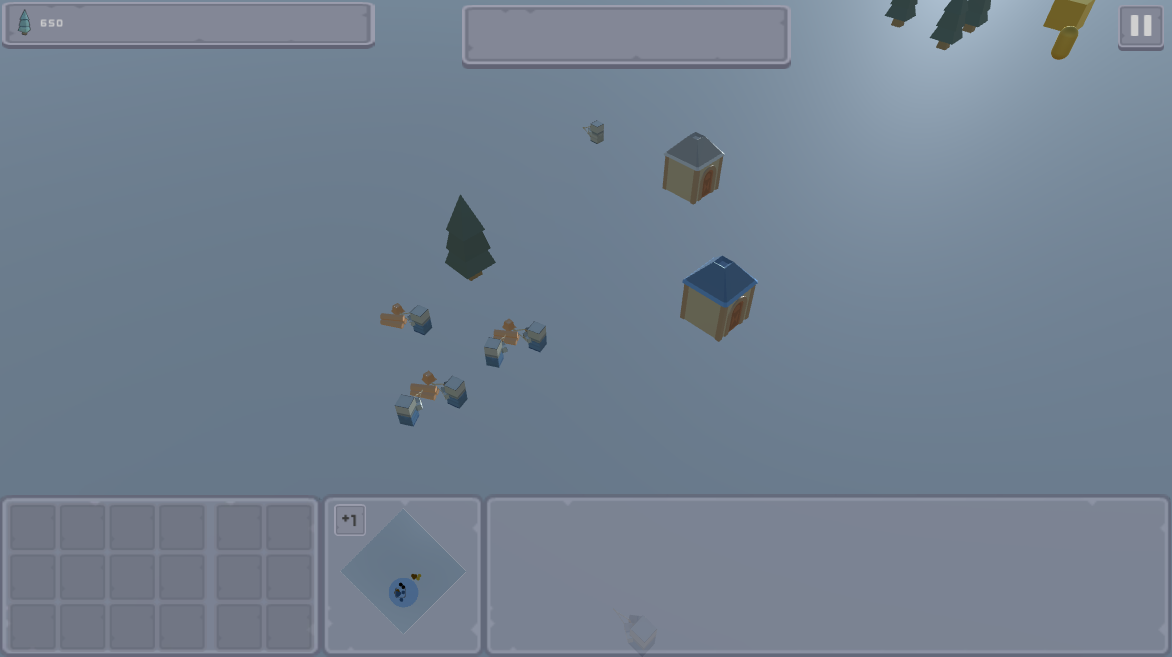
Launch the tutorial_map scene where we added the tree resource entities.
Select the tutorial_unit instances and right click on one of the tree resource entities. If you have auto target search enabled then you will see them move to the closest resource entity to collect wood resources. When resource collecting progresses, you can see that your faction's resource count is increasing in the top left corner of the UI elements.
Download Files
You can download the results of this tutorial here.