Setup Rallypoint
1. Overview
In the last tutorial part, we went through enabling the tutorial_building to produce tutorial_unit instances. In this part, we will be using the Rallypoint component in order to have the newly created units move to a certain destination as soon as they are produced.
Open the tutorial_building prefab and add the Rallypoint component to the building_components child object.
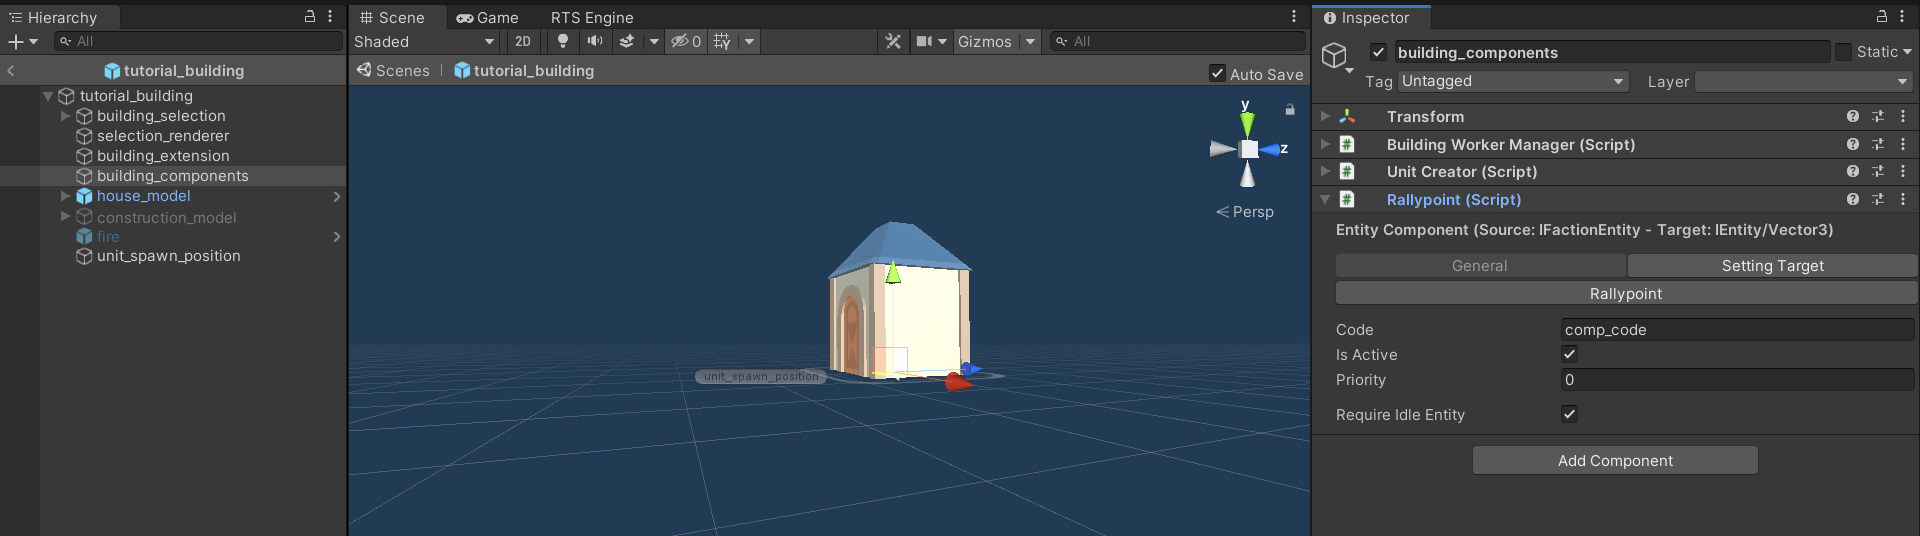
In the beginning of this component's inspector, you can see the following:
Entity Component (Source: IFactionEntity - Target: Entity/Vector3)
This means that this component is attachable to faction entities (including units and buildings) and that it can have IEntity (interface used on all entity types including units, buildings and resources) or Vector3 (position in the map) as its target. In case the target is set as a position in the map, the produced unit moves to that position as soon as it spawns. While in the case where the target is an entity, the produced unit would attempt to interact with that entity as soon as it spawns. For example, if the target is a resource and the created unit has a resource collector, it would attempt to collect it and if the target is an enemy unit/building and the produced unit has an attack component, it would attempt to engage in combat with the target after it is created.
2. Rallypoint Component
2.1 General Tab
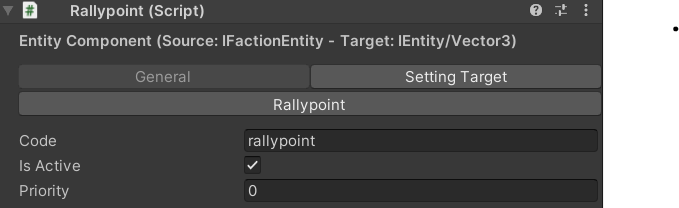
- Code: Provide a unique code that distinguishes this component from other entity components attached to the same building.
- Is Active: Make sure this is active to enable the component.
- Priority: When an entity has multiple entity components that allow for targets, the player can have the entity selected and then right-clicks on a target in the map to assign one of the components a target. This field defines the order in which the components will be considered to set the target. The component with the lowest priority value will be considered first and if it does not allow the target that the player sets, then the component with the next higher priority value will be considered next until one component accepts the target as valid. In our case, we only currently have the Rallypoint component as an entity component that can have a target, therefore we can leave the priority set to 0.
2.2 Setting Target Tab

- Set Target Task UI: An entity component with an ability to set a target allows the player to set that target either by a right-mouse click on the target while the entity is selected or by a dedicated task that appears in the dedicated UI task panel when the entity is selected as well. This means that the rallypoint can be adjusted either through a right-mouse click on a target position or entity when the tutorial_building is selected or by clicking on a task on the task panel. The data that defines the task are assigned here. We went through setting up such a task in the Add Movement Task section. However we will leave this component without a dedicated target assignment task for the sake of this tutorial.
- Order Audio: This field allows you to assign one or multiple audio clips where one is played when the player gives assigns a new target to the rallypoint. If you have multiple audio clips to assign, then the Fetch Type field allows you to determine how the clip is chosen each time. The Cooldown field allows you to input a cooldown time for playing the audio clip. In case you do not want the movement order audio to be played each time when you are spamming the rallypoint target assignment, then a cooldown value of > 0 would allow for that.
- Set Target Resource Of Same Type On Dead: Enable this option to allow the rallypoint to automatically target a resource entity if its last target was a resource entity that has been depleted. The condition here would be that the new target resource entity has the same resource type as the last one. The range of searching for the new resource entity can be set in the Set Target Resource On Dead Range.
2.3 Rallypoint Tab
Goto Transform: Create a child object of the tutorial_building prefab, call it rallypoint_goto_position then drag and drop it into this field. Make sure to have it placed where you would like the default goto position of the rallypoint to be in relation to the spawn position of the Unit Creator. For example, a position of (0, 0, -4) would just be in front of the spawn position that was set up in last tutorial part.
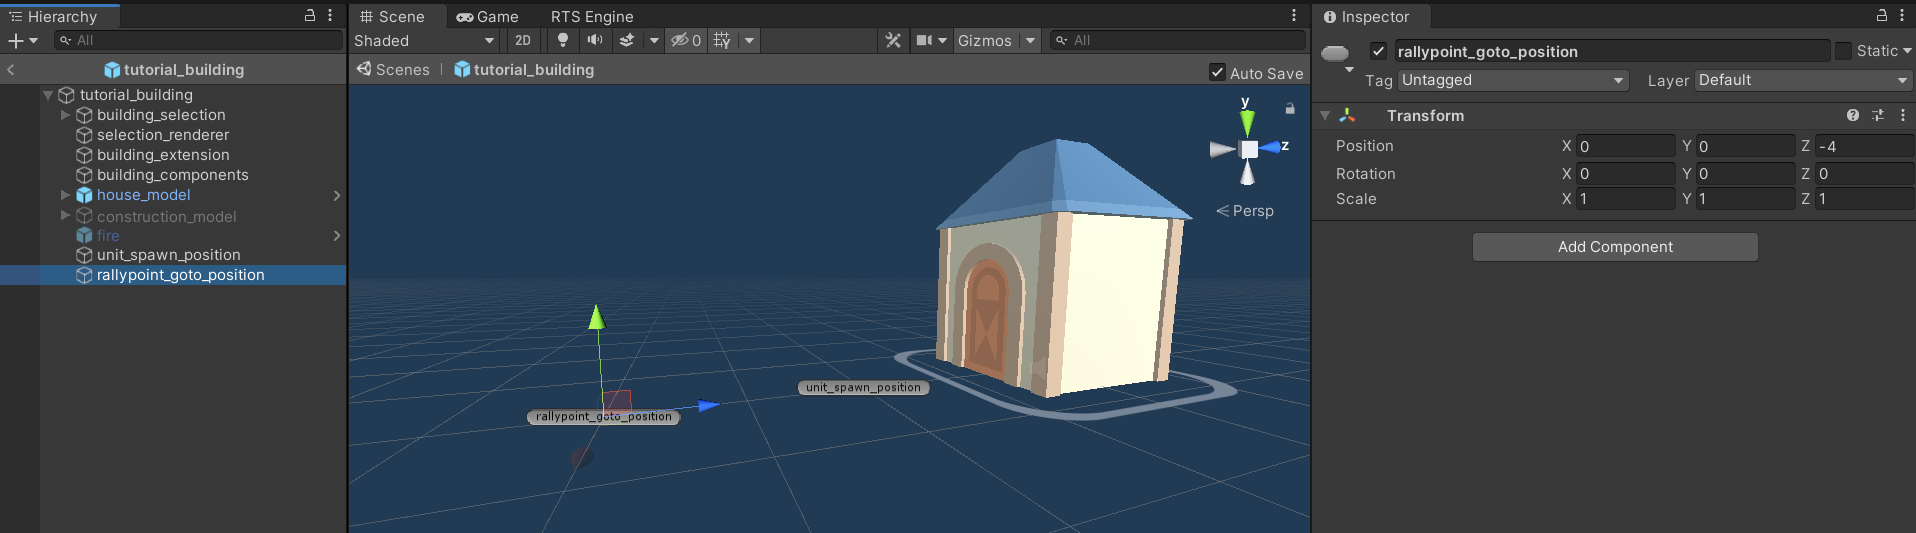
The goto transform object is activated only when the building is selected and it is assigned to a position on the map (and not a target entity). Therefore, we can add a visual object that let the player know where the goto position is when they select the building. If you have the Demo game files, you can search for "flagBlue" and drag it as a child object of the rallypoint_goto_position then set its position to (0,0,0) and its scale to (0.1,0.1,0.1).
You can then add the flag object Renderer components to the main Building component's Colored Renderers array on the Faction Entity tab and assign the appropriate materials so that the rallypoint flag gets colored with the building's faction colors. We went through setting up the colored renderers of a faction entity in details when setting up the building for the first time so refer back to that tutorial for more details.

Forced Terrain Areas: This field allows you to define what terrain area types can the building have its rallypoint position at. The tutorial_map only has type and that is the ground_terrain that was created when setting up the terrain for the map. Therefore, let's add it to this field. If you leave this field empty then the rallypoint can go on any terrain area type.
- Forbidden Terrain Areas: This field allows you to define what terrain area types the building is not allowed to have its rallypoint placed at. If the rallypoint is placed in a position that includes a valid terrain (as defined in the Forced Terrain Areas field) and another forbidden one, the rallypoint can not be placed there. For the sake of this guide, we will keep this array field empty.
- Max Distance: This fields allows you to define the maximum distance allowed for the rallypoint goto position to be in relation to the faction entity that has the Rallypoint attached to it (the tutorial_building in our case). When enabled, you'd be able to input the distance under the field Max Distance.
- Reposition To Valid Terrain Area: When enabled, this component will attempt to reposition the rallypoint object on building placement around the entity's radius to attempt and find a position that satisfies the rallypoint's forced terrain areas. The offset size when repositioning the rallypoint around this faction entity's radius is determined by the value in the Reposition Size. The larger, the more potential positions to be sampled.
- Attack Move Enabled: When enabled and the created units that use the rallypoint can attack enemy entities, they will move towards the rallypoint destination and will stop when encountering enemy entities to combat them before resuming their movement to the original rallypoint destination.

3. Testing
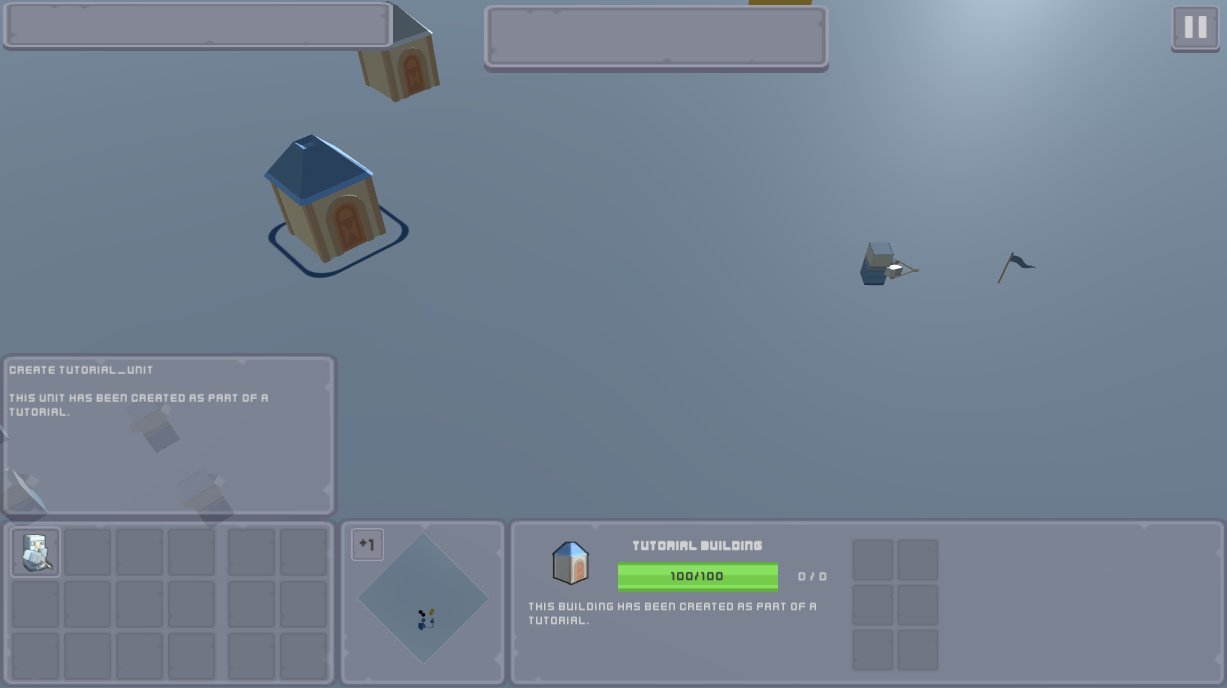
Now back to the tutorial_map scene. Launch it to test the newly added Rallypoint component. Select the tutorial_building and the blue flag of the rallypoint goto position should appear.
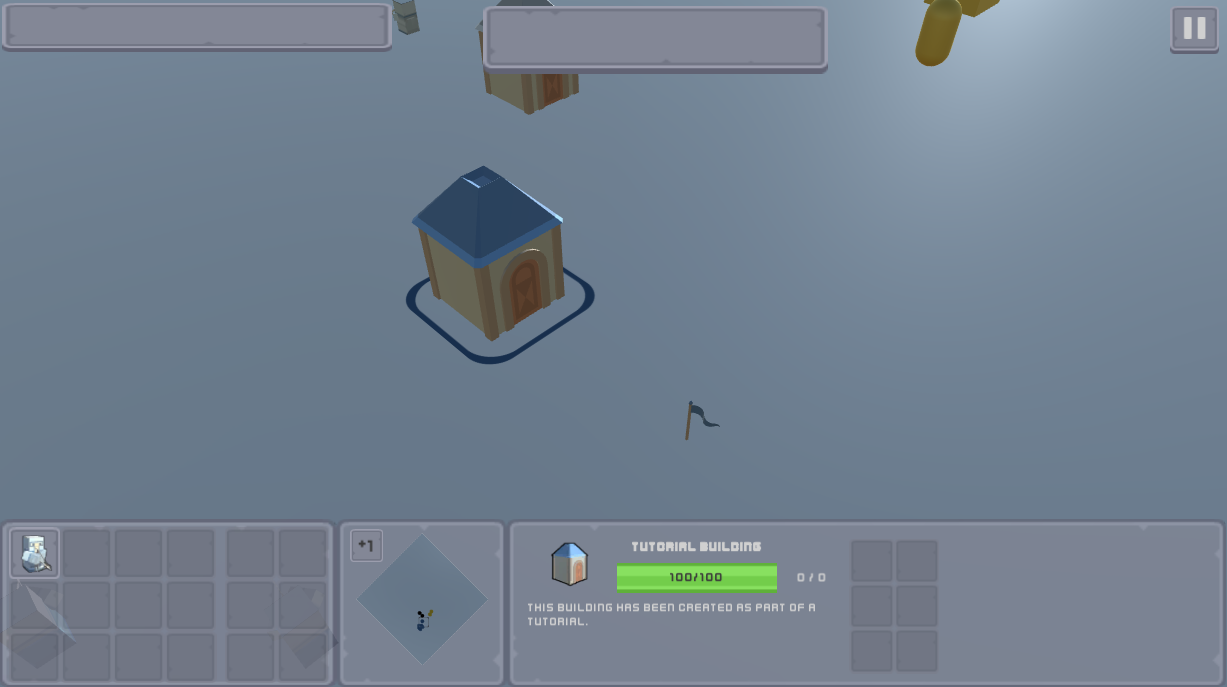
Now use the right-mouse button while still selecting the building to click on empty areas of the map to move the rallypoint goto position then create a new unit and watch it spawn then immediately move to the rallypoint.
Download Files
You can download the results of this tutorial here.